
28 Aug, 2023
Posted on 28 Aug, 2023 by Ankit Gore, Posted in PowerApps Portal
 Blogs
Blogs
Introduction:
In this blog, we will show you how to configure Auth0 with Power Pages (Portal) for authenticating new users. Auth0 is a popular authentication and authorization service, and integrating it with Power Pages (Portal) will provide a secure and user-friendly authentication experience. Follow our step-by-step guide to set up Auth0 and enhance the authentication capabilities of your Power pages. Let's get started!
Steps of Configuration:
To start the configuration, you will need an Auth0 account. You can create your Auth0 account and begin the process by visiting the following website: https://auth0.com
1. Create an Application in Auth0.
To create the application, Go to Applications -> Applications -> click on "+ Create application".
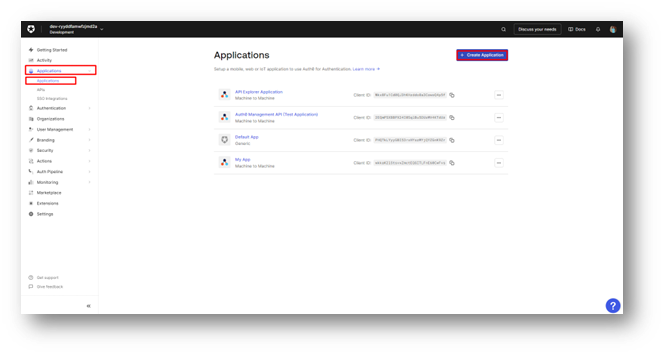
The pop-up box will appear to help you create the application. Input the name, choose the application type, and then press the Create button.

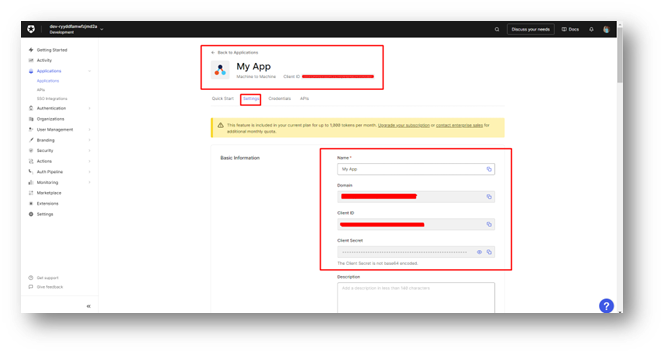
An App will be created and now you can copy the client ID, secret, and domain for the next process.
2. Add an Authentication Provider in the Authentication Settings of the Portal.
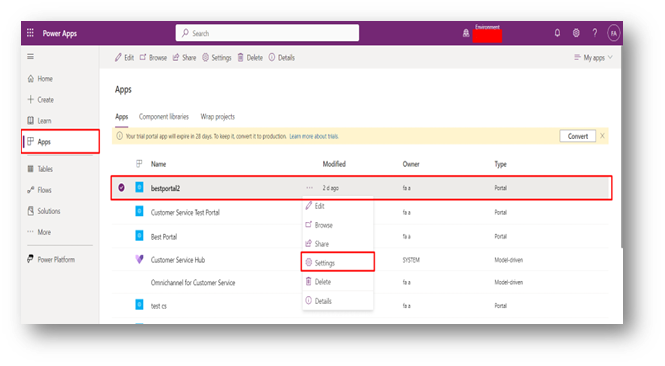
Open the power apps click on the Apps and select your portal (page) where you want to add the new Authentication provider.
Click on three dots (…) and settings.
In Portal settings click on authentication settings.

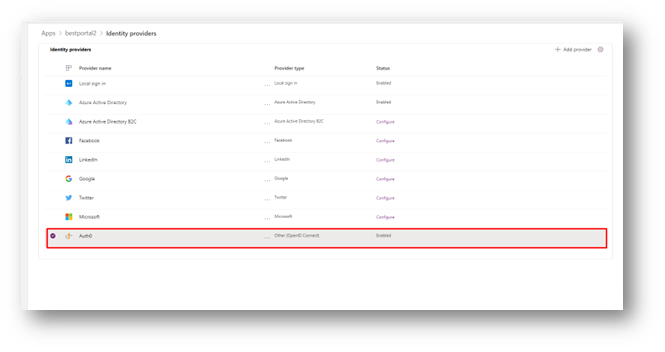
You will be taken to the Identity Provider page, where you can view all the configured methods available for configuring the portal. You have the option to add your new Identity Provider. Additionally, we are introducing a new method here for Auth0. Click the "+ Add Provider" button.

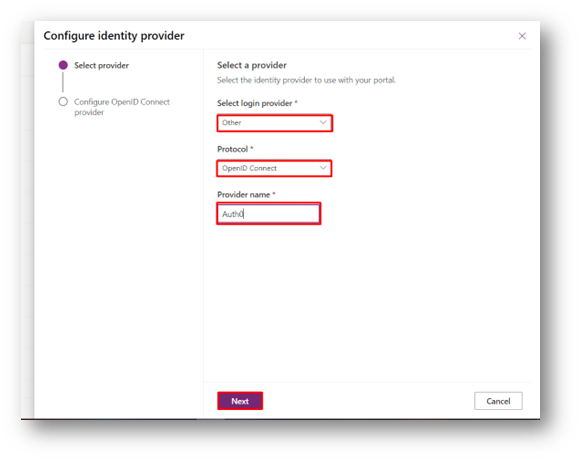
Select information as given in the below Picture. Click on Next.
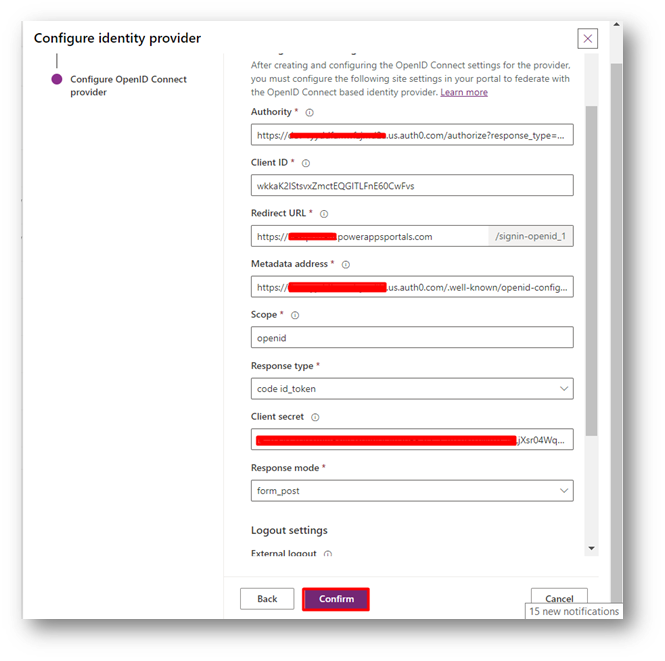
Now, on the next page, you will need to fill in the Auth0 configuration information.
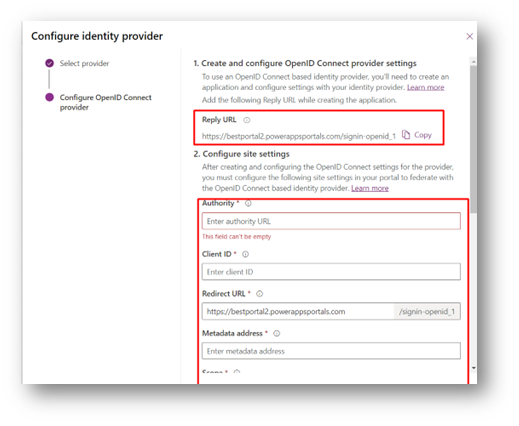
Before you proceed to fill in the information, please copy the Reply URL and paste it into the Auth0 Application that you have created.
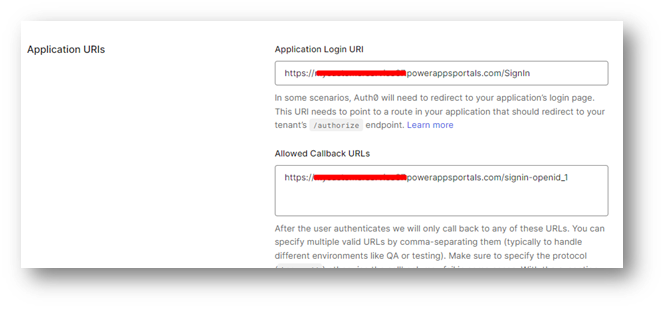
Open Auth0 -> Applications – > Applications -> Click on the new Created Application.
In the Settings tab, as you scroll down, you will come across a section for Application URLs. Paste the information here as shown below.
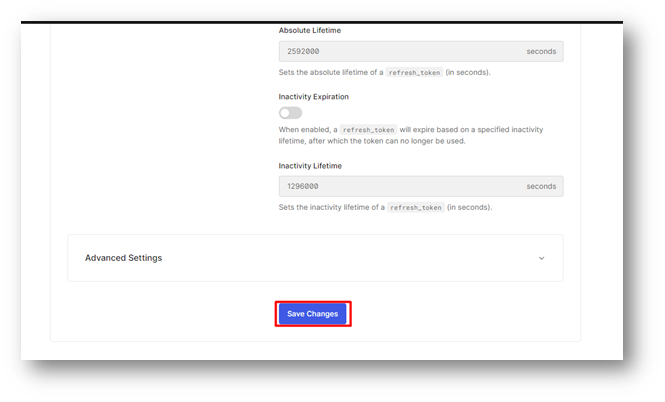
Scroll down and click on save
Fill the configuration information as given below:

Authority:
https://{yourauth0_domain}/authorize?response_type=code&client_id={your_clientid}redirect_uri=undefined&scope=SCOPE&state=STATE

Client ID: {your_clientid}

Redirect URL: {your_powerappsportal_url}/signin-openid_1

Metadata address: https://{your_auth0_domain} /.well-known/openid-configuration

Scope: openid

Response type: code id_token

Client secret: {your_clientsecret}

Response mode: form_post.
Example:
Click On Close.
You can see that the Auth0 option is enabled.
Now, open the portal and click on the "Sign in" button on the Sign-in page. You will be able to see the Auth0 button.

Now, click on the Auth0 button, and you will be directed to the Sign-in page.

Hope you find this blog useful. Thank you.
Comment

Introduction: Organizations frequently generate documents like invoices, certificates, quotations, transcripts, inspection reports etc. While single-value fields such as Name, Email,…
READ MORE
The Problem Recently, we faced an interesting issue while working with the Status Reason (statuscode) field on the Contact table.…
READ MORE
There are certain things in a CRM project that a QA must validate or verify before any solutions gets deploy…
READ MORE