
20 Aug, 2024
Posted on 20 Aug, 2024 by Mihir Khot, Posted in Dynamics 365 Customer Service
 Blogs
Blogs
What are Macros?
Macros are a set of sequential actions that a user performs. They enable users to perform daily operations efficiently in a fast and process-compliant manner. You can reuse macros with different sessions based on the context parameters that are specific to the session.
Macros provide various connectors:
1. Productivity Automation
Using Productivity automation action, we can perform whole bunch of actions such as Update an existing record, Clone input record, Save the record, Action to resolve case, etc.

2. Session Connector
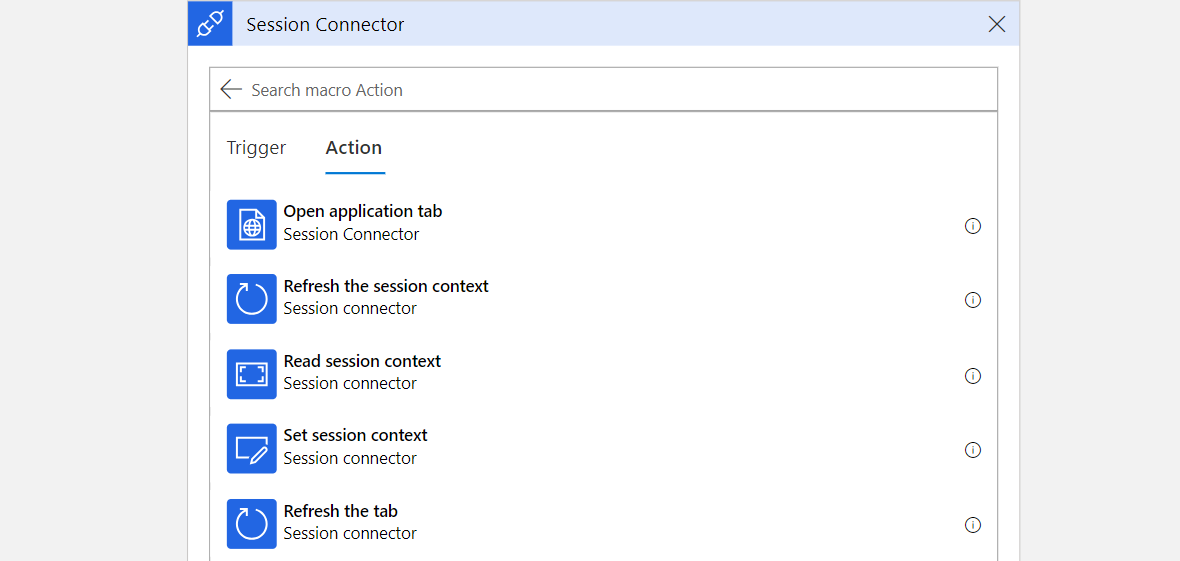
Session connector enable you to add actions such as getting the ID, refreshing a tab, passing the tab ID, setting a focus to a tab based on the tab ID, opening a tab template, and refreshing session context.

3. Omnichannel Connector
Using Omnichannel connector, we add actions such as Send Knowledge Base article in chat, Link or unlink record from the conversation, etc.

4. Other Connector i.e. Flow Connector
Basically, using this connector, Macro allows us to run a power automate flow.

Prerequisites:
Usage of Macros:
Steps to add Macros:
1. To define Macros - navigate to Customer service admin center and select Productivity. On clicking Productivity, you see Macros.

2. After selecting Manage, click on +New button to create a new macro.

3. Now, enter the details and select trigger as Start Macro execution and select the predefined automation actions. For example, here we are creating an action to open a record grid action. For this, we use the Productivity Automation.

4. Now, in Productivity Automation, we select Open a record grid action.

5. Add the details for the action and then Click on Save and close.

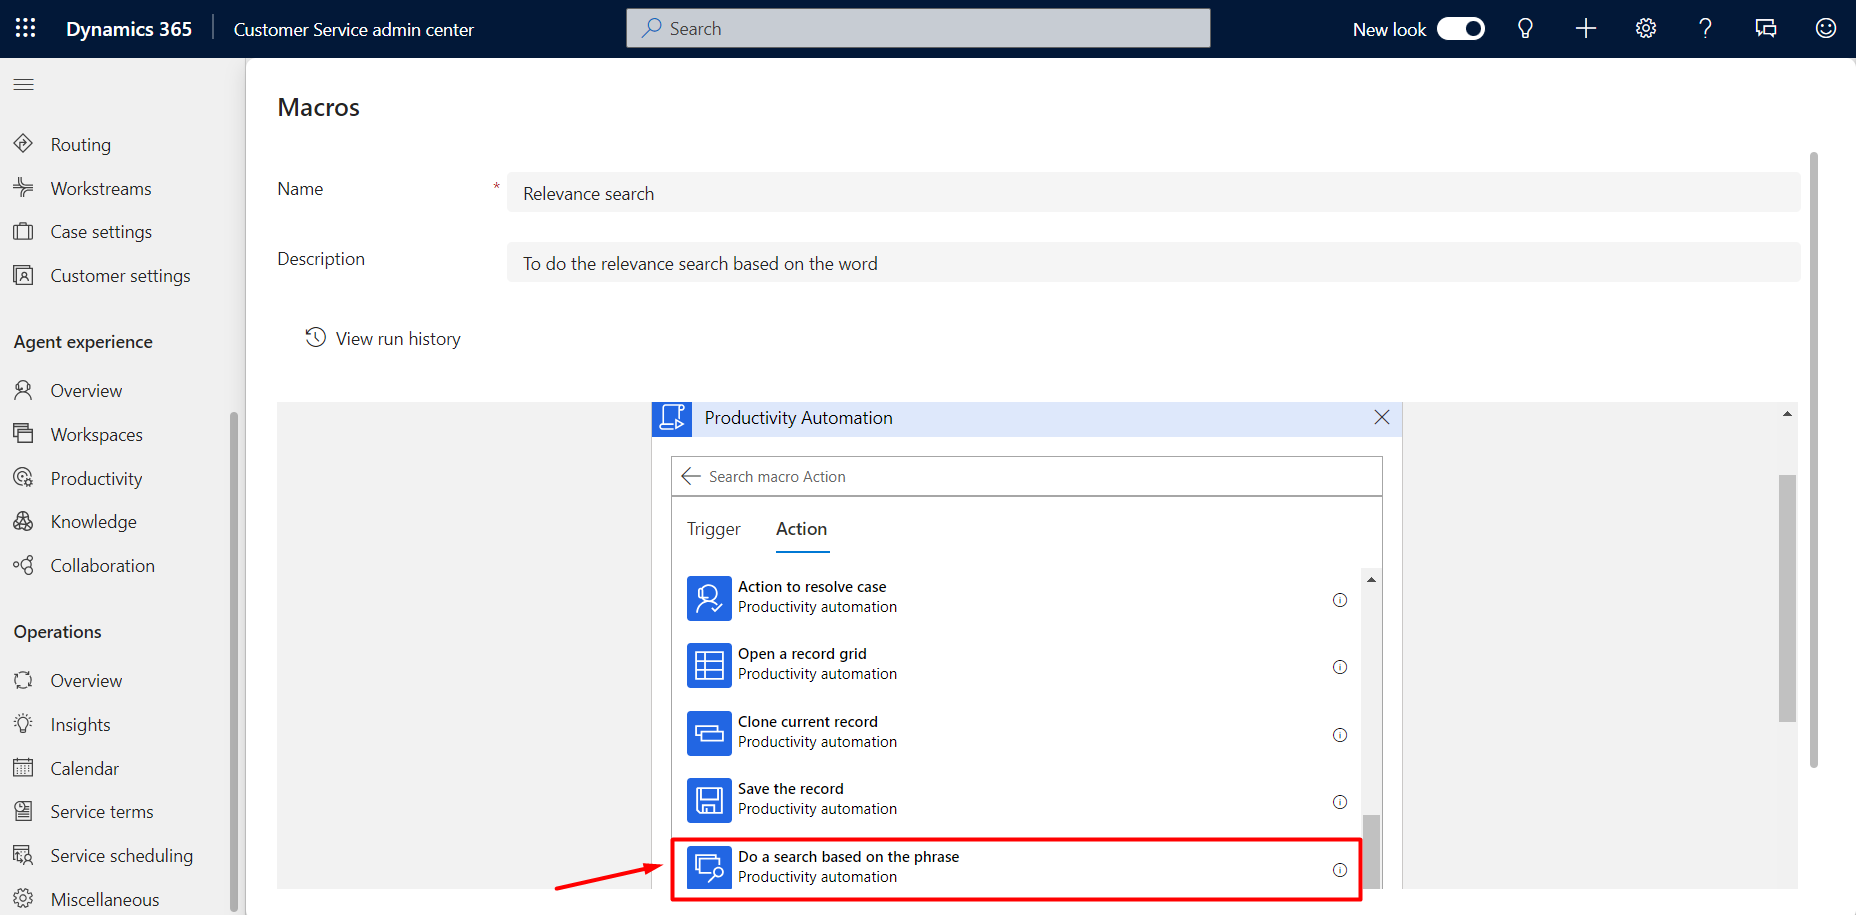
6. Similarly, another example of macro action - Do a search based on the phrase action.

7. After selecting that, we add the search string value and click on Save.

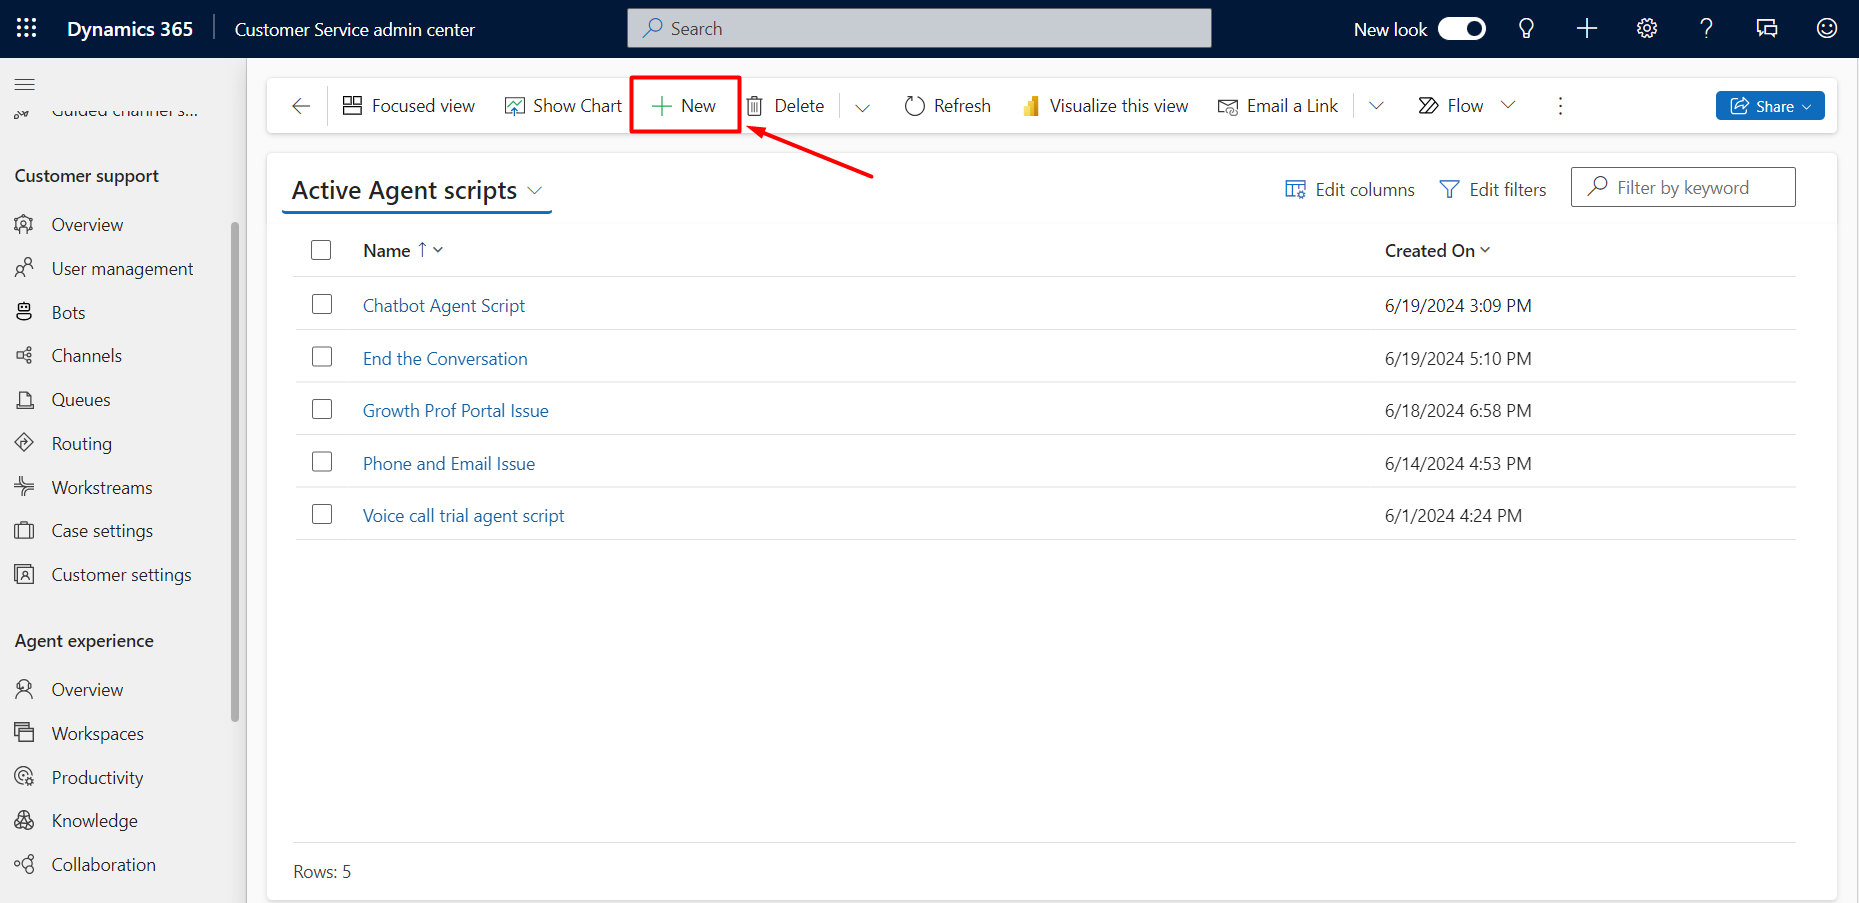
8. Now to add Macros to Agent Scripts – Select Productivity and click on Agent Scripts.

9. Click on New to create a new Agent script or select the existing agent scripts to add your created Macros as steps.

10. Fill in all the details for Agent script and click on Save. Once Saved, there appears a sub grid to define agent script steps. Click on New Agent Script Step to add Macros there as a step(s).

11. Here we define the Macro created as a step by specifying its order, action type and target macro and then click on Save.

12. Similarly, we add the created macros as agent script steps as shown in steps 10 and 11. Then click on Activate.

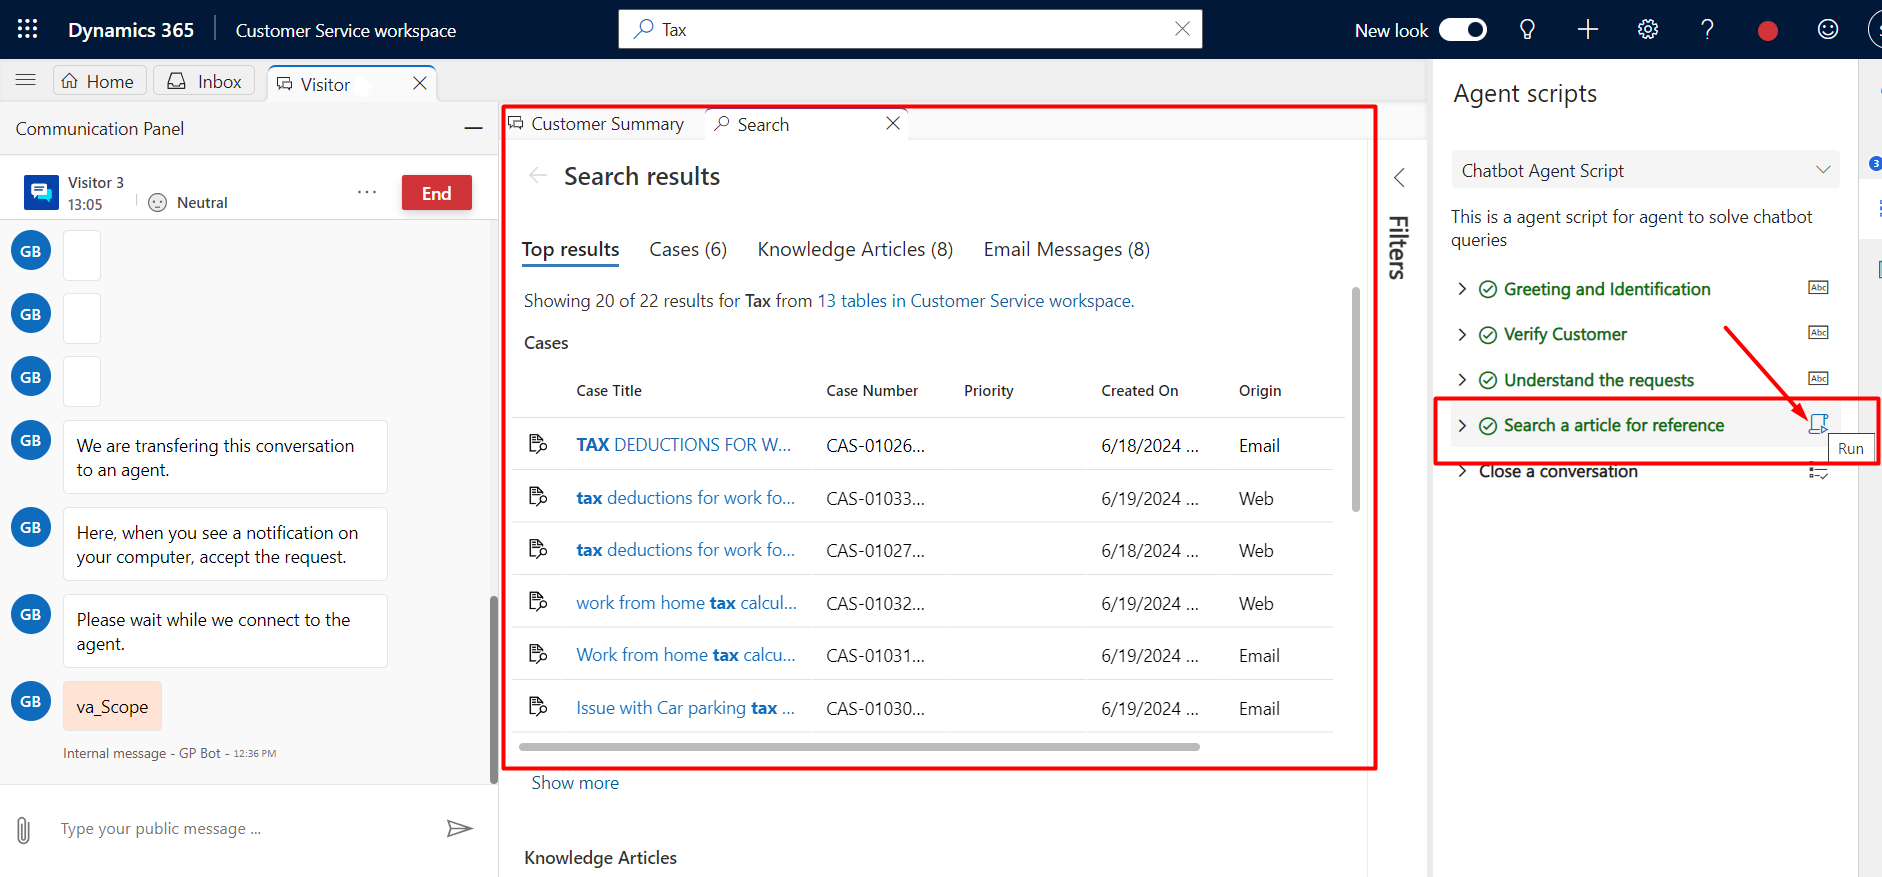
13. Now, when a new chat is initiated and routed to an agent, the required or added Agent Scripts appears. Here, the created Macros as agent script step appears as shown below and we click on the Run symbol. This is to run the created macro which is a set of instructions that tells the system how to complete the task.

In this way, Macros in Omnichannel empower customer service agents with structured, step-by-step guidance, ensuring consistent and accurate communication. Integrating macros into your workflow can significantly improve efficiency and accuracy, making them an invaluable tool for agents in customer service environments.
Comment