
25 Mar, 2025
Posted on 25 Mar, 2025 by Ankit Gore, Posted in Azure Microsoft 365
 Blogs
Blogs
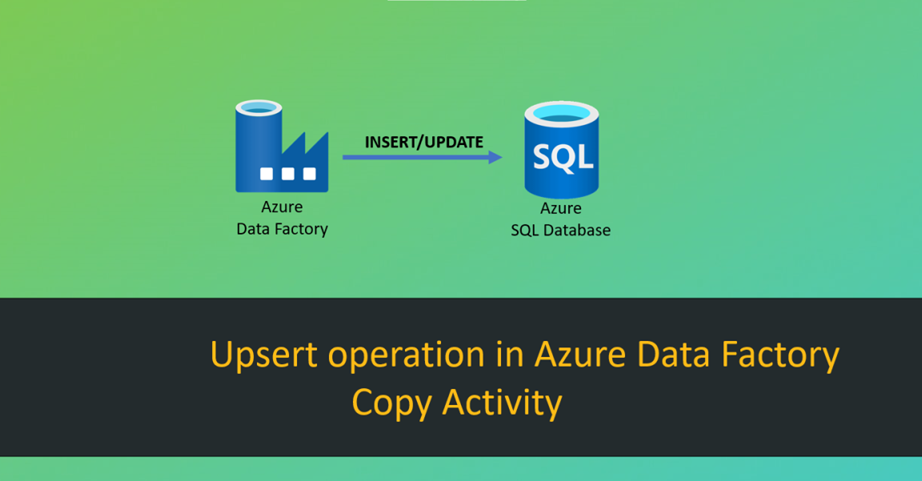
In today's data-driven world, automating data flow between APIs and databases is crucial for efficient data management. Azure Data Factory (ADF) provides a powerful solution to extract, transform, and load (ETL) data seamlessly.
This blog walks you through a step-by-step process of integrating a REST API with an Azure SQL Database using ADF. You'll learn how to:
By the end of this guide, you'll be able to automate API data ingestion into SQL Server, making data readily available for reporting, analysis, and business intelligence. Let's dive in!!!
Before you start, ensure you have the following:
Once you have these ready, you're all set to start the integration process!!
1. Open ADF Studio.
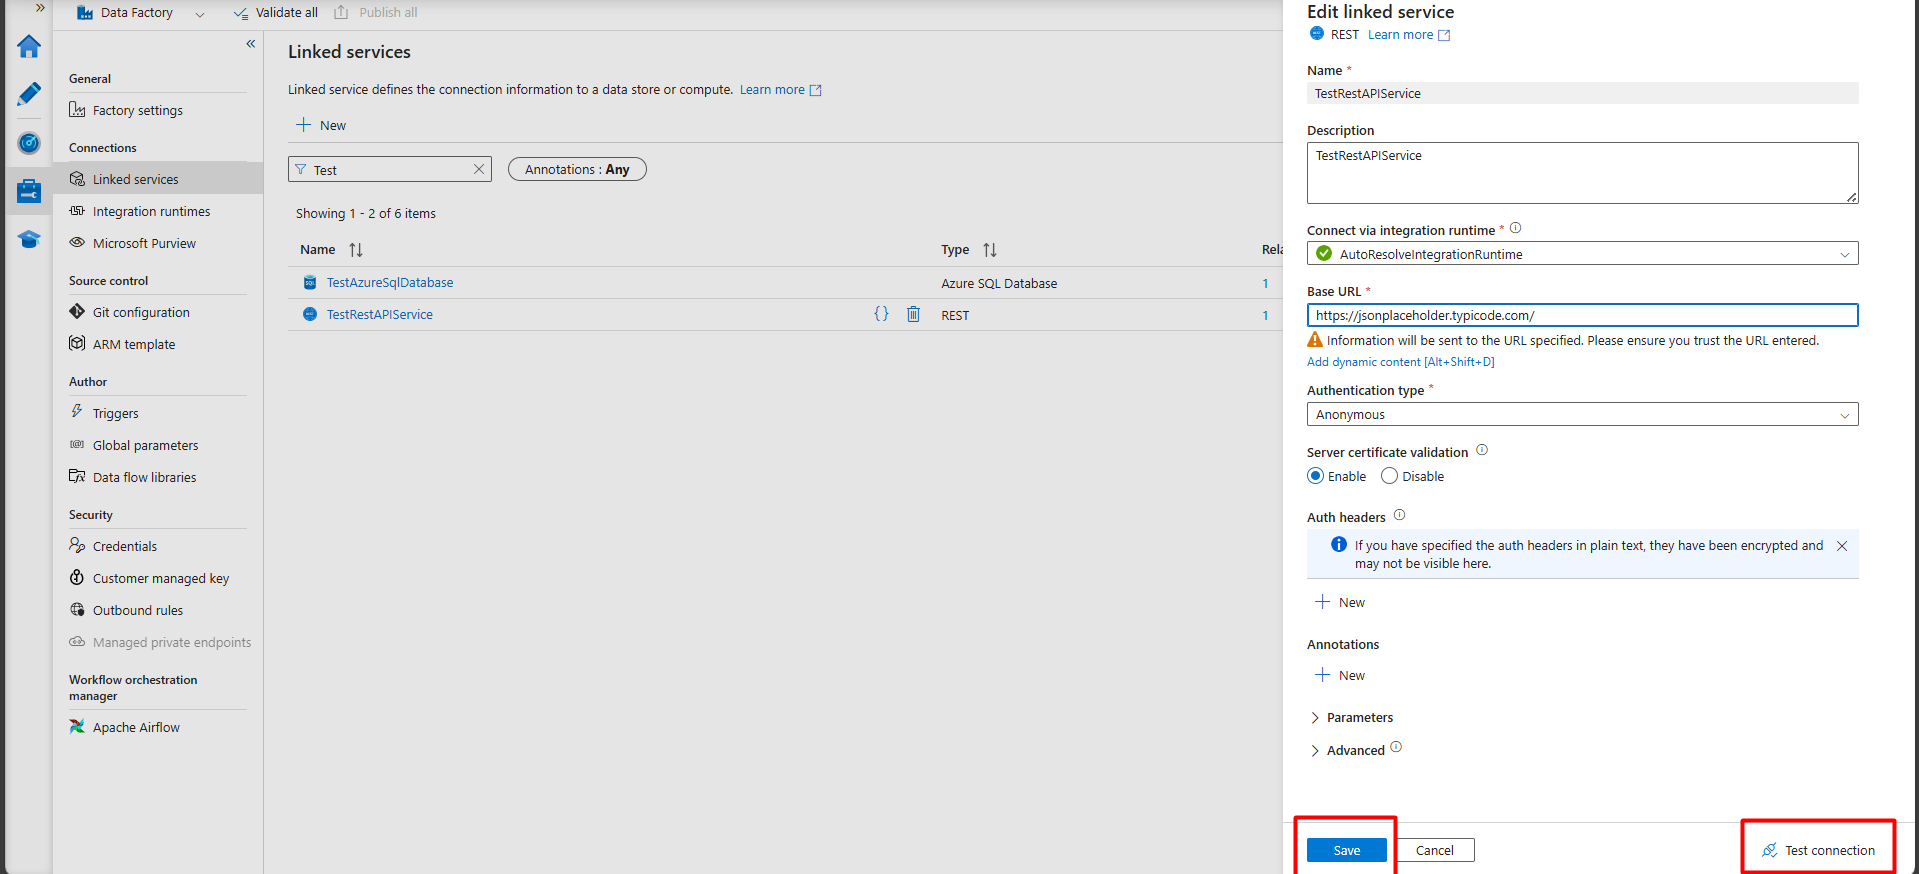
2. Navigate to Manage > Linked Services > New.
3. Search for HTTP and select it.

4. Configure the following settings:
Base URL: https://jsonplaceholder.typicode.com/
Authentication: Anonymous

5.Test the connection and create the linked service.
1. Go to Manage > Linked Services > New.
2. Search for Azure SQL Database or SQL Server.
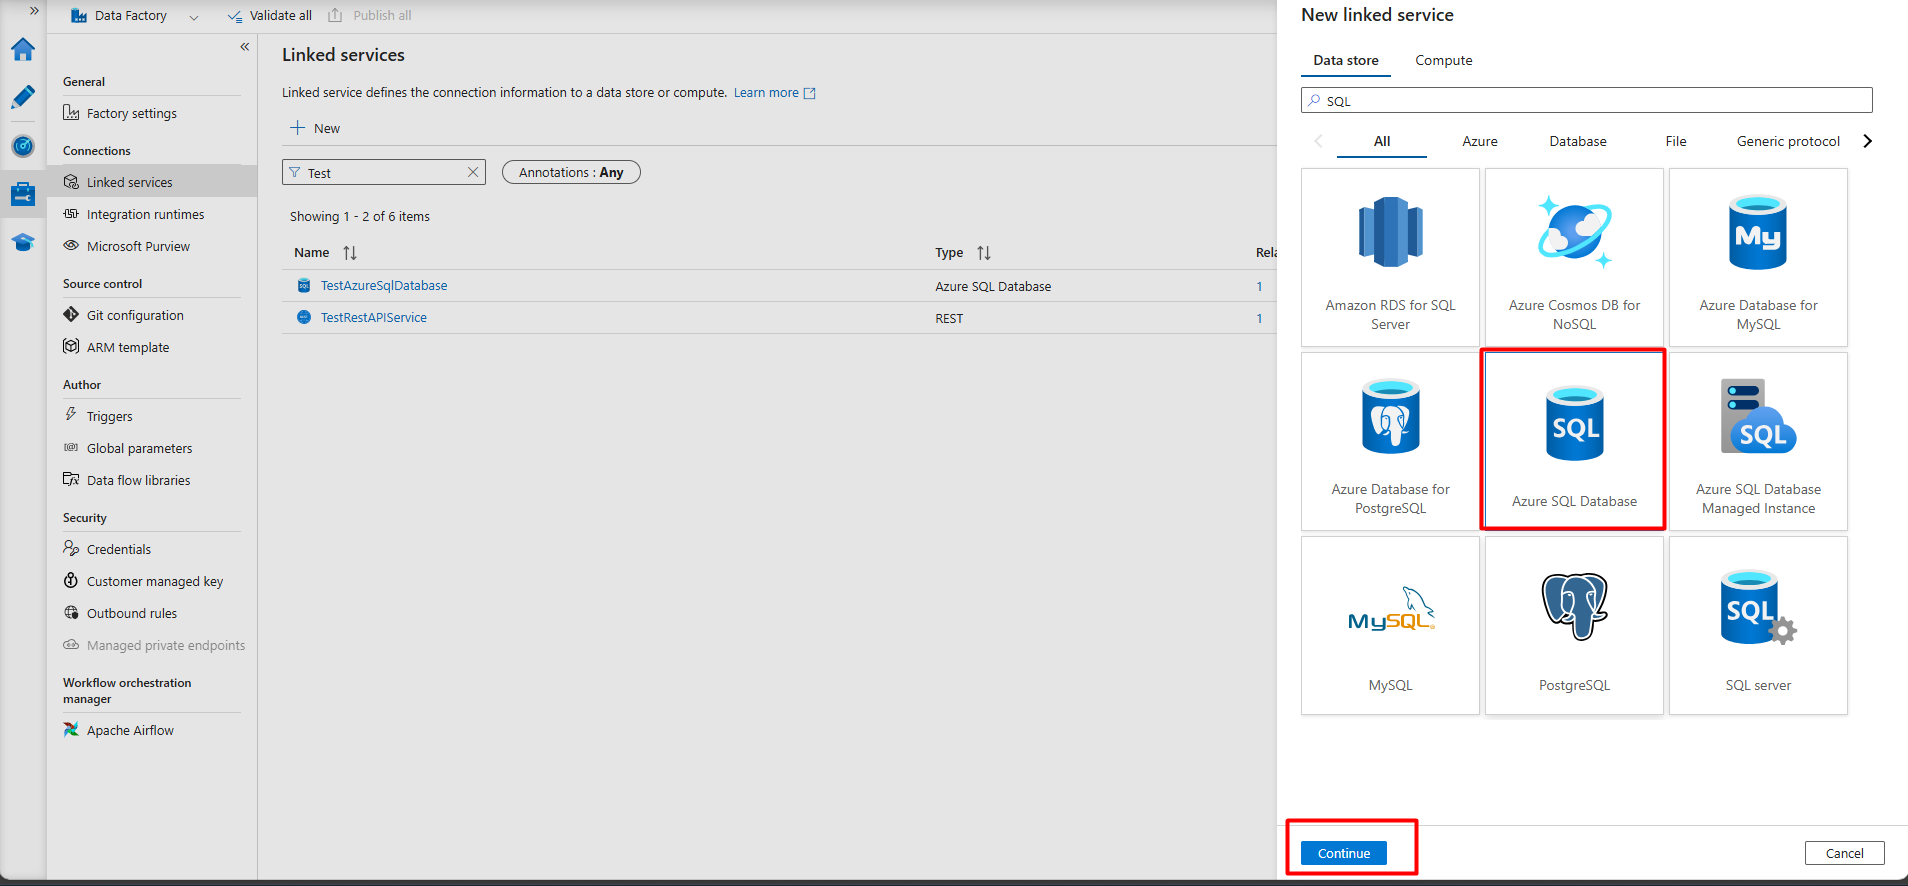
3. Enter the server details and authentication credentials.

4. Test the connection and create the linked service.

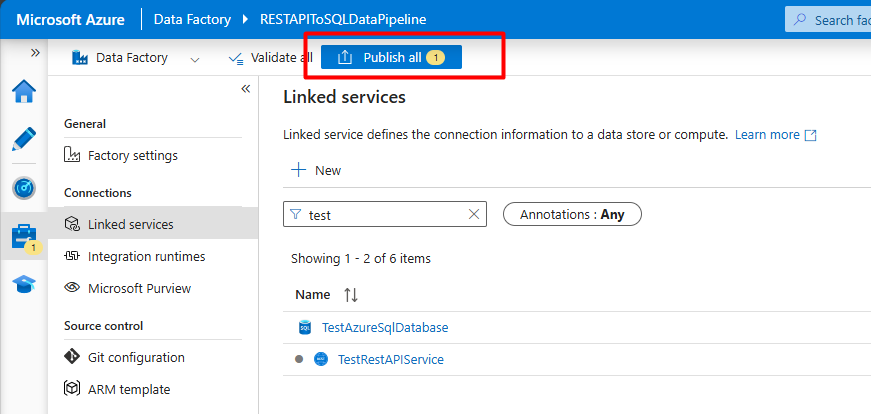
Publish the Changes.
1. Create a Pipeline
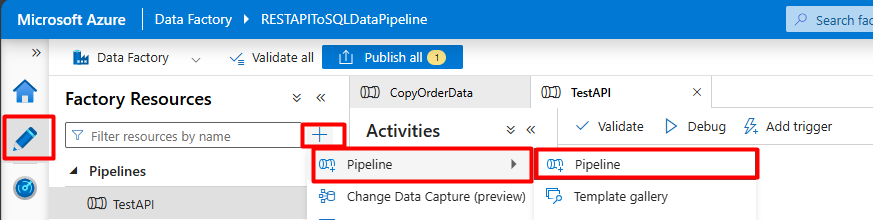
Add the Copy Data Activity.
2. Configure the Copy Data Activity
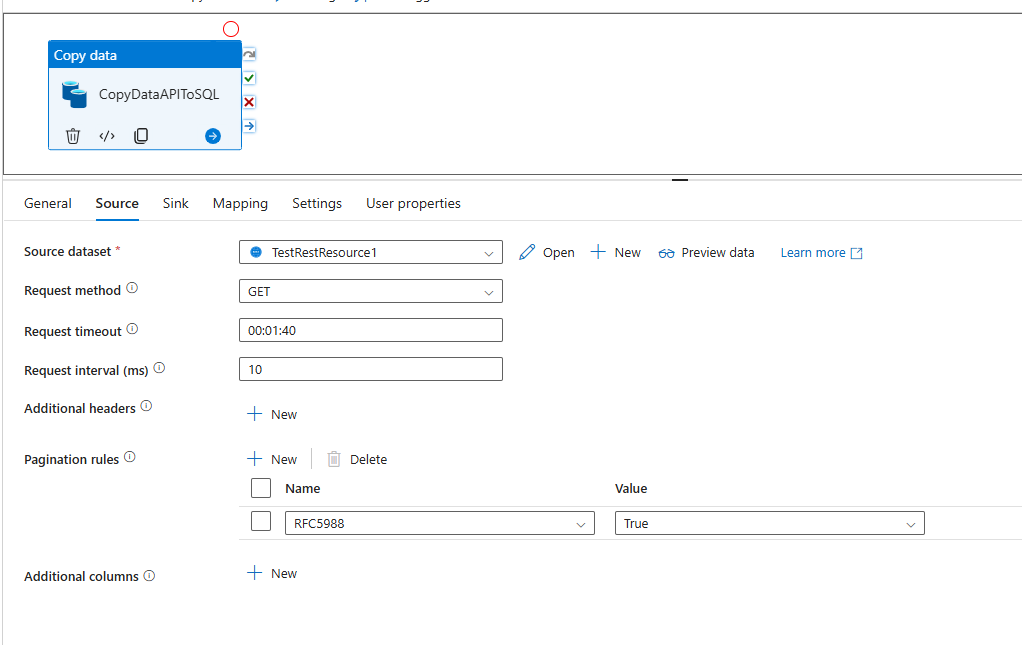
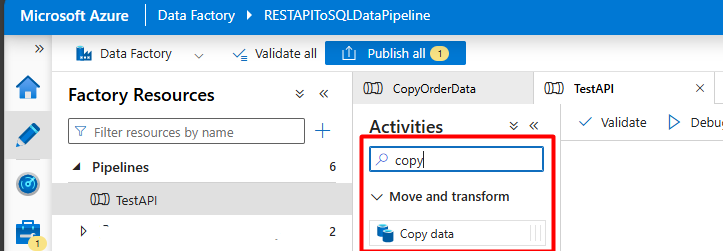
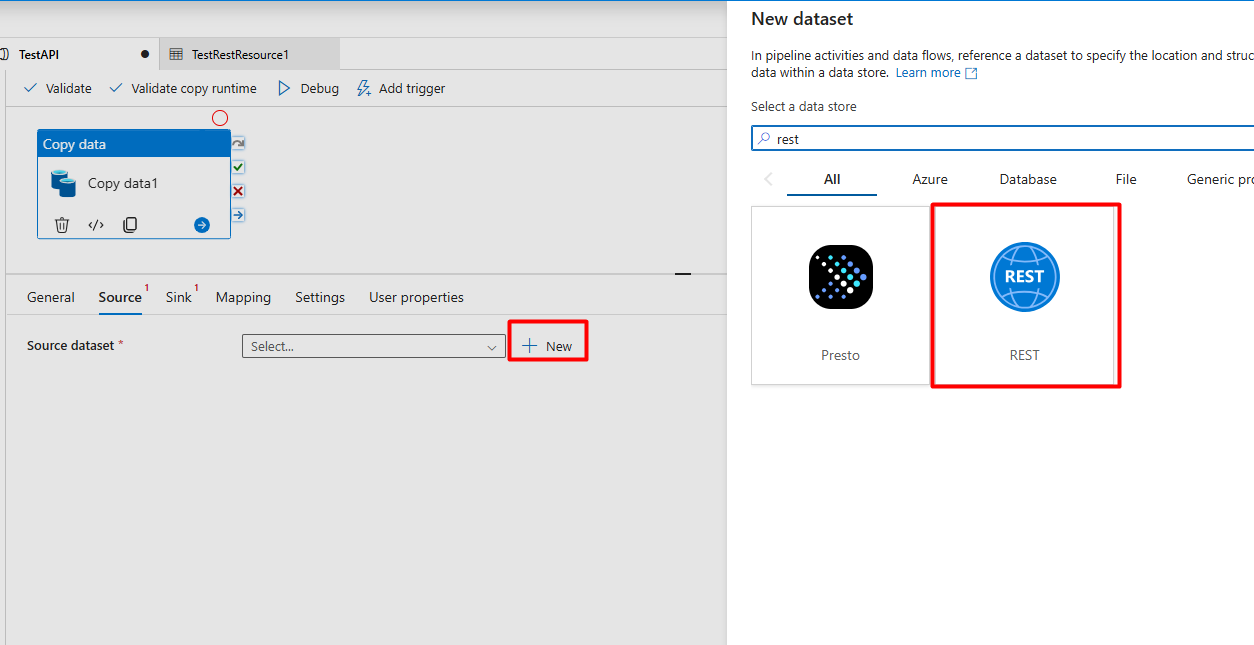
1. Choose REST or HTTP and select the API Linked Service.

2. Set Relative URL: users
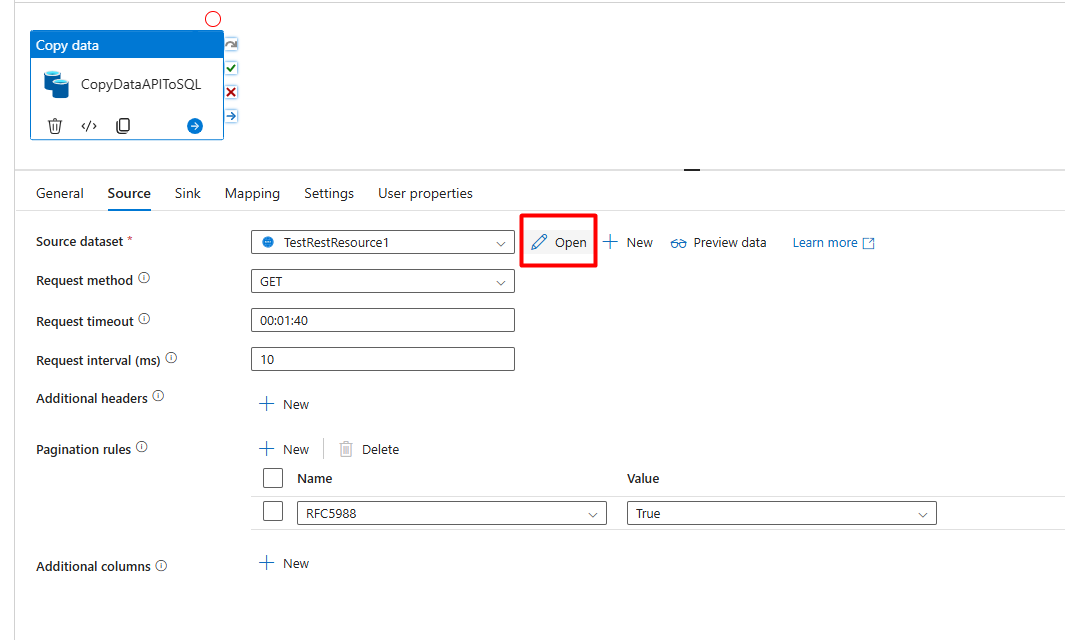

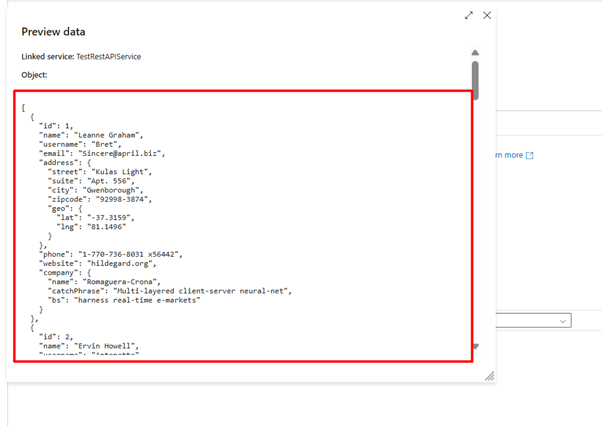
3. Click Preview to check if the API is working.

4. The JSON output should be visible.
Publish the changes.
5. Create Table in SQL Database
(Assuming the SQL database is already created.)
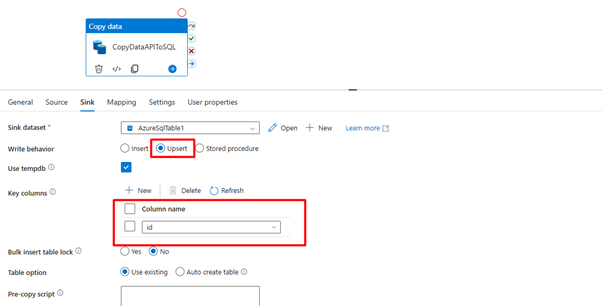
1. Choose Azure SQL Database or SQL Server.
2. Select the SQL Linked Service and choose the destination table.

3. Update the sink settings and publish the changes.
1. Click on Mapping.
2. Click Import to fetch the API fields.
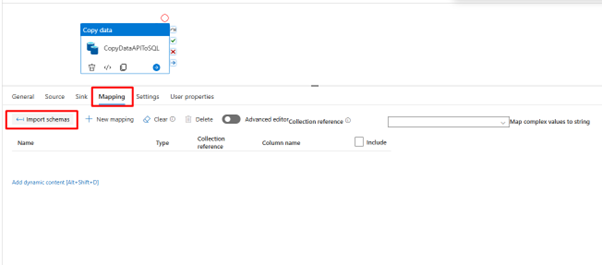
3. The mapped data will be visible.
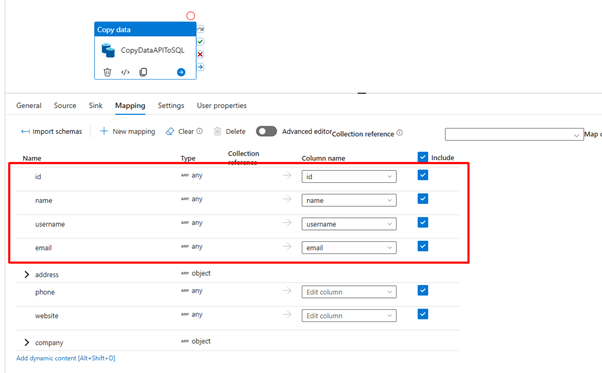
4. Delete any unwanted fields.

Publish the changes.
1. Click Debug to test the pipeline.
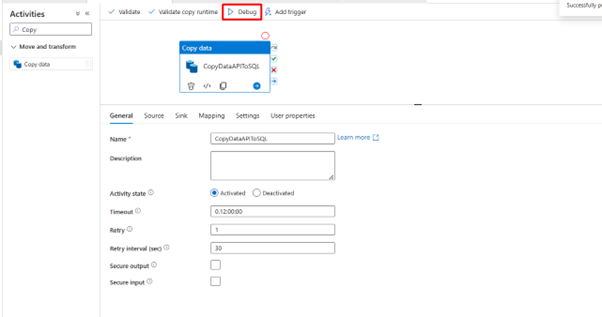
2. Check the output in SQL Server to verify the data transfer.

Hope this was useful! Stay tuned for more interesting blogs like this.
Comment

Introduction: Organizations frequently generate documents like invoices, certificates, quotations, transcripts, inspection reports etc. While single-value fields such as Name, Email,…
READ MORE
The Problem Recently, we faced an interesting issue while working with the Status Reason (statuscode) field on the Contact table.…
READ MORE
There are certain things in a CRM project that a QA must validate or verify before any solutions gets deploy…
READ MORE