
16 Feb, 2026
Posted on 16 Feb, 2026 by Javed Shaikh, Posted in PCF (PowerApps Component Framework) Dynamics-365 Sales Dynamics 365
 Blogs
Blogs
In Model-driven apps, PCF controls are typically embedded inside forms or views. However, unique business requirements often demand more flexibility, such as launching a rich UI experience from a Ribbon button, utilizing the full screen, or opening advanced functionality in a pop-up window.
Standard form customizations may not always satisfy complex UI or interaction requirements. In such scenarios, Custom Pages offer a powerful, modern approach.
This blog walks you through step-by-step instructions to launch the PCF control from a Ribbon button using a Custom Page.
In our scenario, we have an Opportunities button on the Account form. When clicked, it should open a Custom Page in a pop-up window that hosts a PCF control displaying a list of associated Opportunities.
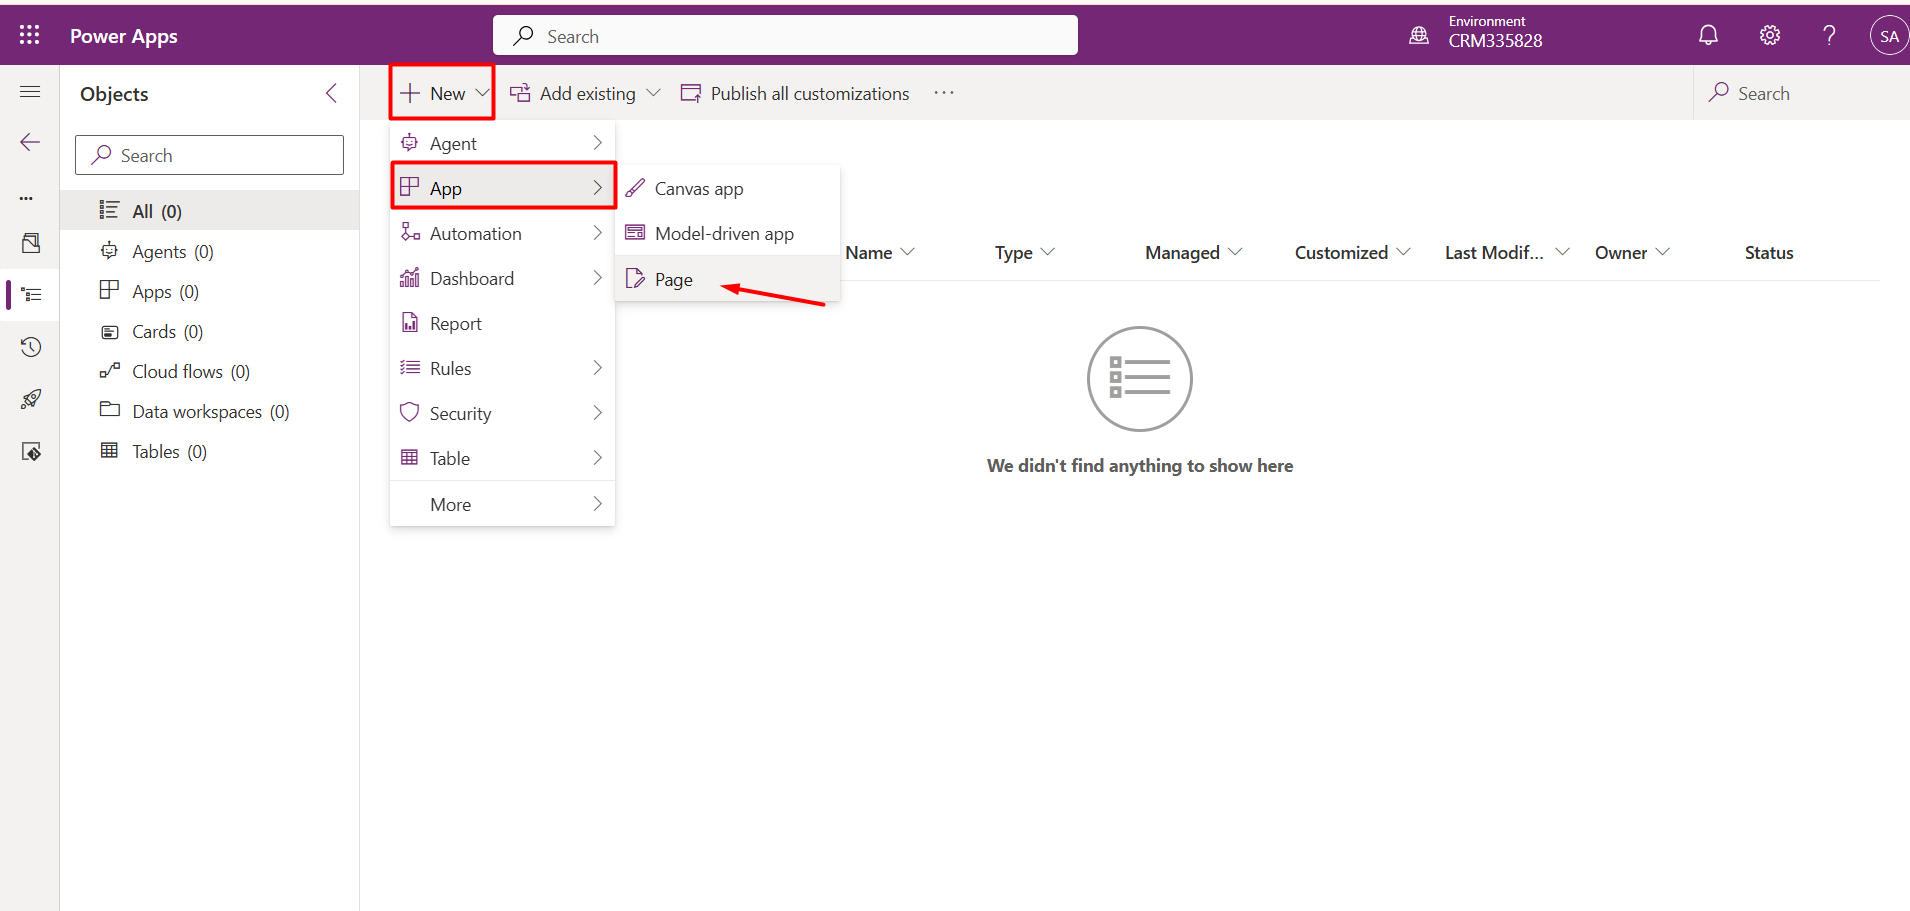
Navigate to Power Apps Maker Portal à Solutions à
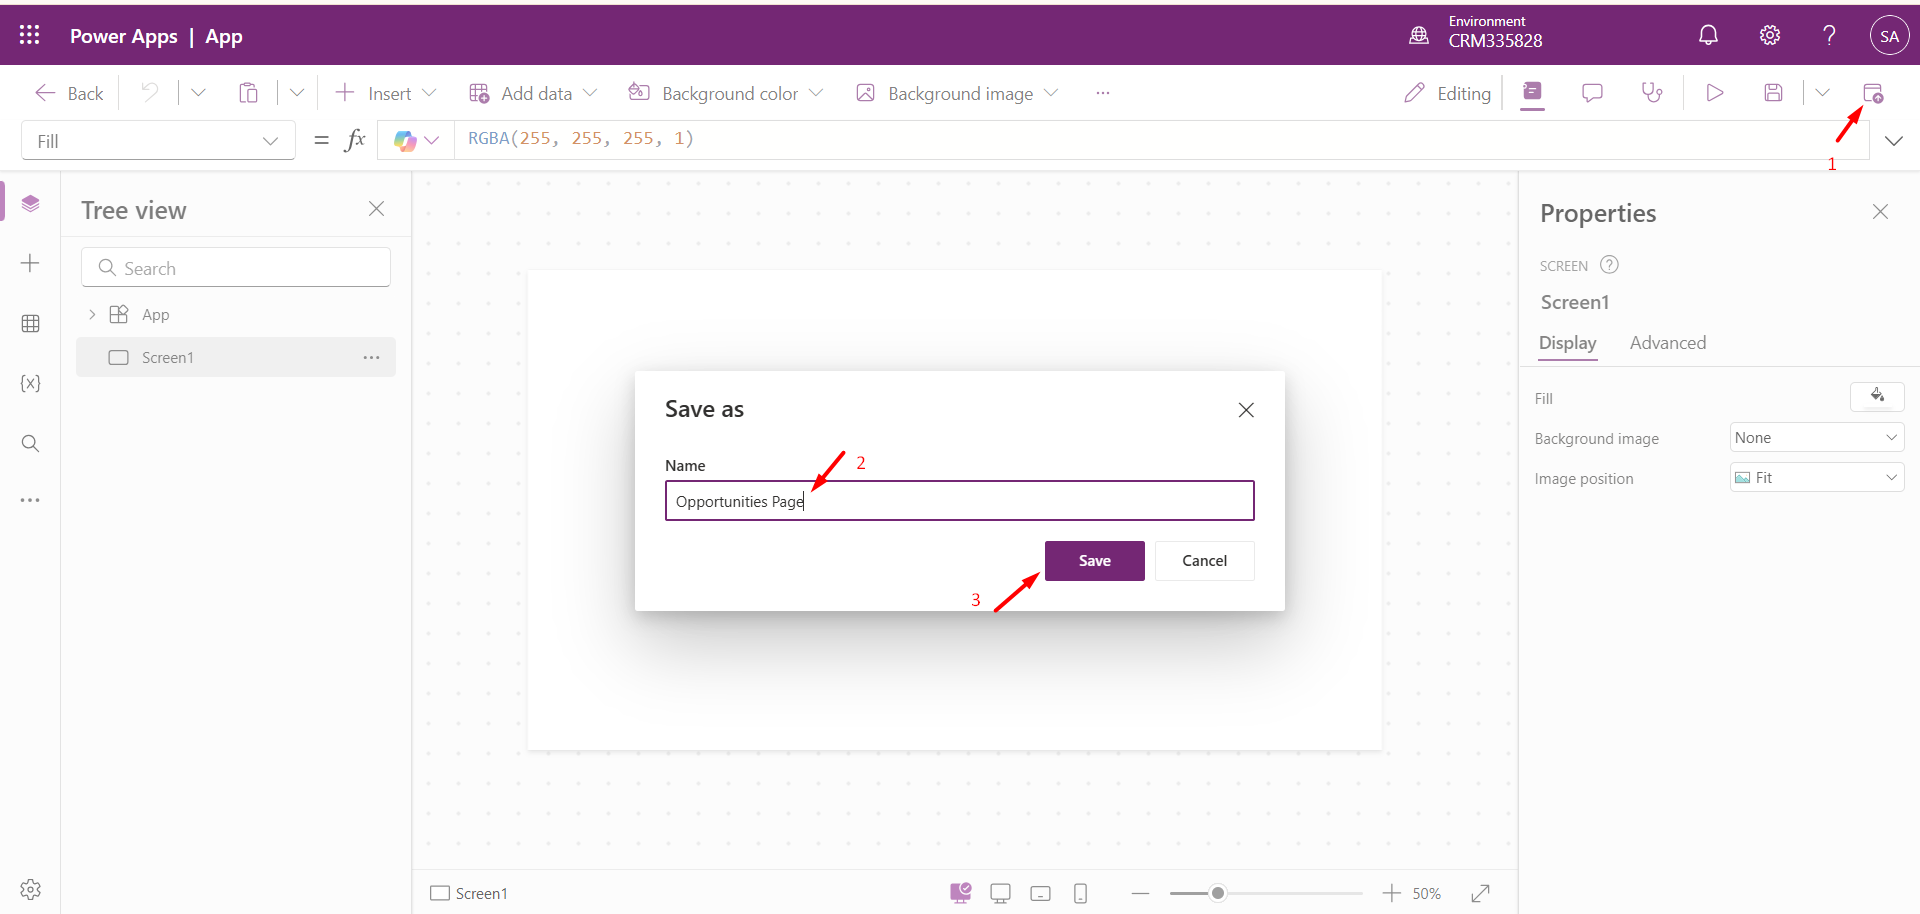
Custom Page opens in Power Apps Editor. Click the Publish button from the command bar and provide a name for the custom Page.
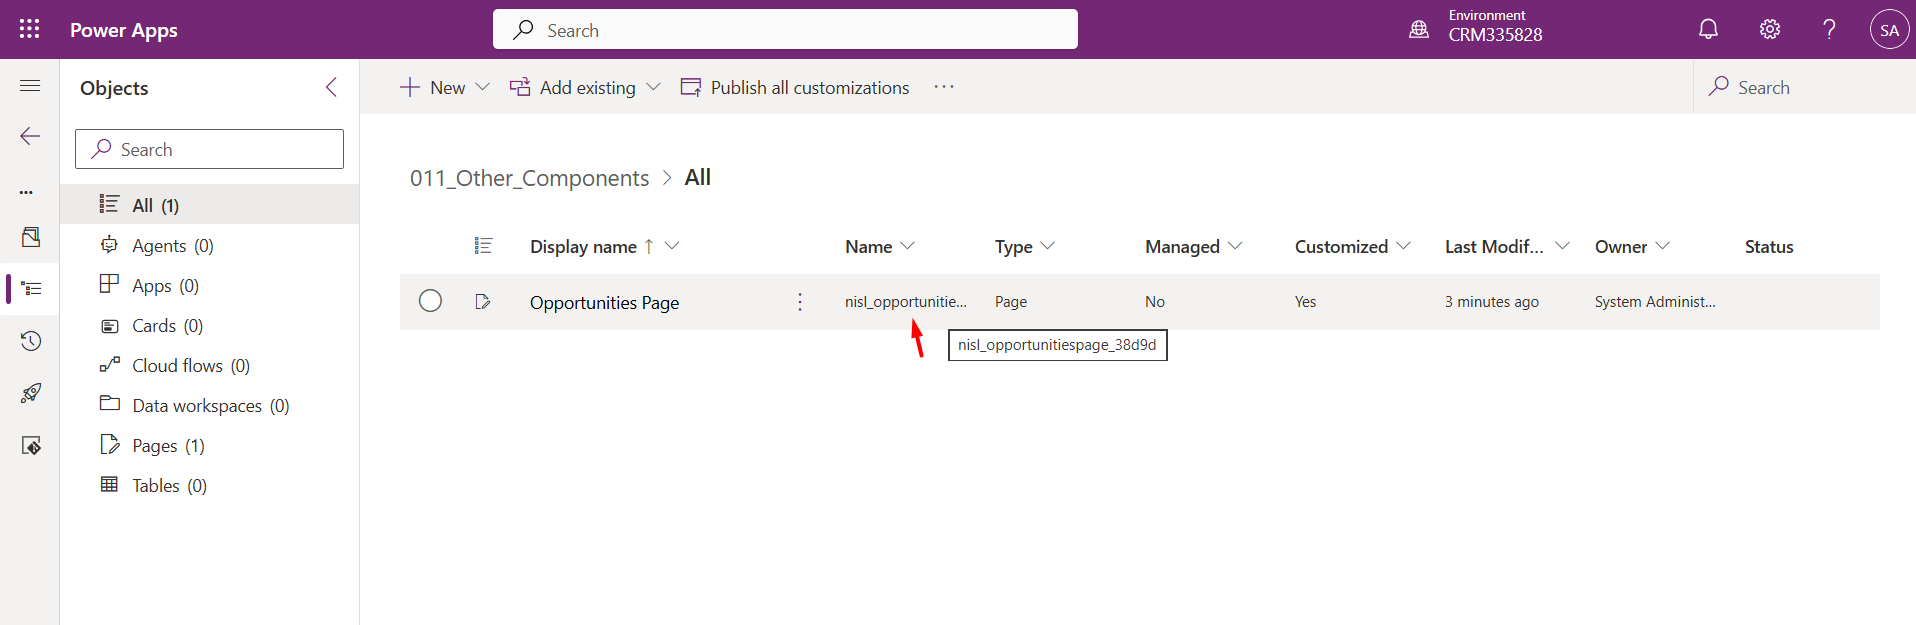
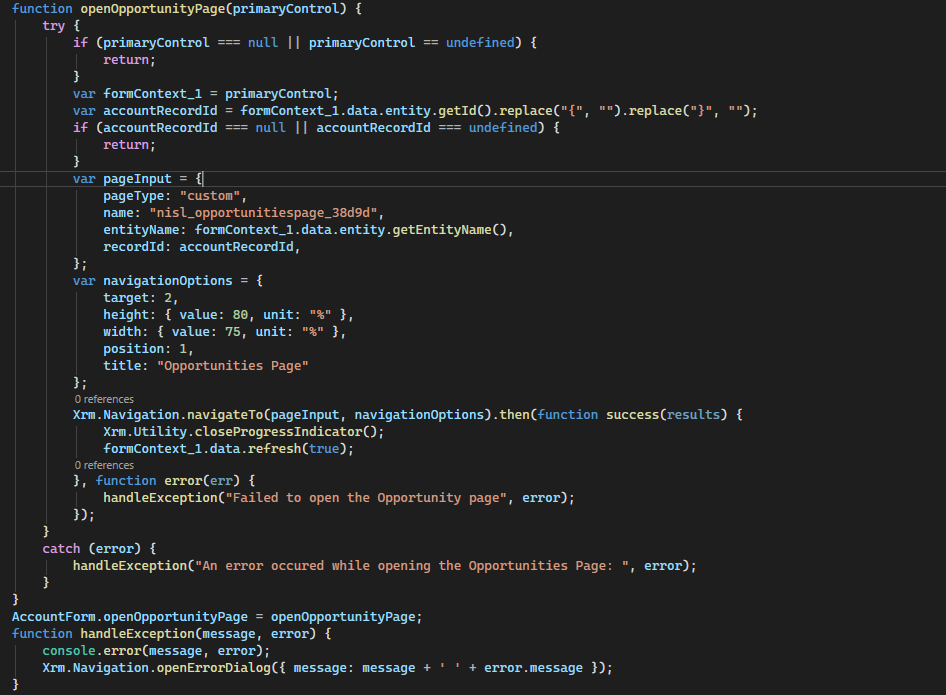
Copy the logical name of the Custom Page and pass it to the JavaScript function associated with the Opportunities ribbon button.
Below is the JavaScript function where the Custom Page name is used:
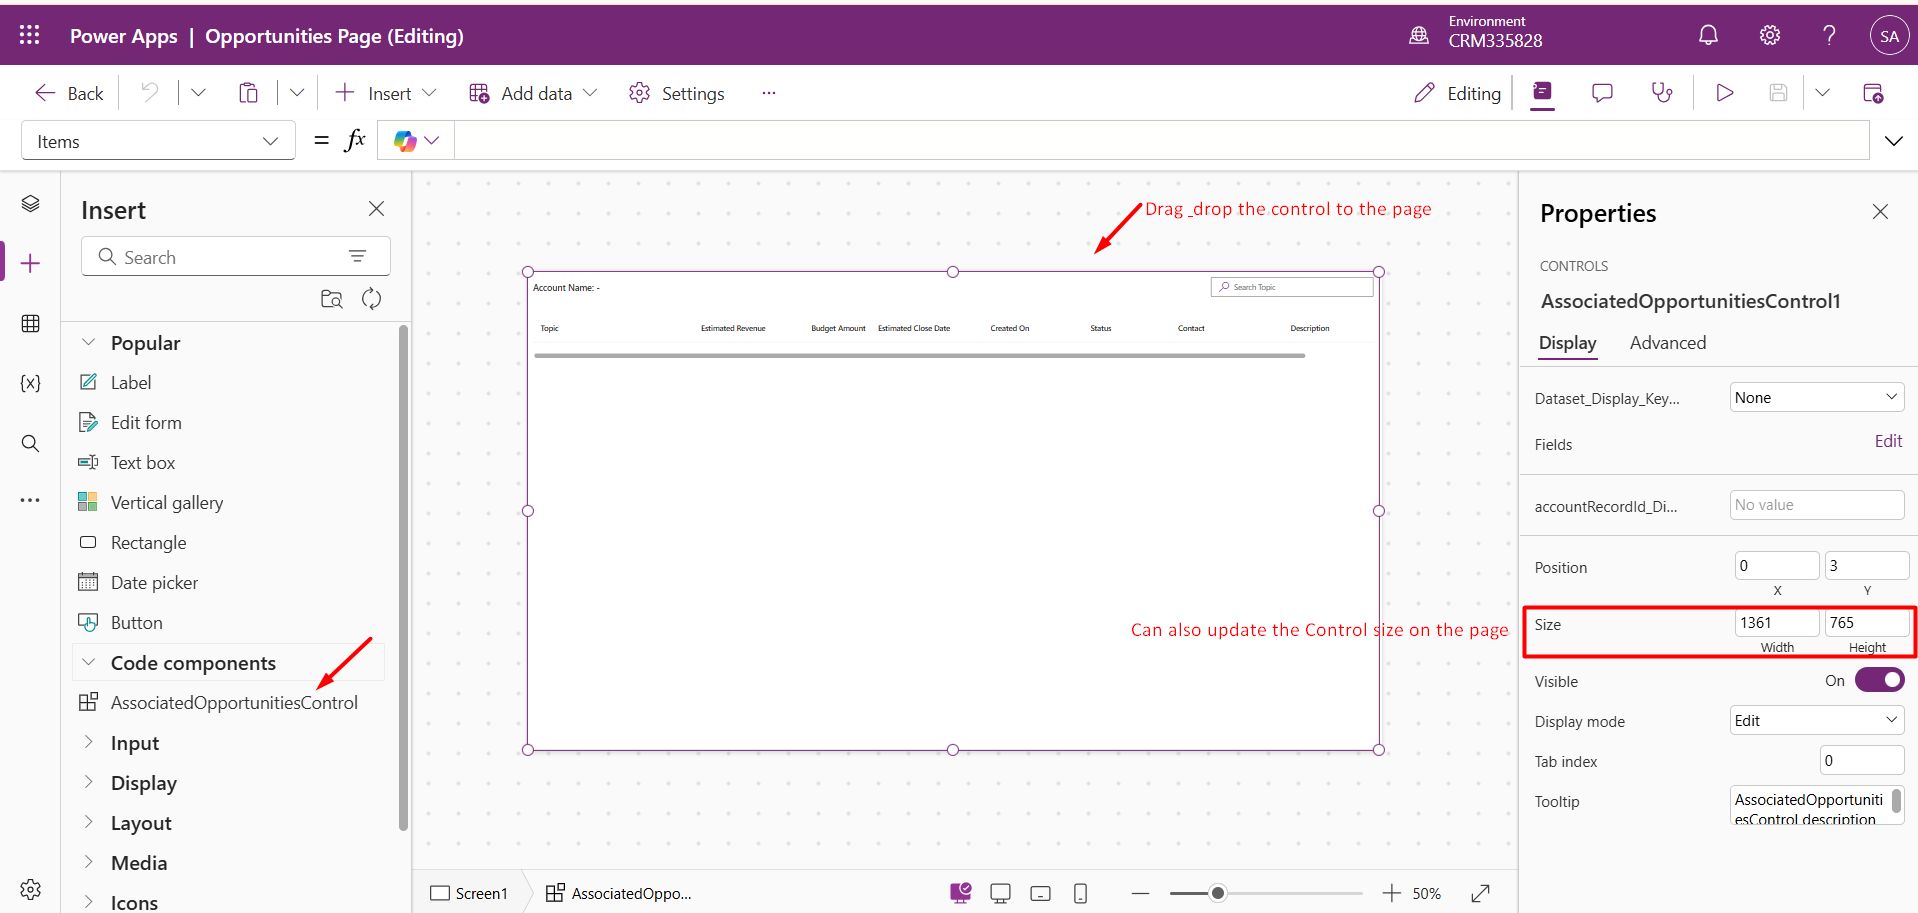
Step 3: Add the PCF Control to the Custom Page
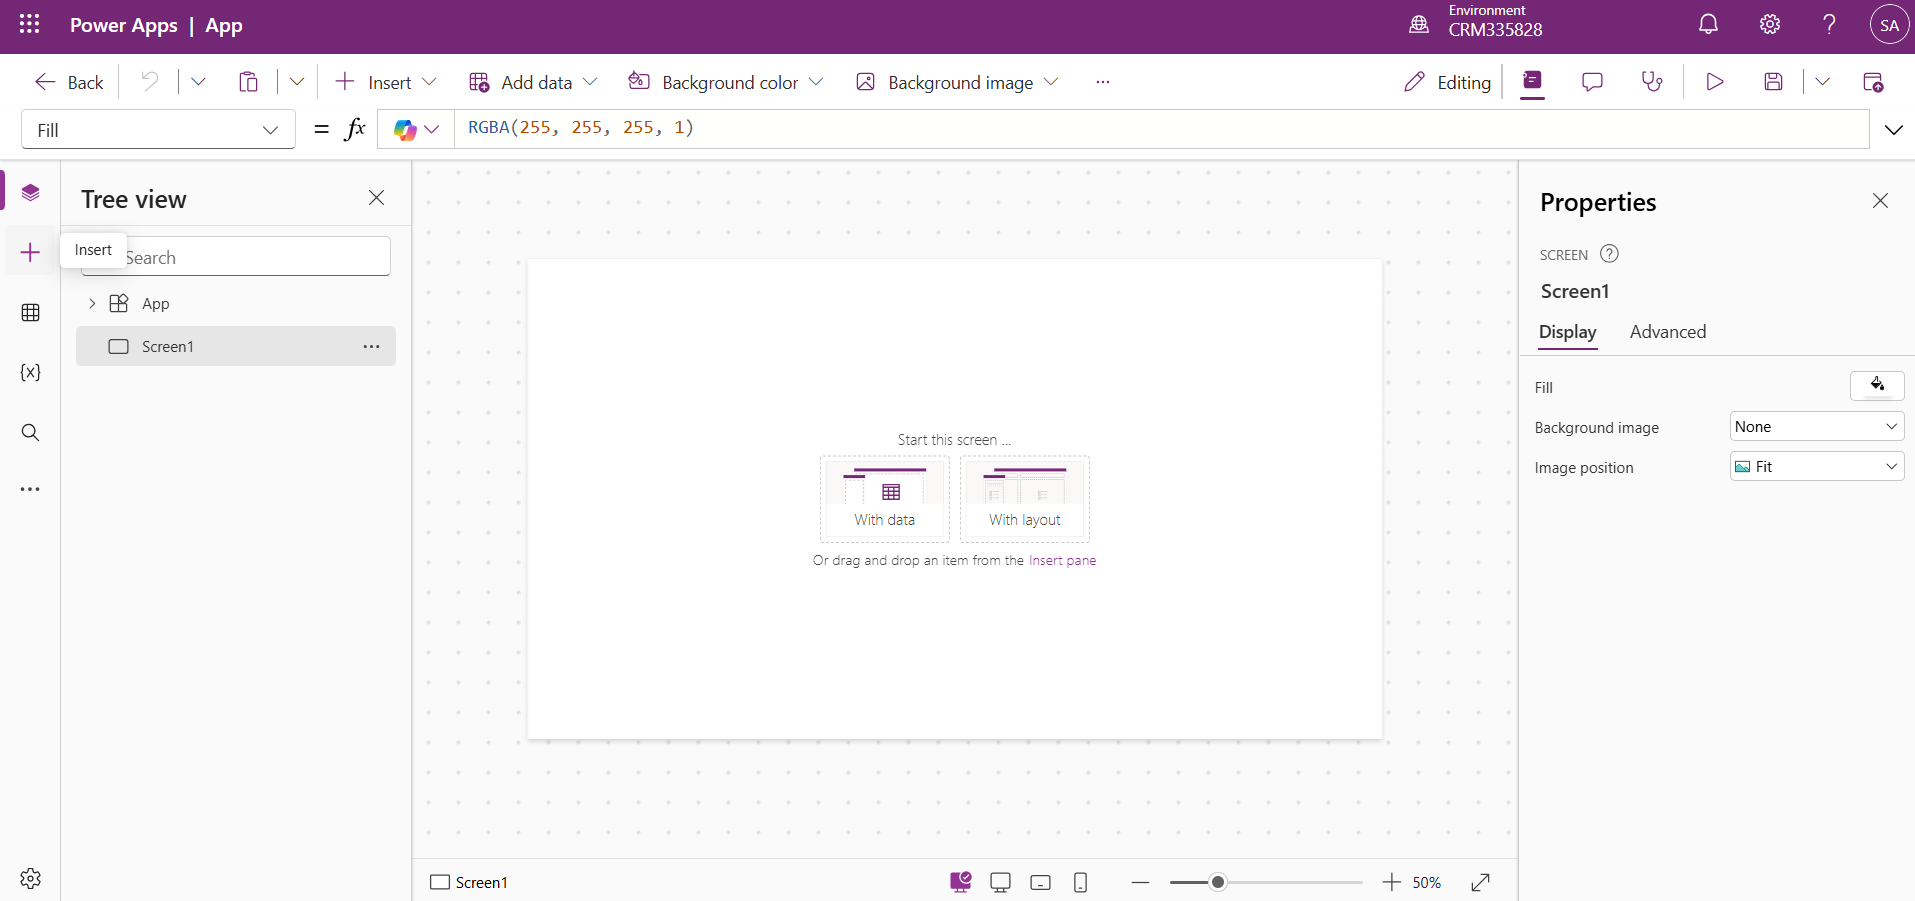
Click on the “ + ” (Insert) button on the sitemap, as shown below:
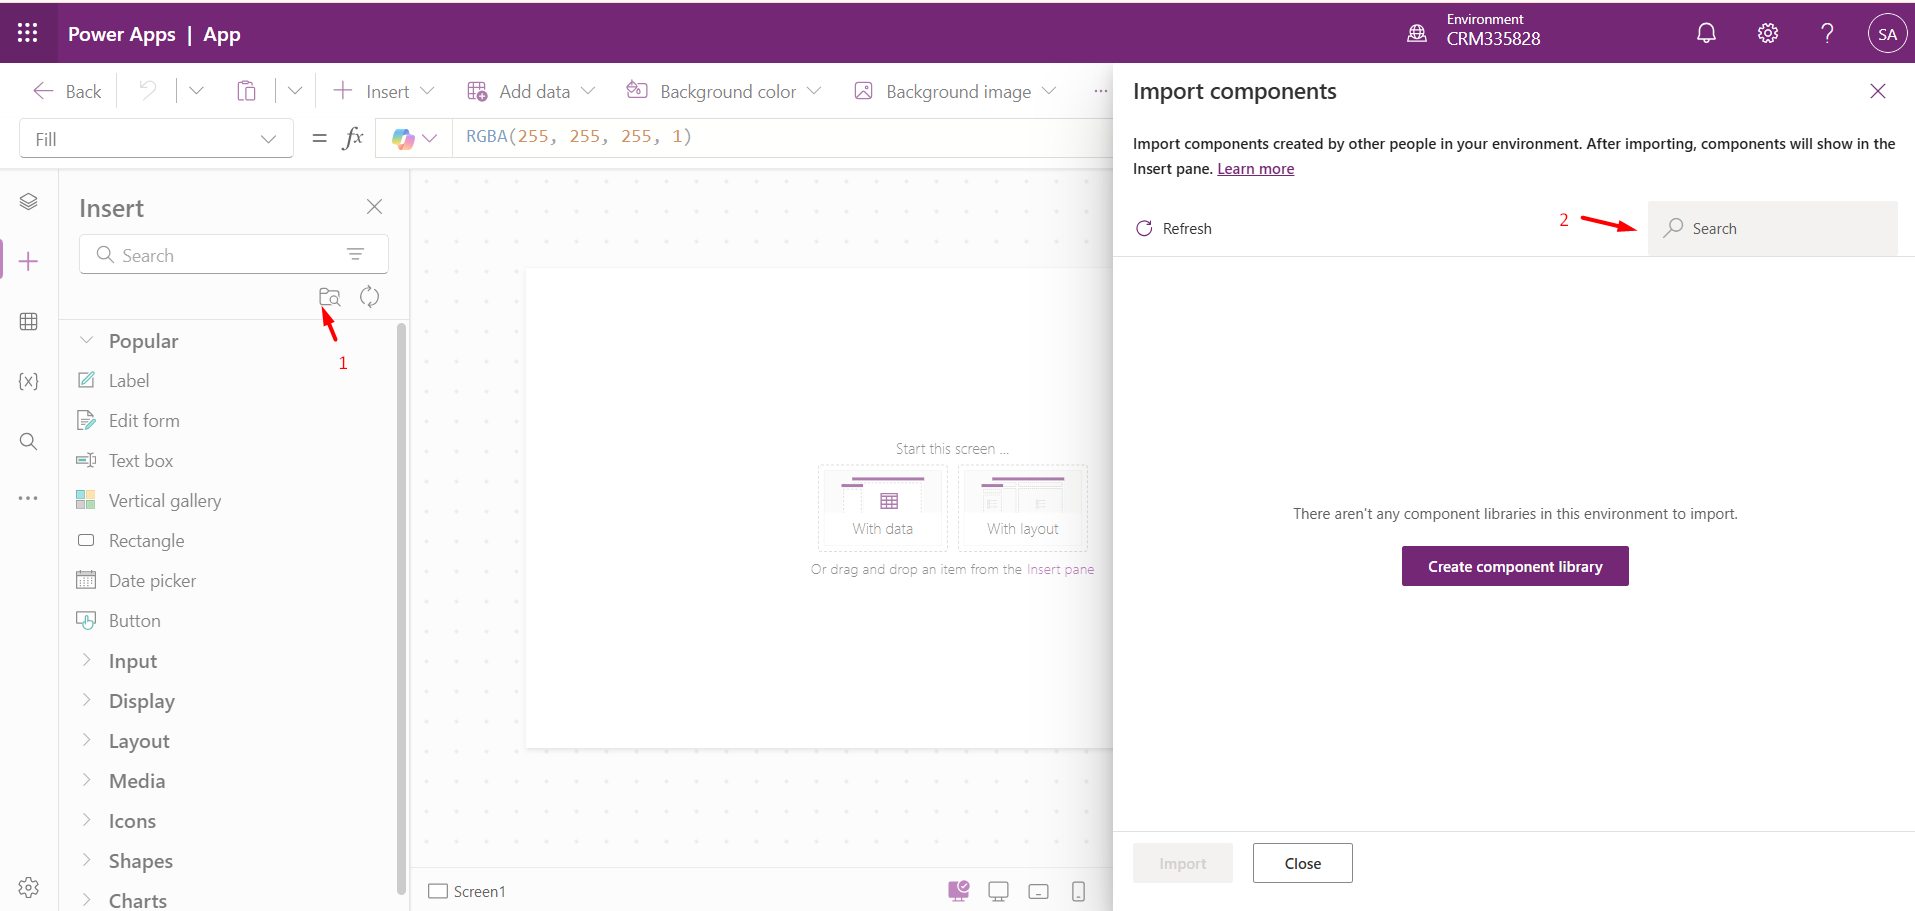
Next, click on the Get more components icon from the sitemap. An Insert Pane will appear, allowing us to add the PCF Control.
Note:
If the PCF control is deployed but not visible in the Insert pane, enable the following feature:
Navigate to Power Platform Admin Center à Select

After refreshing the page editor, you will see Canvas and Code Options in the Insert pane.
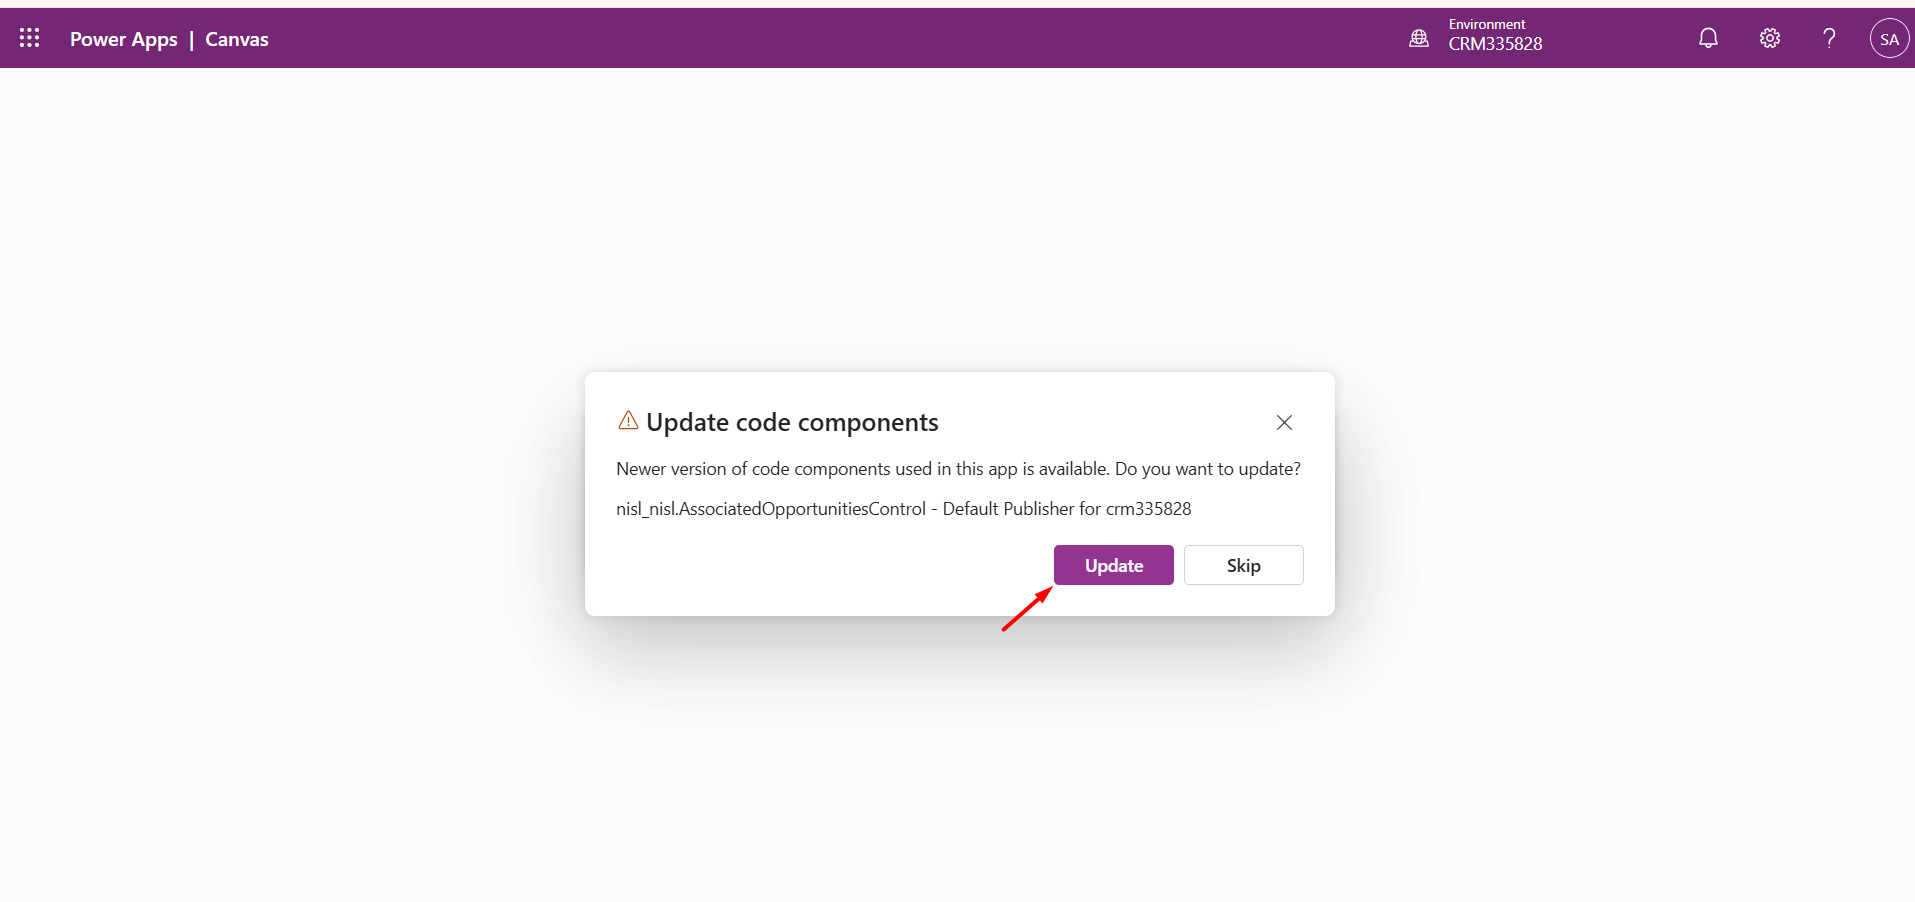
Select your control (here, AssociatedOpportunitiesControl) and click Import.
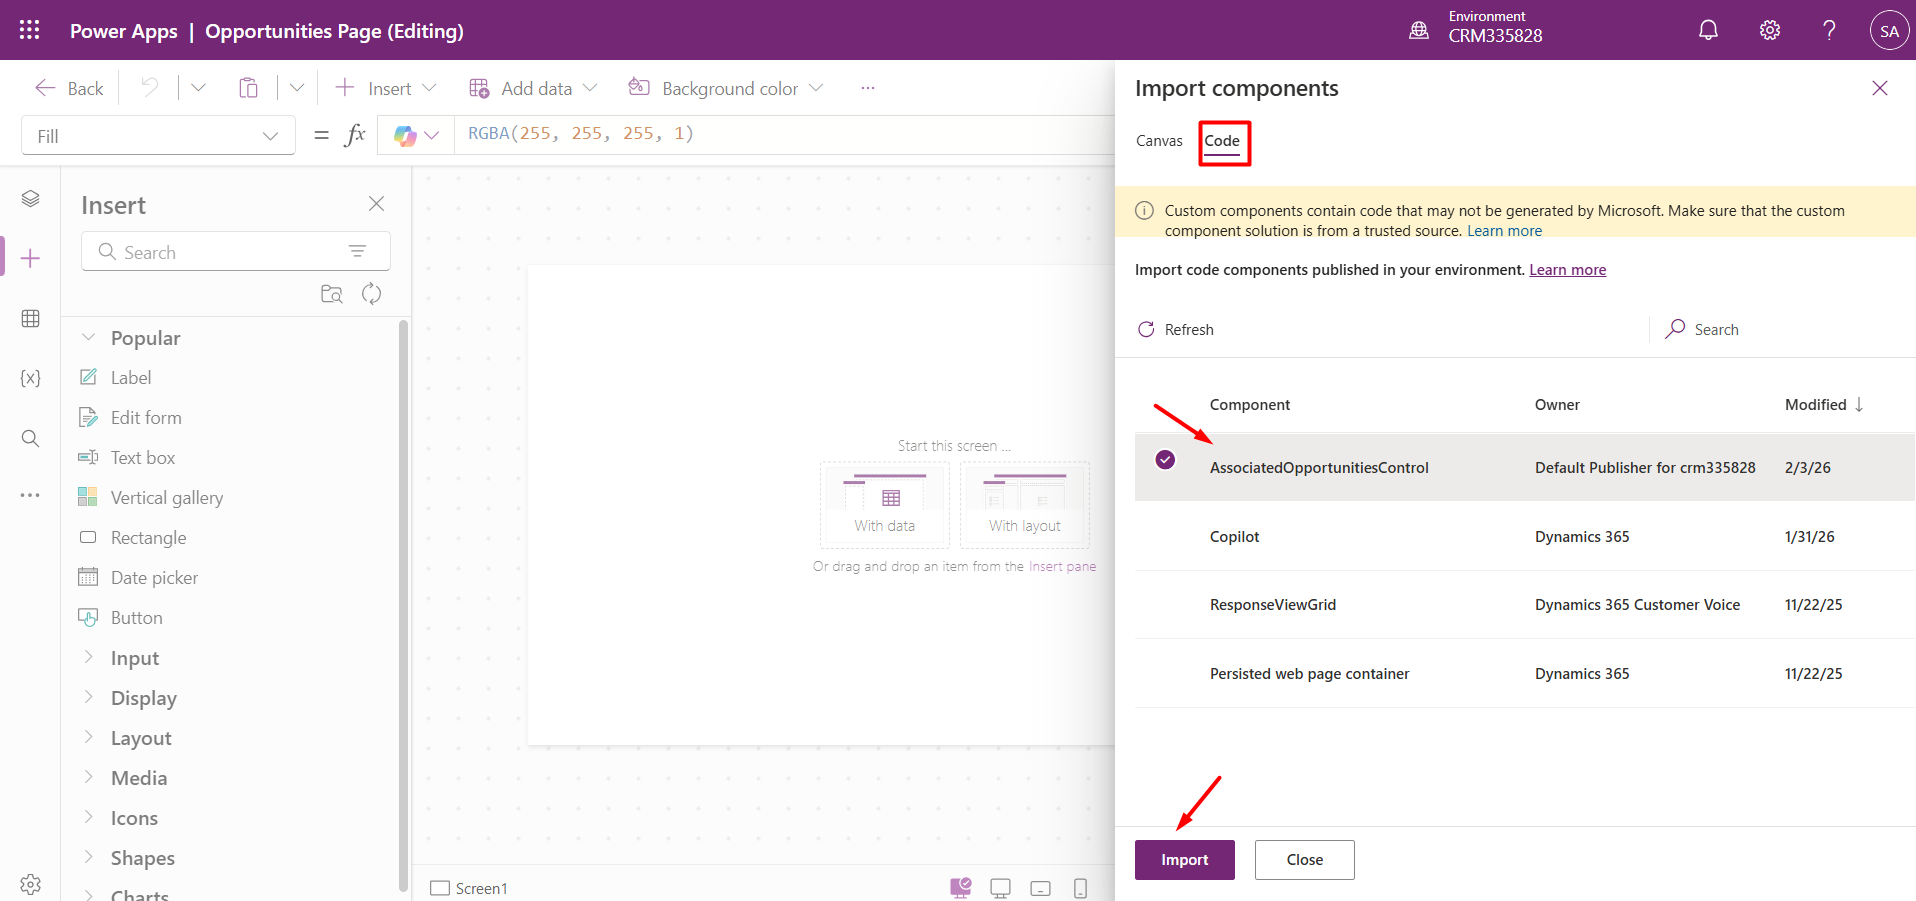
Once imported, the Code Components will appear in the site map.
Drag and drop the PCF control onto the Page, adjust the size, then Save and Publish the page.
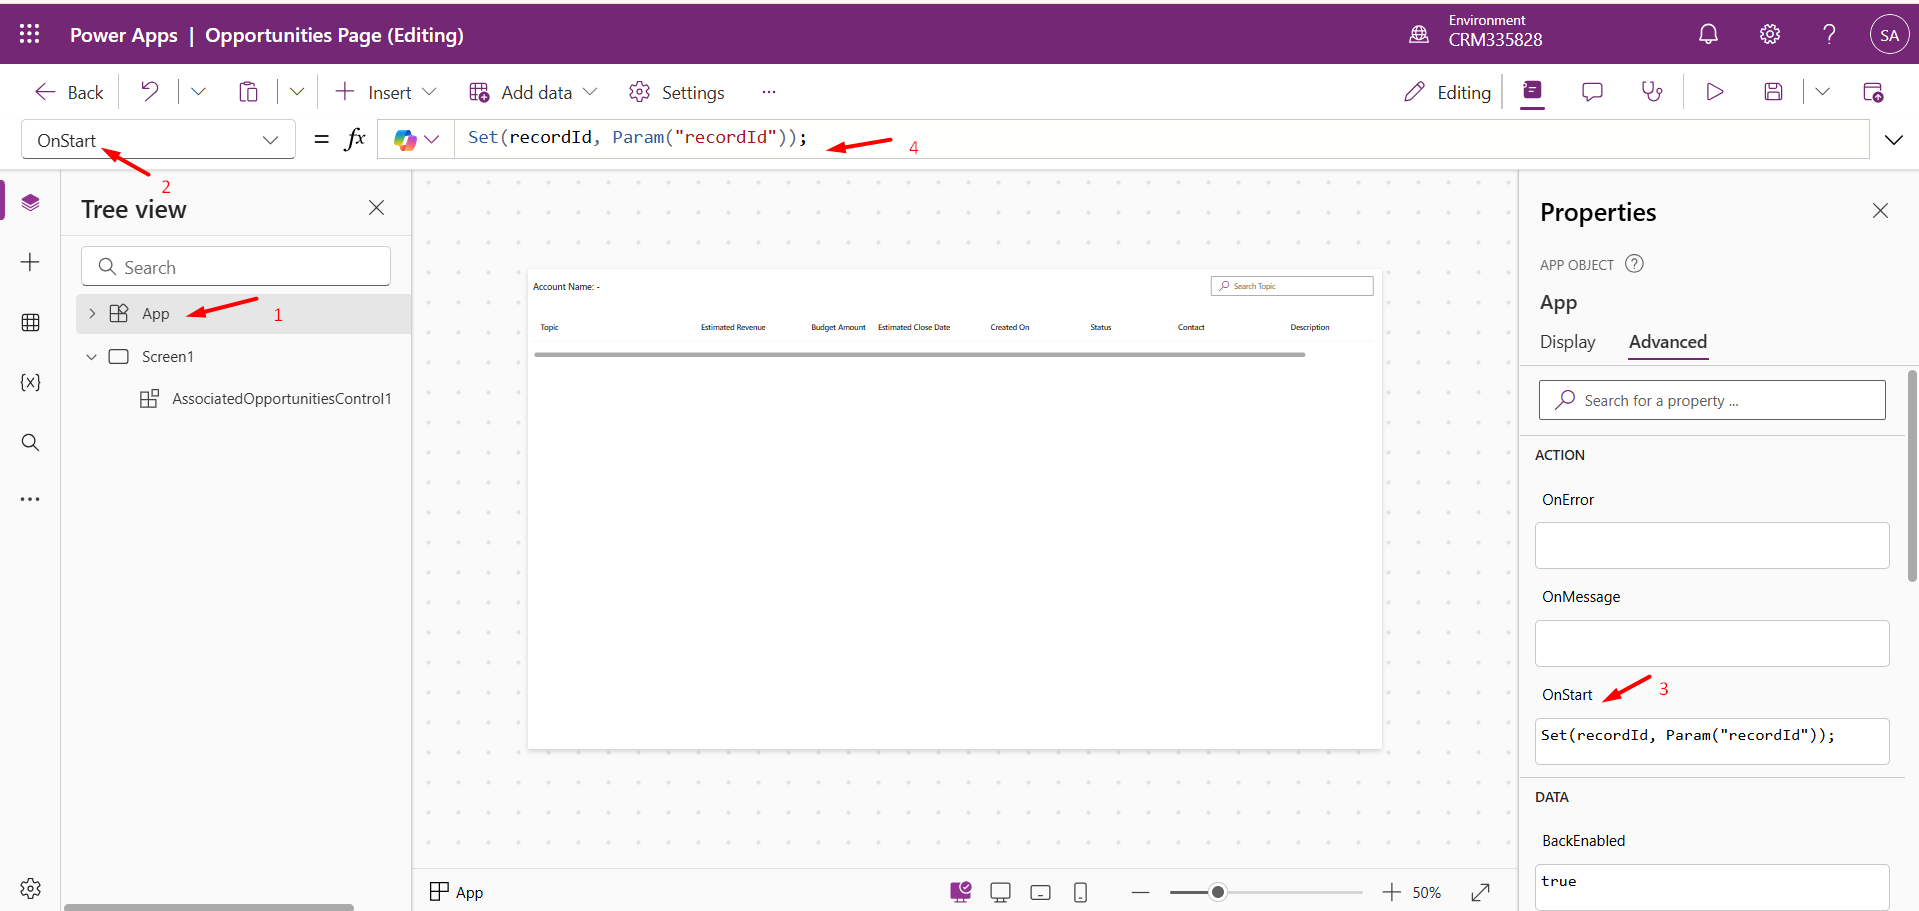
Custom Pages do not automatically receive the recordId from the context. We must pass explicitly.
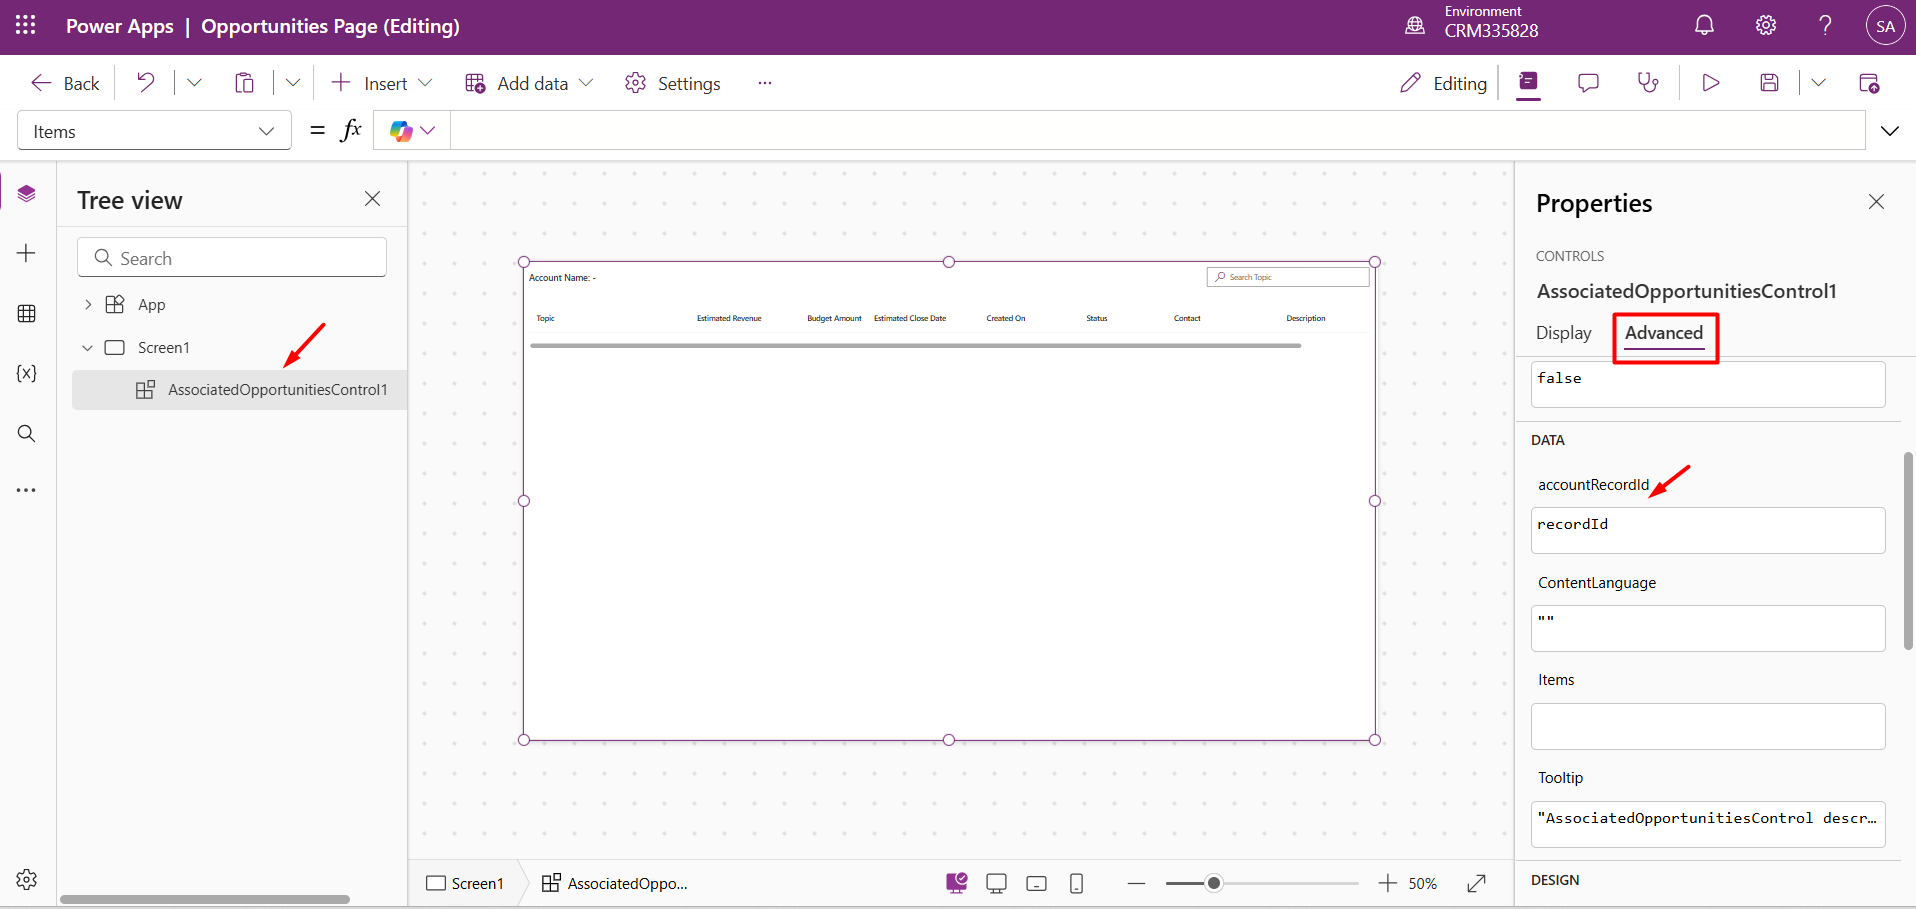
In the PCF control’s ControlManifest.Input.xml, define an input property:
<property name="accountRecordId" display-name-key="accountRecordId_Display_Key" description-key="accountRecordId_Desc_Key" of-type="SingleLine.Text" usage="input" required="false" />
Open the Custom Page and select App from the sitemap.
From the dropdown, select OnStart, then click Advanced and add:
Set(recordId, Param("recordId"));
This stores the recordId passed from JavaScript.
Select the PCF control from the sitemap.
Go to Properties → Advanced and bind the input property (here, accountRecordId) to the recordId variable. Save and Publish the page.
We will retrieve the account Id from the Input Parameter in the PCF Control, as shown below.
const accountRecordId = context.parameters.accountRecordId.raw ?? " Account Id is null";
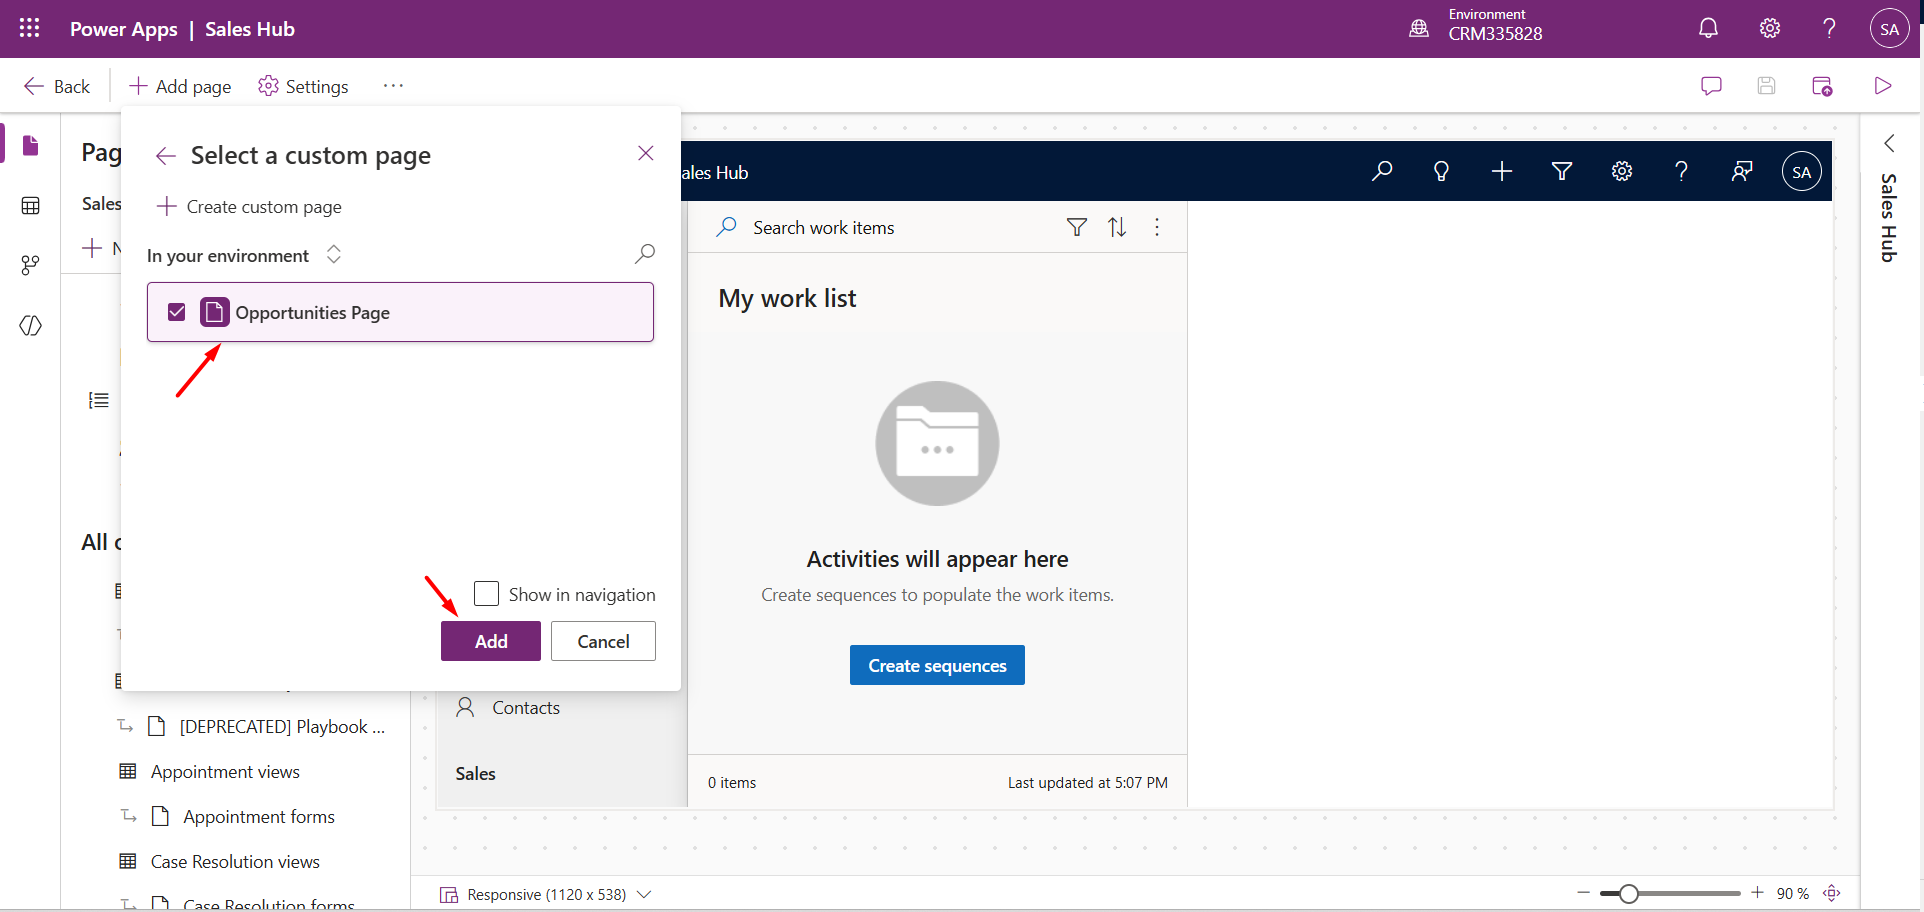
If the Custom Page is not added to the Model-Driven App, it will not load.
Open <Your App> in the Power Apps editor, click on the “+ Add Page” button and select Custom Page.
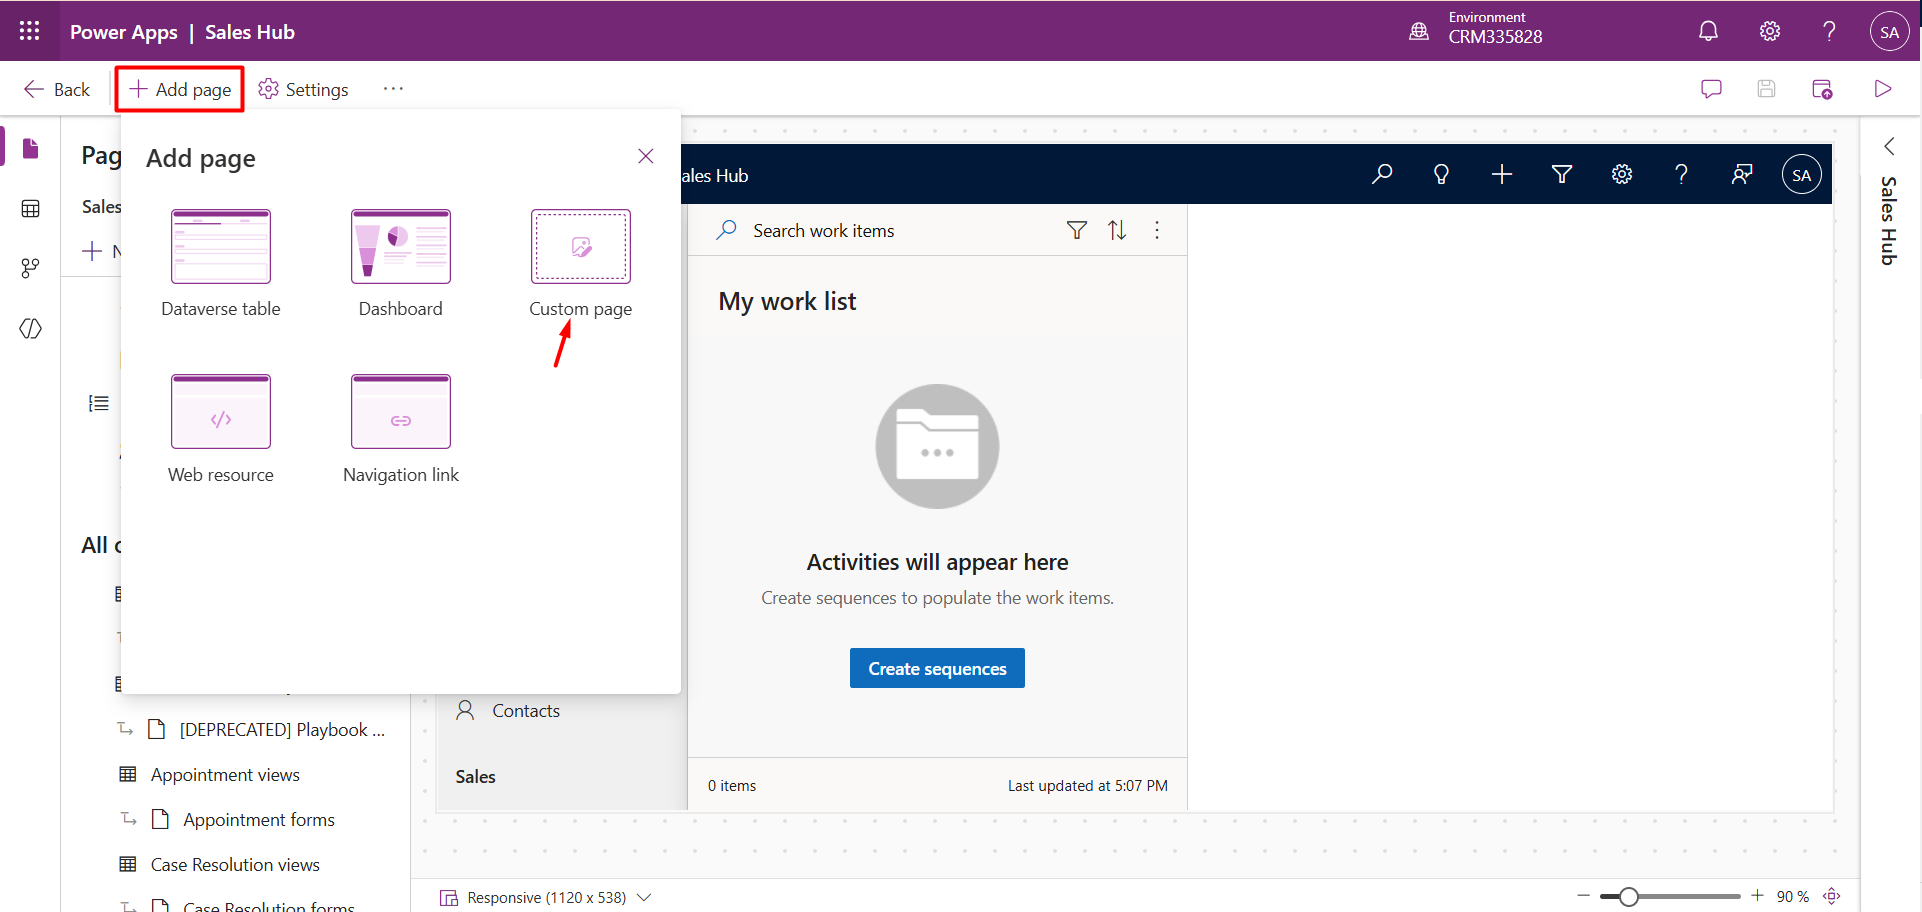
Next, choose the custom page and click on the Add button.
Optionally, enable Show in navigation if you want the page visible in the sitemap.
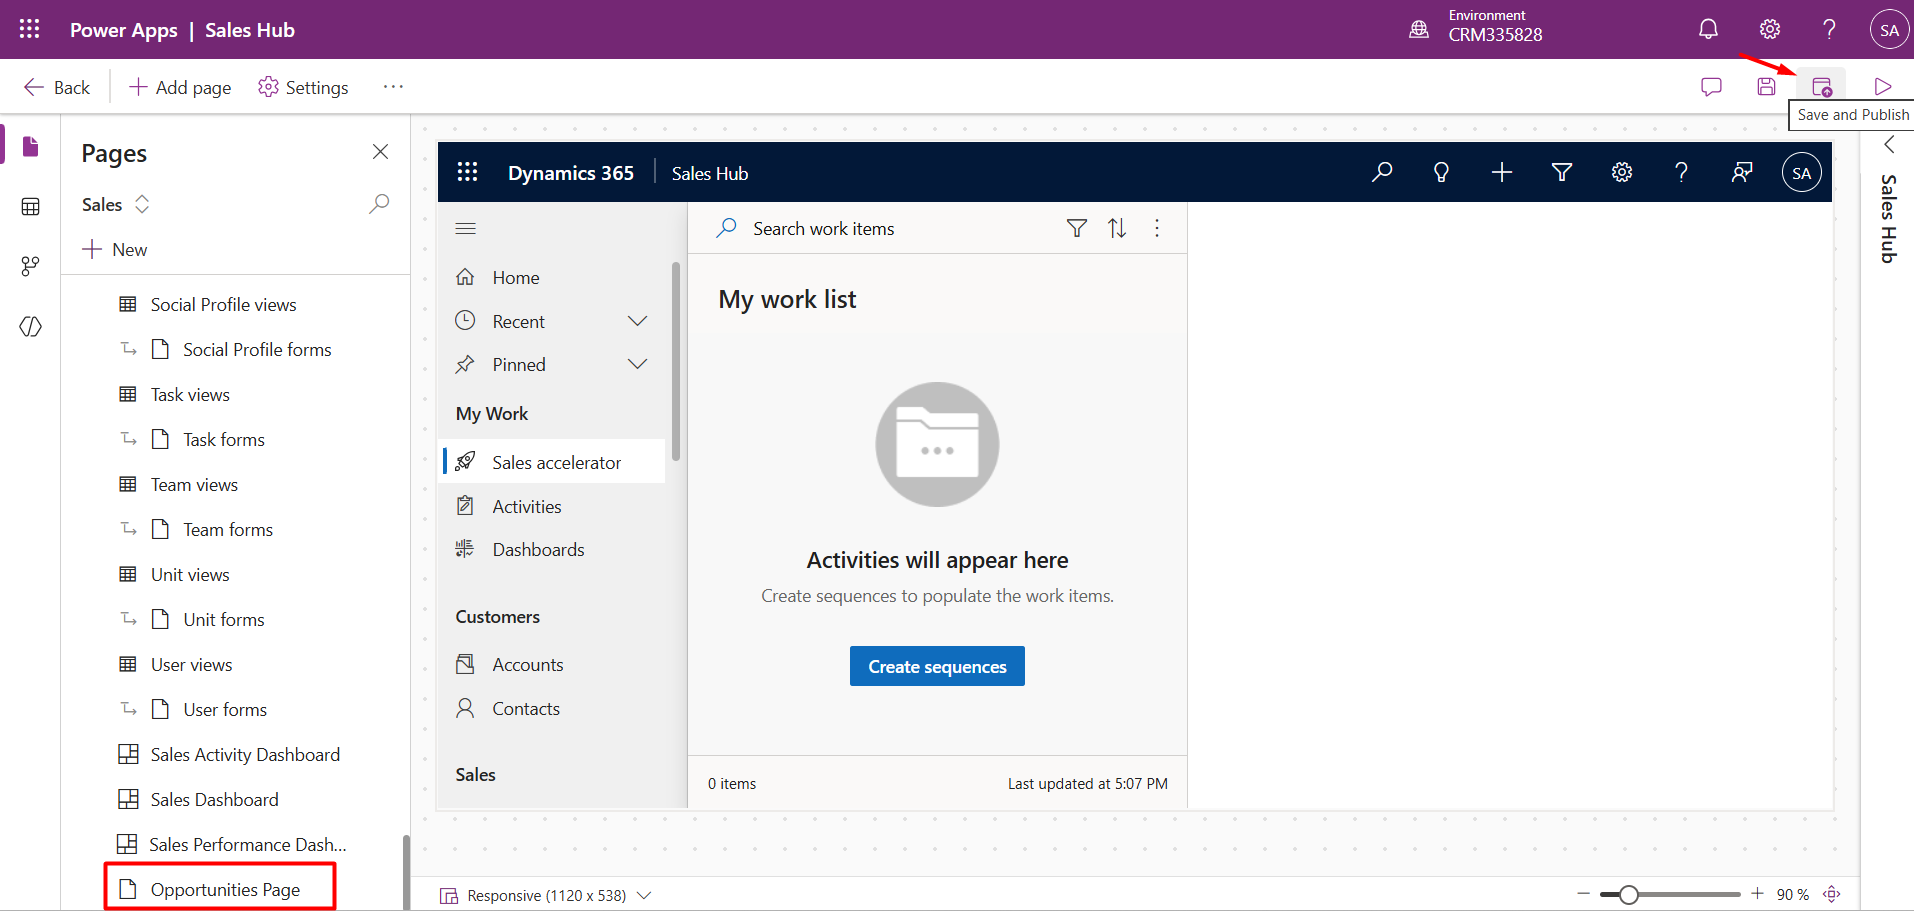
The page will be added to the app. Now, click on the Save and Publish button.
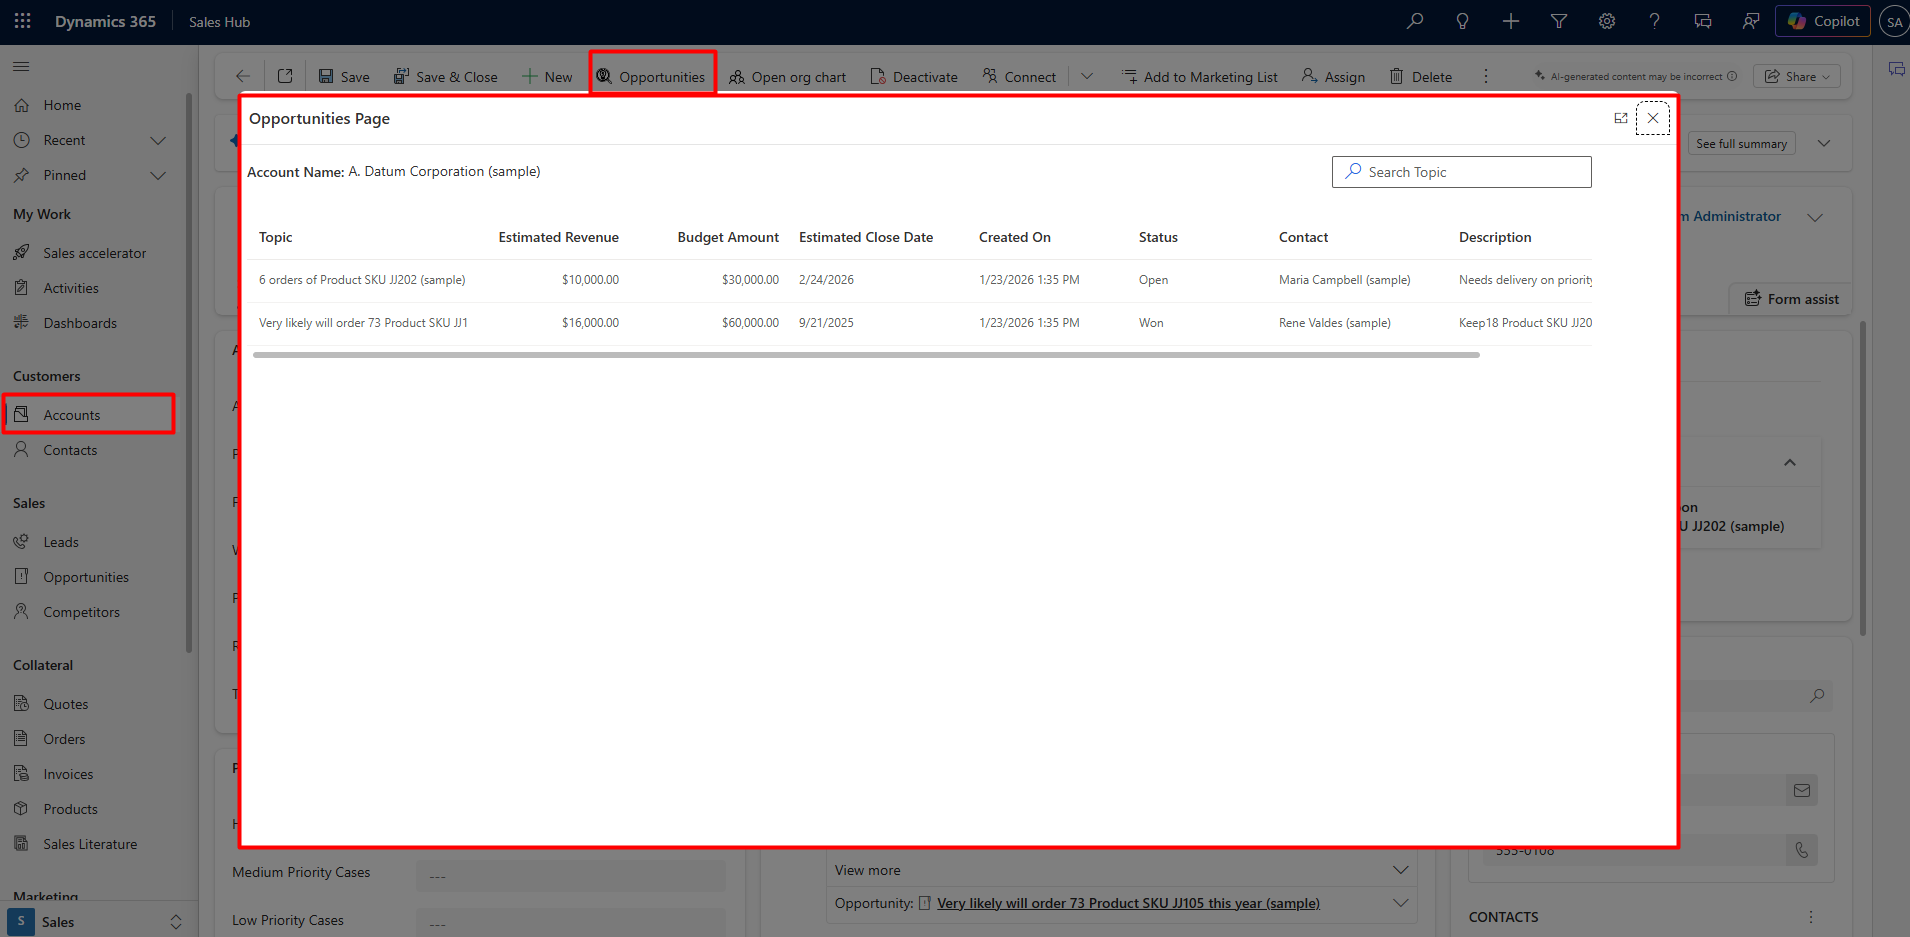
Open the Account record à Click on the Opportunities ribbon button. The Custom Page opens a pop-up window. The PCF control loads the associated opportunities as shown below.
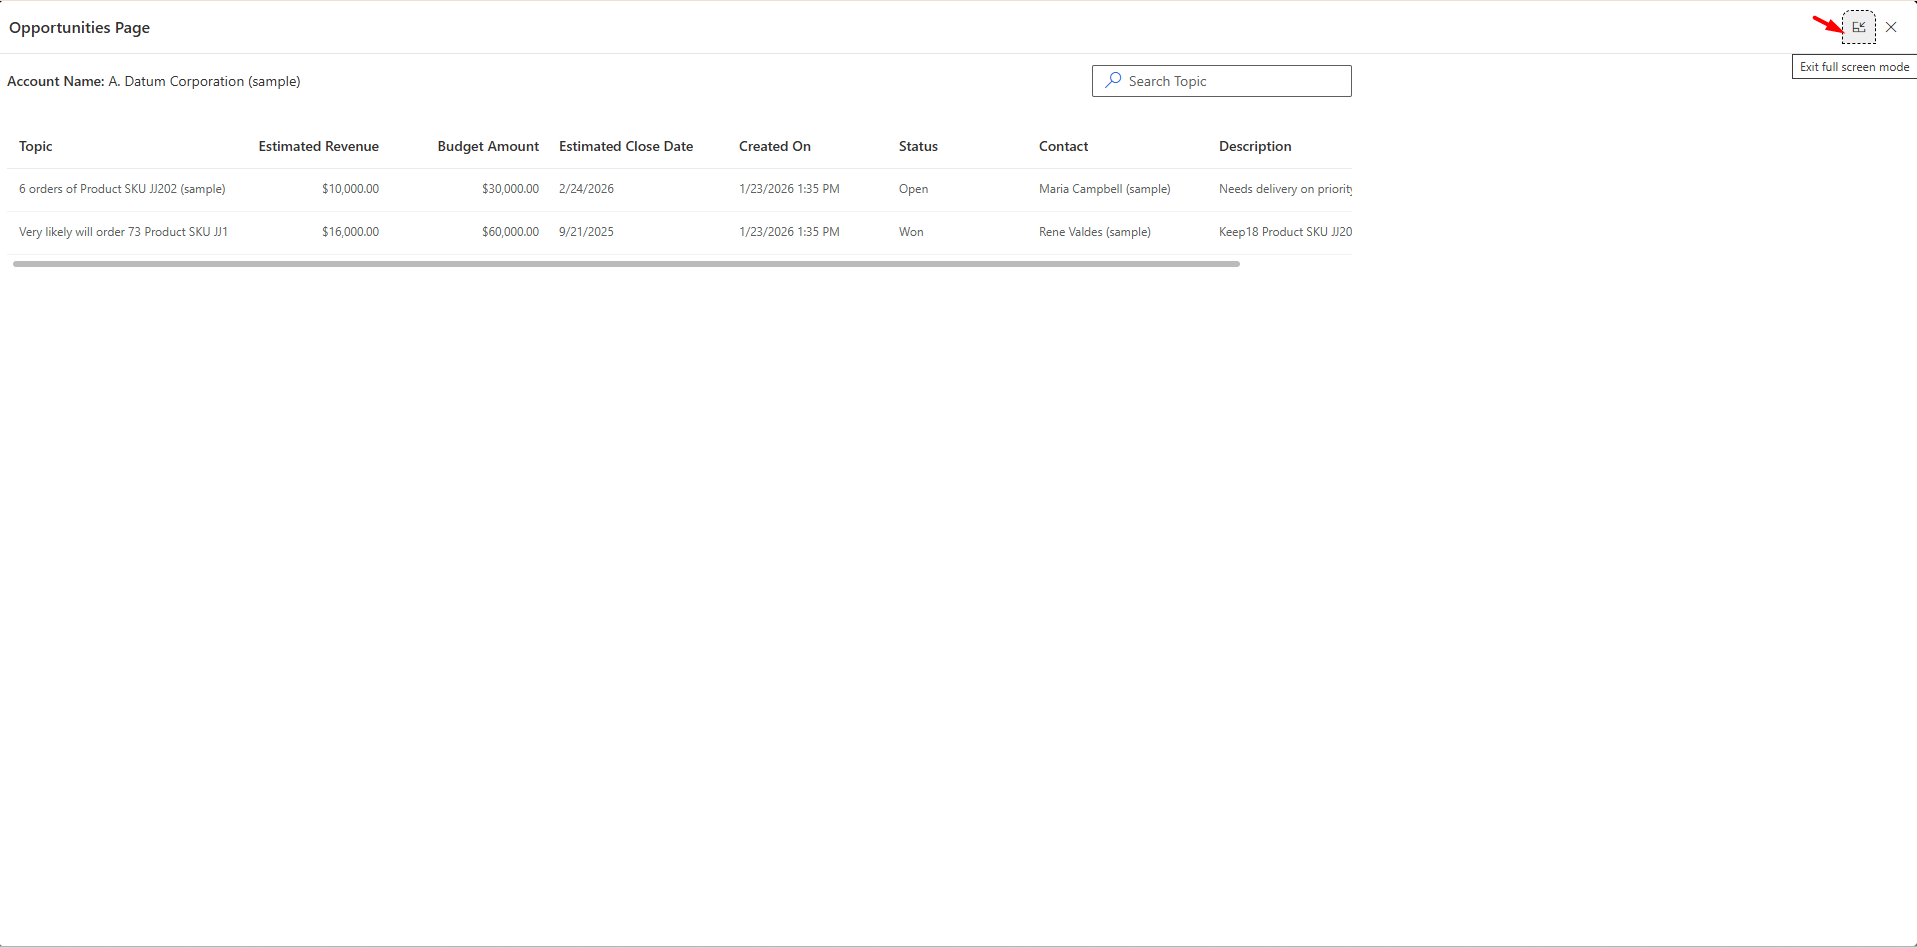
We can also utilize the full screen by clicking on the View full screen icon
When business requirements go beyond simple form customisation, using Custom Pages to host PCF controls is a scalable and future-ready solution.
This design pattern improves user experience, keeps forms clean and lightweight, and supports advanced UI requirements.
Comment

There are certain things in a CRM project that a QA must validate or verify before any solutions gets deploy…
READ MORE
Building a Power Apps Code App is just the beginning. In real-world business applications, users often need to send emails,…
READ MORE
Power Pages Server Logic allows developers to execute secure backend JavaScript directly within Power Pages. It is commonly used for…
READ MORE