
25 Sep, 2025
Posted on 25 Sep, 2025 by Javed Shaikh, Posted in Project Management Dynamics 365 Project Service Automation Dynamics 365 Field Service Dynamics 365
 Blogs
Blogs
The Schedule Board in Dynamics 365 Field Service and Project Operations is an essential tool for efficiently managing resource assignments. Out of the box, users can filter resources by roles, skills, territories, and more.
However, unique business requirements may call for custom filtering, such as filtering by Region, Department, etc. This blog details a step-by-step approach to achieve this, empowering organizations to tailor the resource scheduling experience to their needs.
The customer wants to filter resources on the Schedule Board by custom fields – Region and Department, in addition to standard fields such as roles, business units, and territories.
We will walk through step-by-step instructions to add a custom filter Department to the Schedule Board in D365 Project Operations.
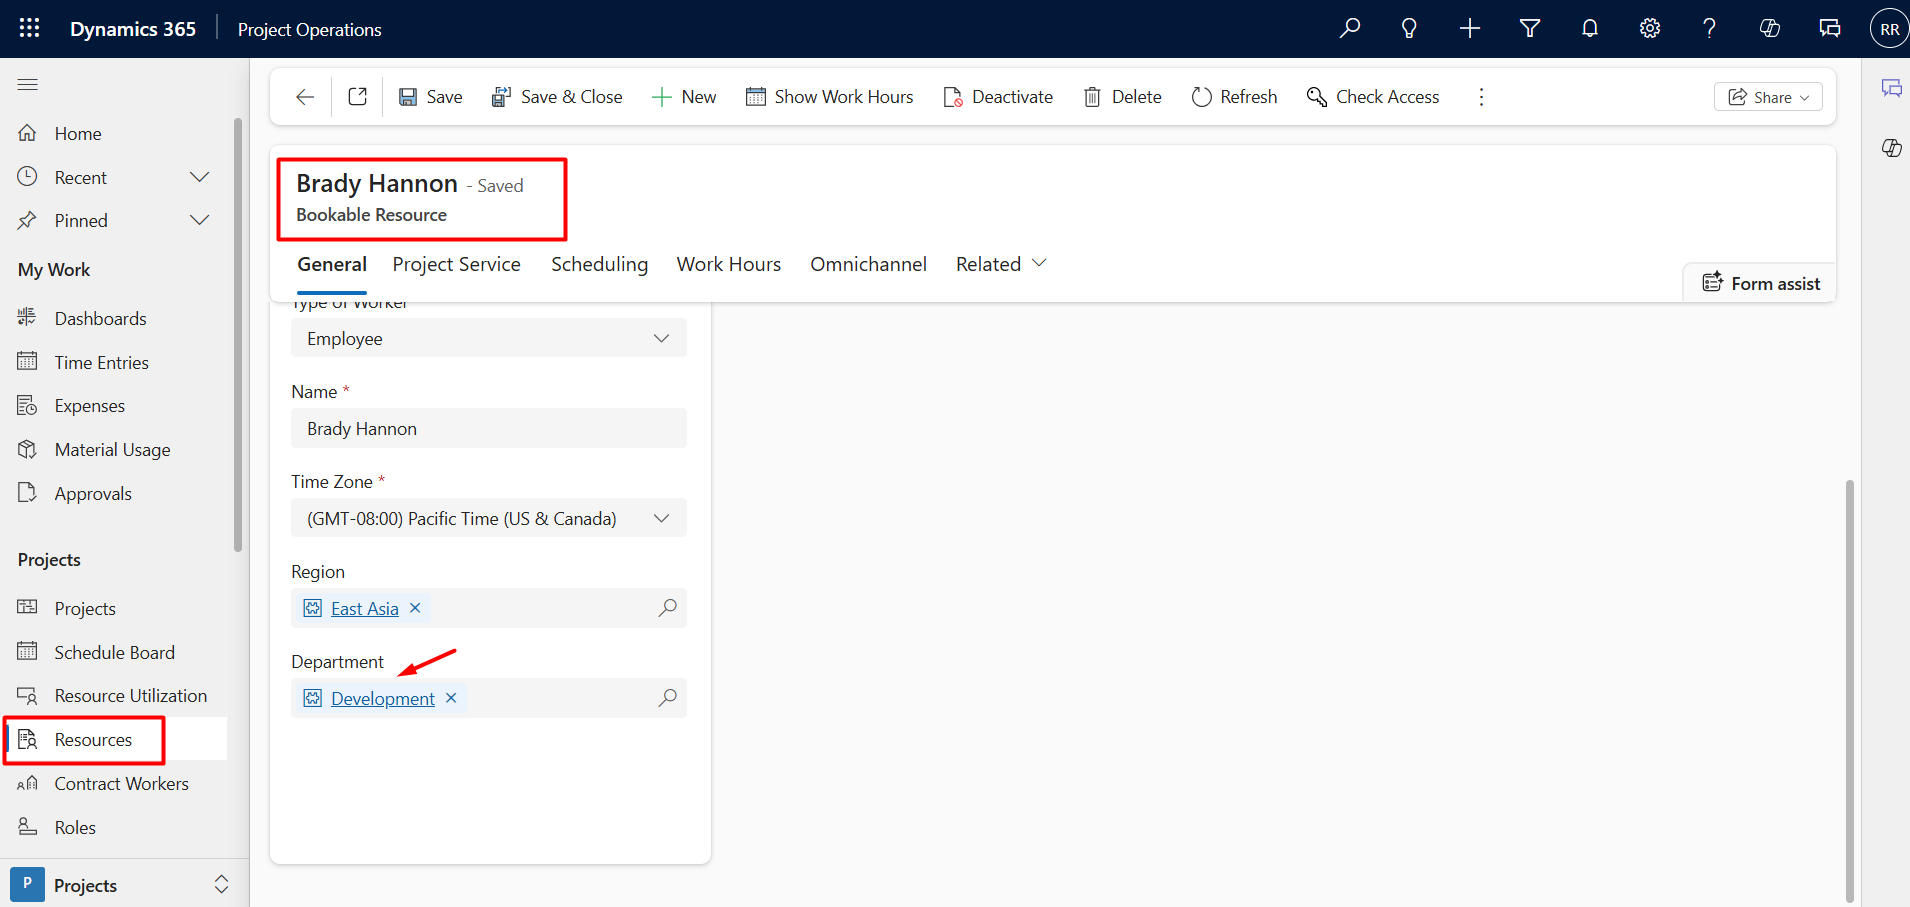
We need to establish a relationship between the Resource (bookableresource) and Department (nisl_department) entity.

The Schedule Board filter passes selected department identifiers (IDs) to the query engine. By linking Resources records to the Department entity, the system can evaluate which resources match the selected filter criteria.
The Filter Layout XML governs which filters are visible in the Schedule Board UI.
Navigate to Project Operations App à Schedule Board in sitemap à Select SJM Schedule Board à Click on “:” dots à Select Board Setting.
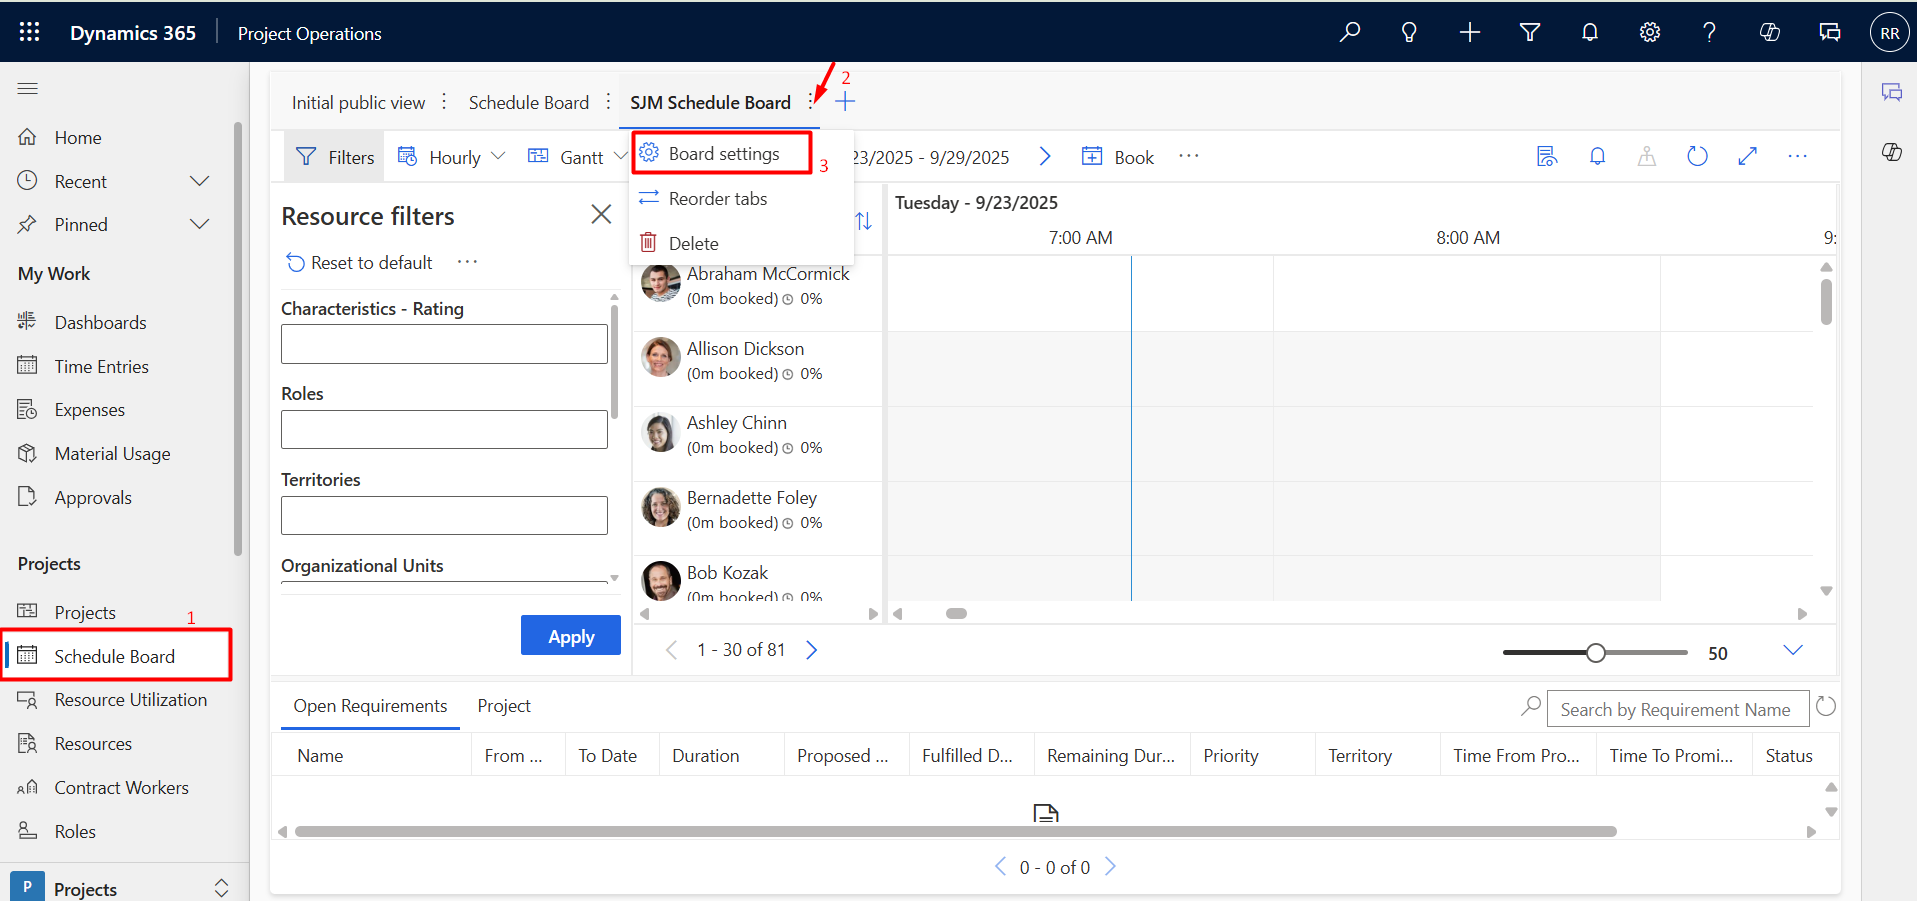
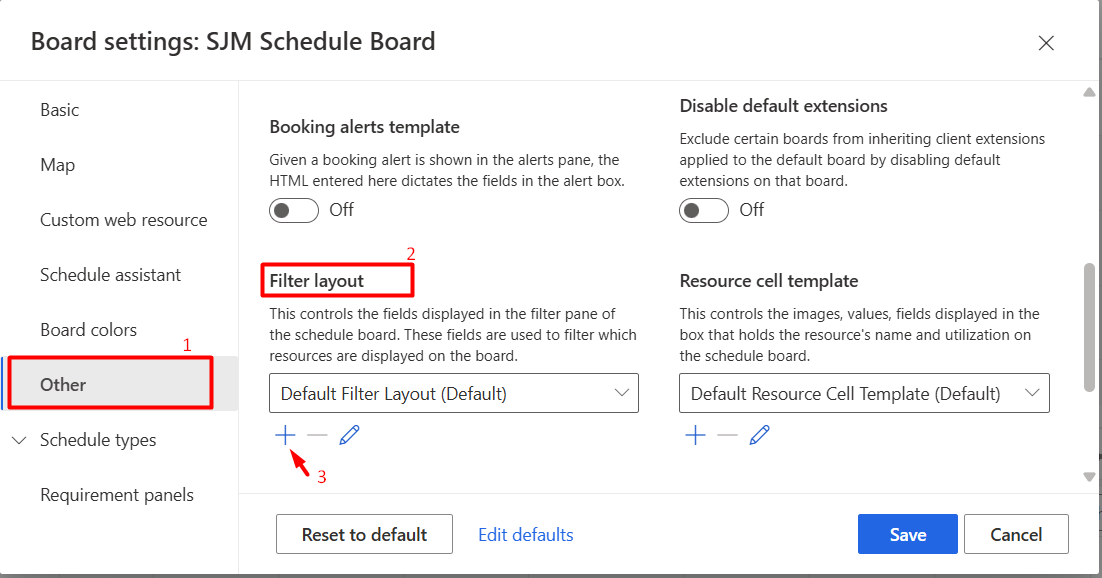
The Board Settings Dialog box will appear. Select Other from sitemap à Scroll down à Under Filter Layout, click on the “ + ” icon. You can also edit the existing filter.
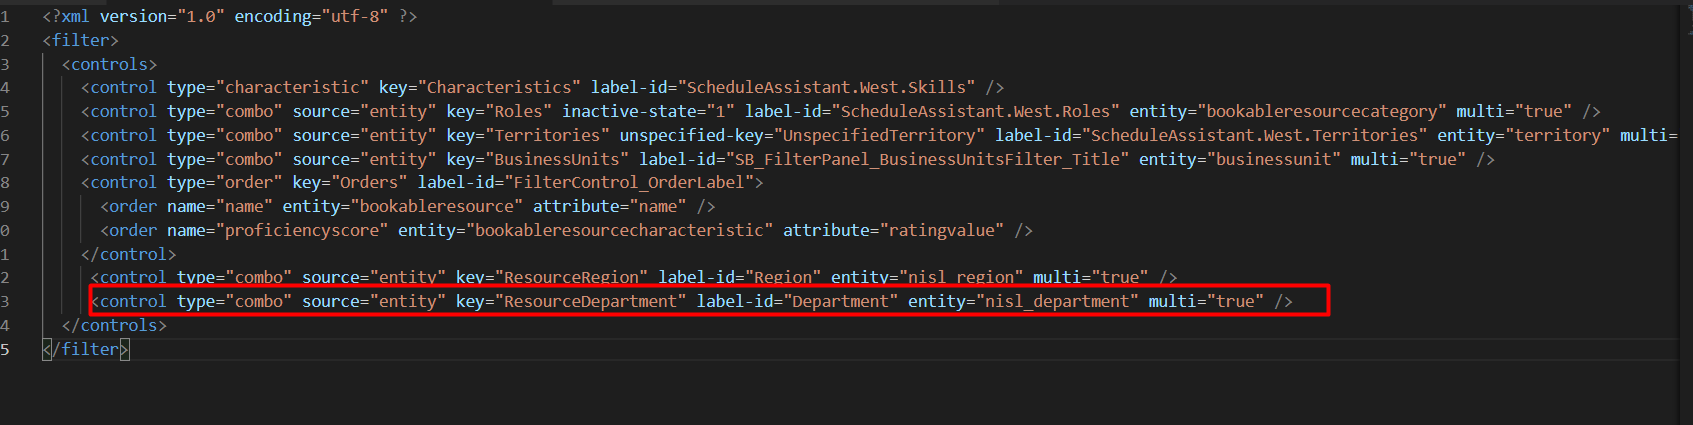
Add the following code inside the
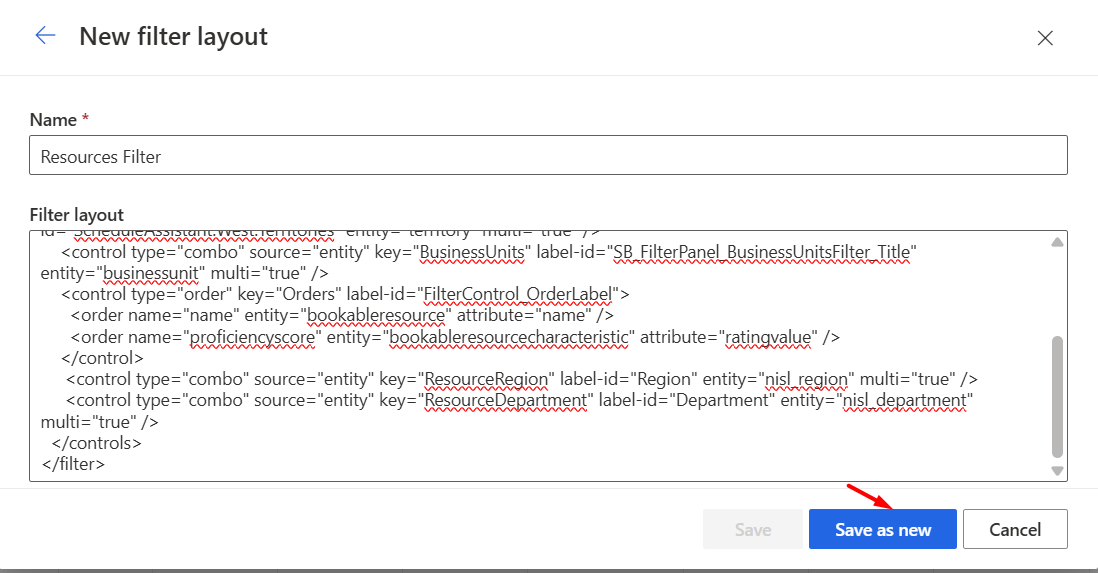
<control type="combo" source="entity" key="ResourceDepartment" label-id="Department" entity="nisl_department" multi="true" />
Here,
Open Visual Studio Code àAdd the above code as shown below:
Copy the code and paste it inside the filter layout, and click on the Save as new button shown in the image below.
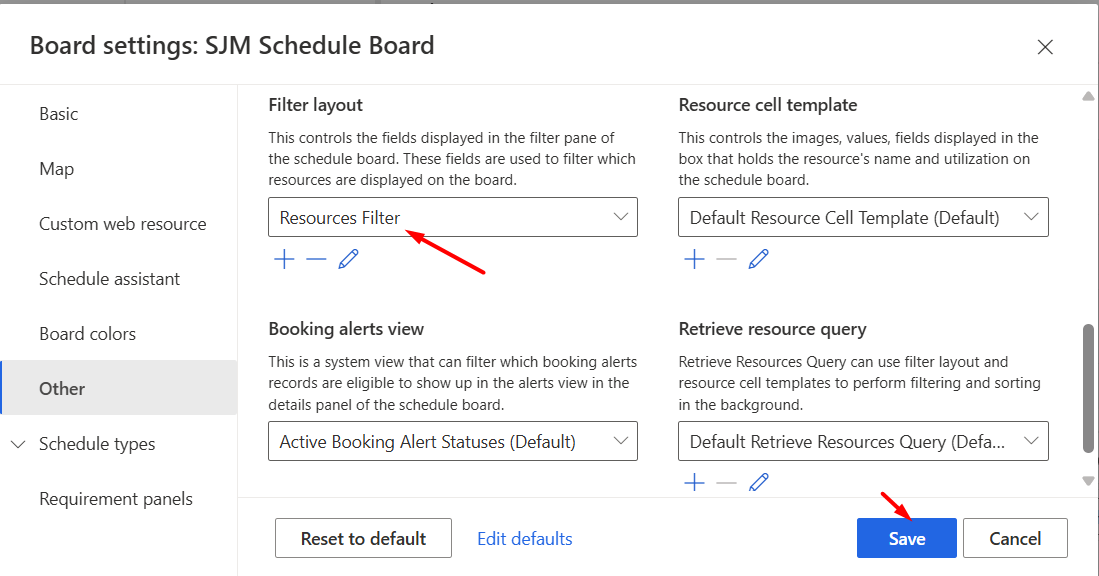
After adding the Resources filter layout, click on the Save button and refresh the form.
This Filter Layout XML snippet introduces a new dropdown filter for Department. When users select departments from the filter panel, their GUIDs are pushed into the scheduling query.
Next, extend the Universal FetchXML (UFX) for resource retrieval, enabling filtering by the selected Department.
Like Filter Layout, we will add the Retrieve Resource Query under the Board Settings.
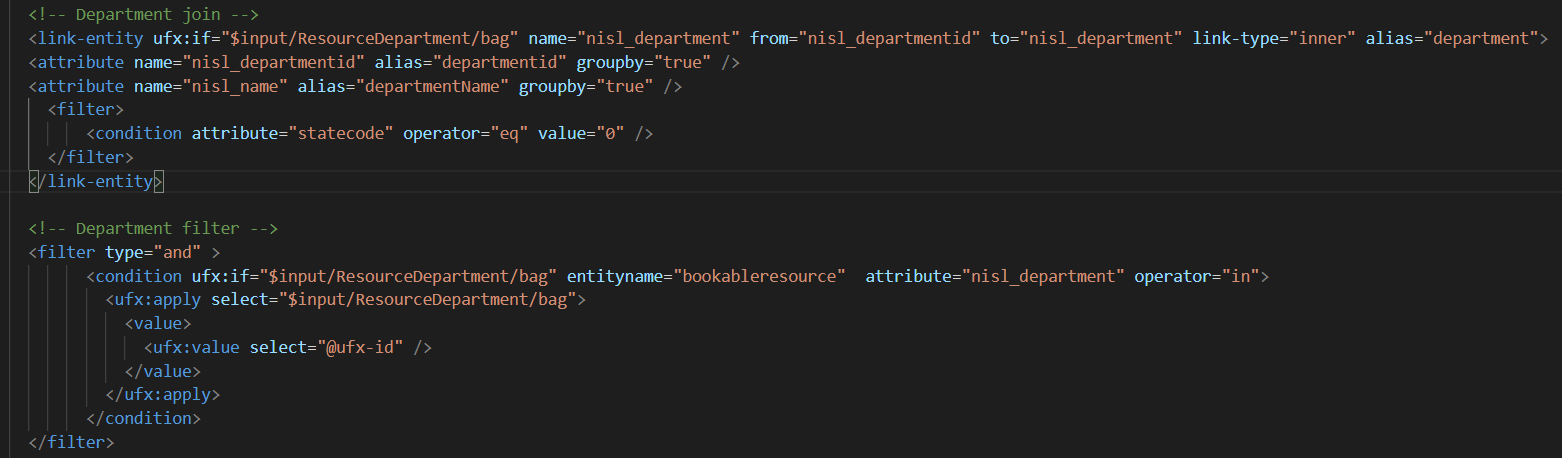
Add a link-entity and a filter condition for Department as follows:
<link-entity ufx:if="$input/ResourceDepartment/bag" name="nisl_department" from="nisl_departmentid" to="nisl_department" link-type="inner" alias="department">
<attribute name="nisl_departmentid" alias="departmentid" groupby="true" />
<attribute name="nisl_name" alias="departmentName" groupby="true" />
<filter>
<condition attribute="statecode" operator="eq" value="0" />
filter>
link-entity>
<filter type="and" >
<condition ufx:if="$input/ResourceDepartment/bag" entityname="bookableresource" attribute="nisl_department" operator="in">
<ufx:apply select="$input/ResourceDepartment/bag">
<value>
<ufx:value select="@ufx-id" />
value>
ufx:apply>
condition>
filter>
Retrieve Resource Code Image:
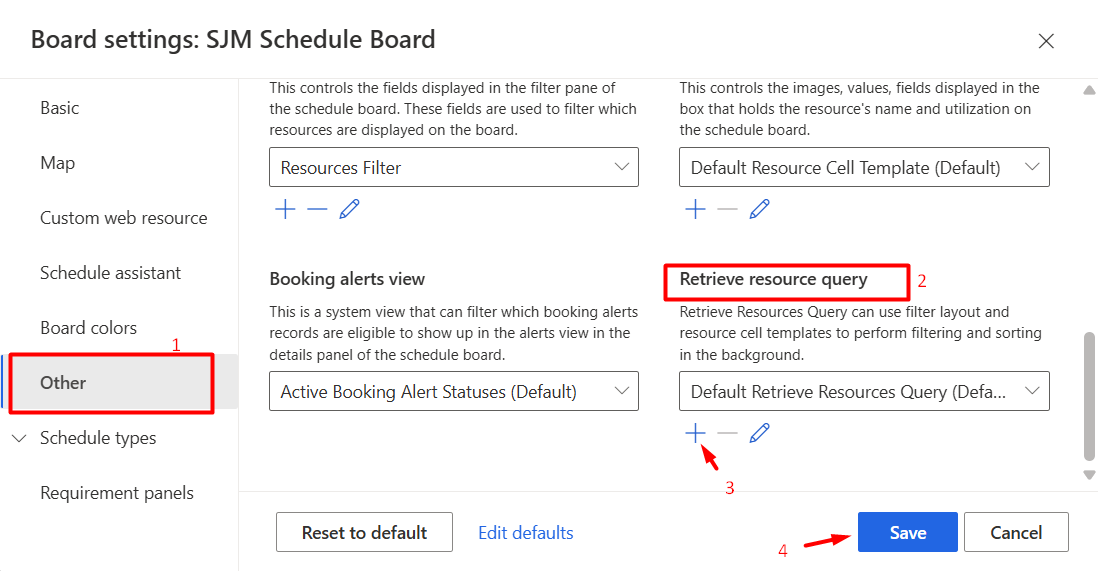
The Board Settings Dialog box will appear. Select Other from sitemap à Scroll down à Under Retrieve resource query, click on the “ + ” icon. You can also edit the existing query.
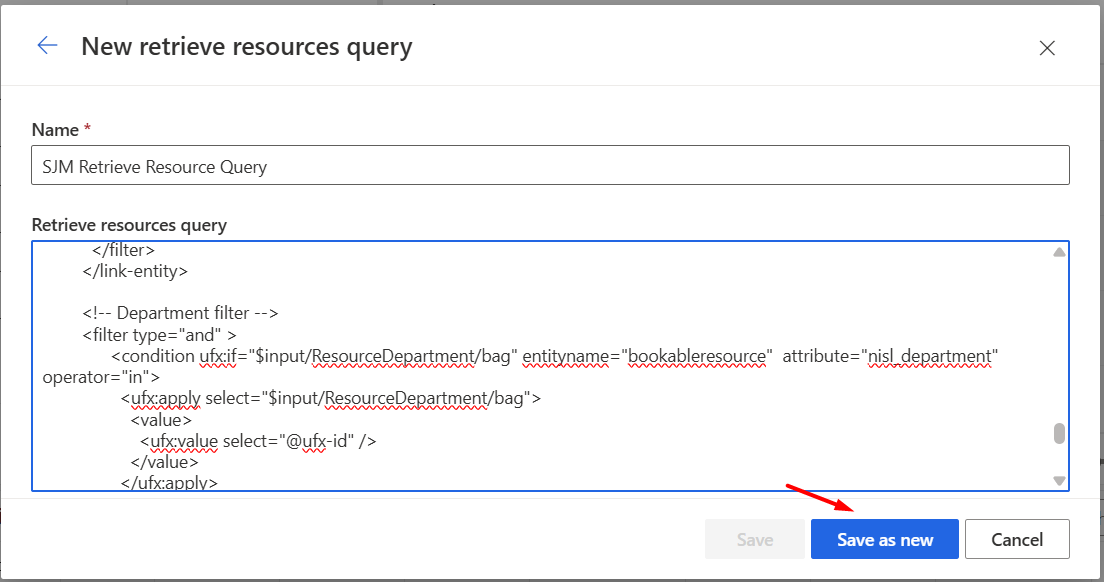
Copy the code for the Retrieve resource query and paste it inside the SJM Retrieve Resource Query, and click on the Save as new button shown in the image below.
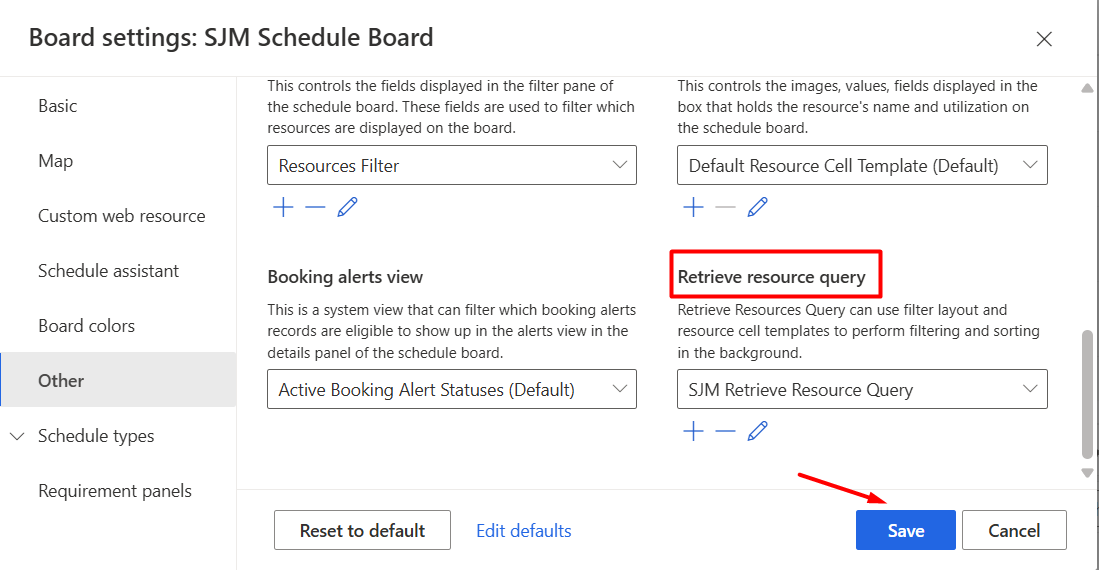
After adding the Retrieve Resource Query, click on the Save button and refresh the form.
After updating both the Filter Layout and Retrieve Resource Query:
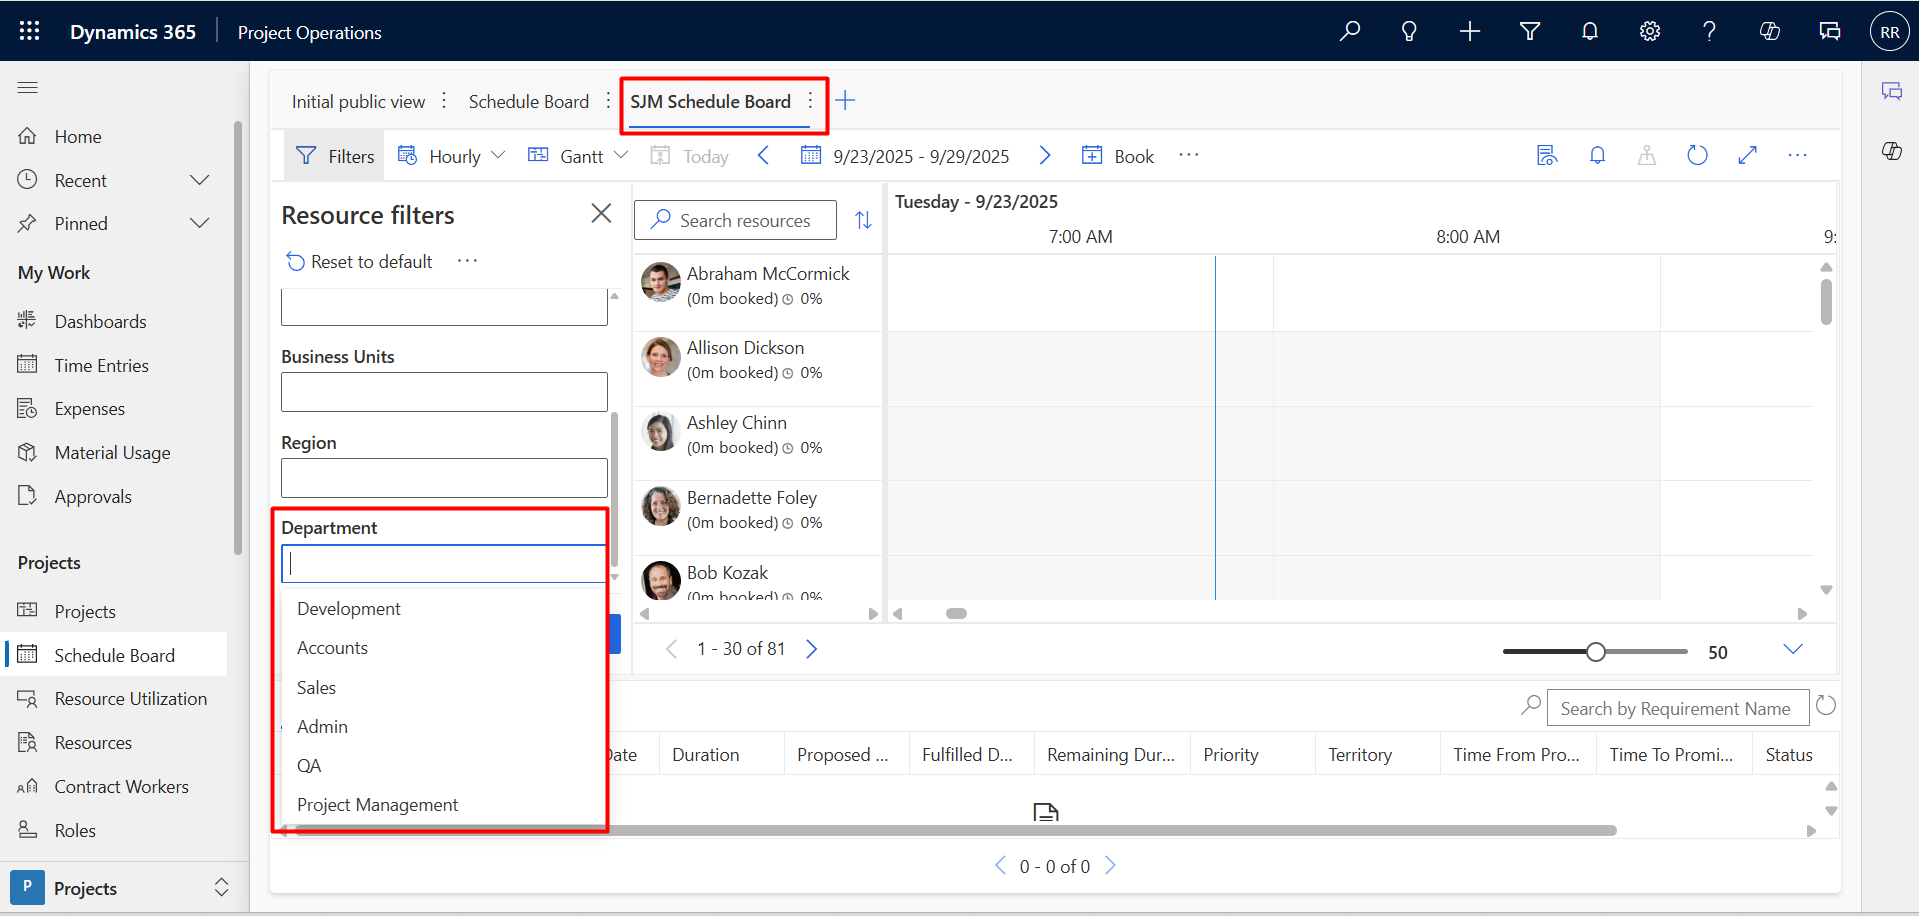
The matched resources will be filtered and appear as shown below:
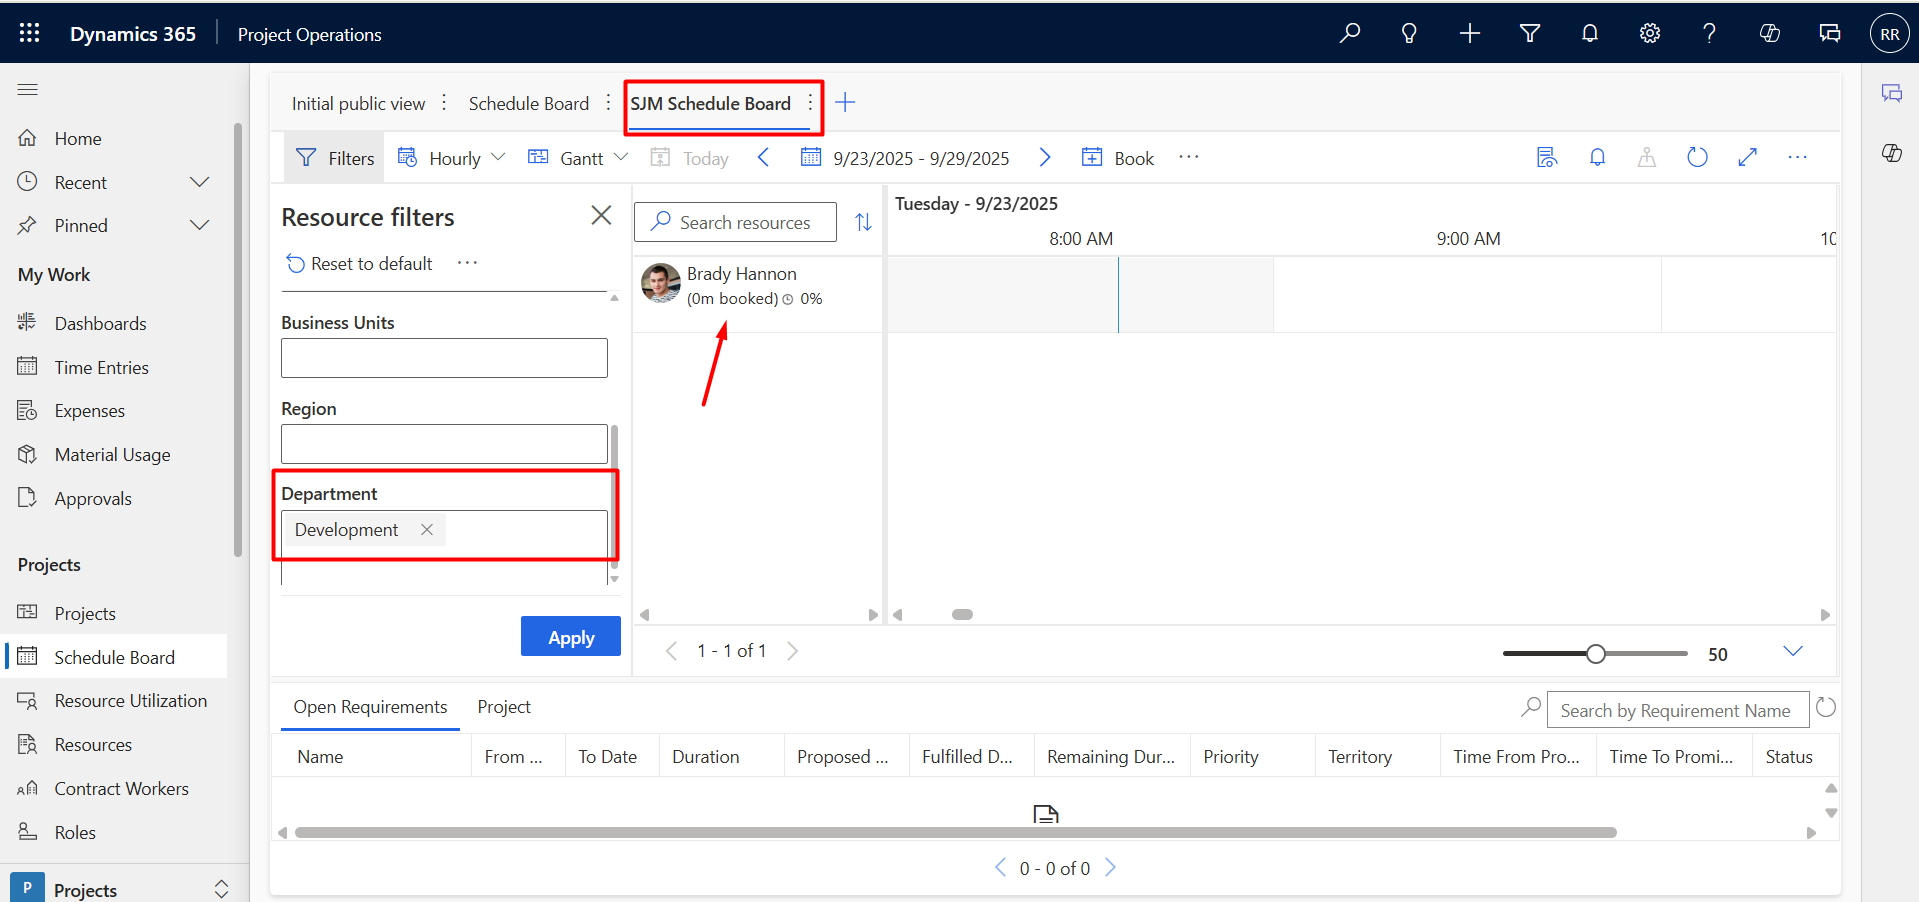
With this technique, users can make the Schedule Board more flexible and align it perfectly with their organization’s unique scheduling needs.
Comment
Building a Power Apps Code App is just the beginning. In real-world business applications, users often need to send emails,…
READ MORE
Power Pages Server Logic allows developers to execute secure backend JavaScript directly within Power Pages. It is commonly used for…
READ MORE
In this blog, we’ll build and deploy a Single Page Application (SPA) using React + Vite and host it on…
READ MORE