
18 Nov, 2025
Posted on 18 Nov, 2025 by Rohit Bhagat, Posted in Microsoft Power Platform Power Apps
 Blogs
Blogs
Power Apps has long supported rapid app development with low-code/no-code tools. With Code-First Apps, developers can now create fully customised applications using familiar coding frameworks. This guide demonstrates how to build a Code-First App from scratch and deploy it to your Power Platform environment.
Before you start, ensure you have the following:
Step 1: Environment Setup

Note: If you don’t see the toggle, ensure your environment has the latest admin updates and preview features enabled.
Step 2: Project Initialization
Before creating the project, open your terminal in the directory where you want to store your Code App files to keep your workspace organized.
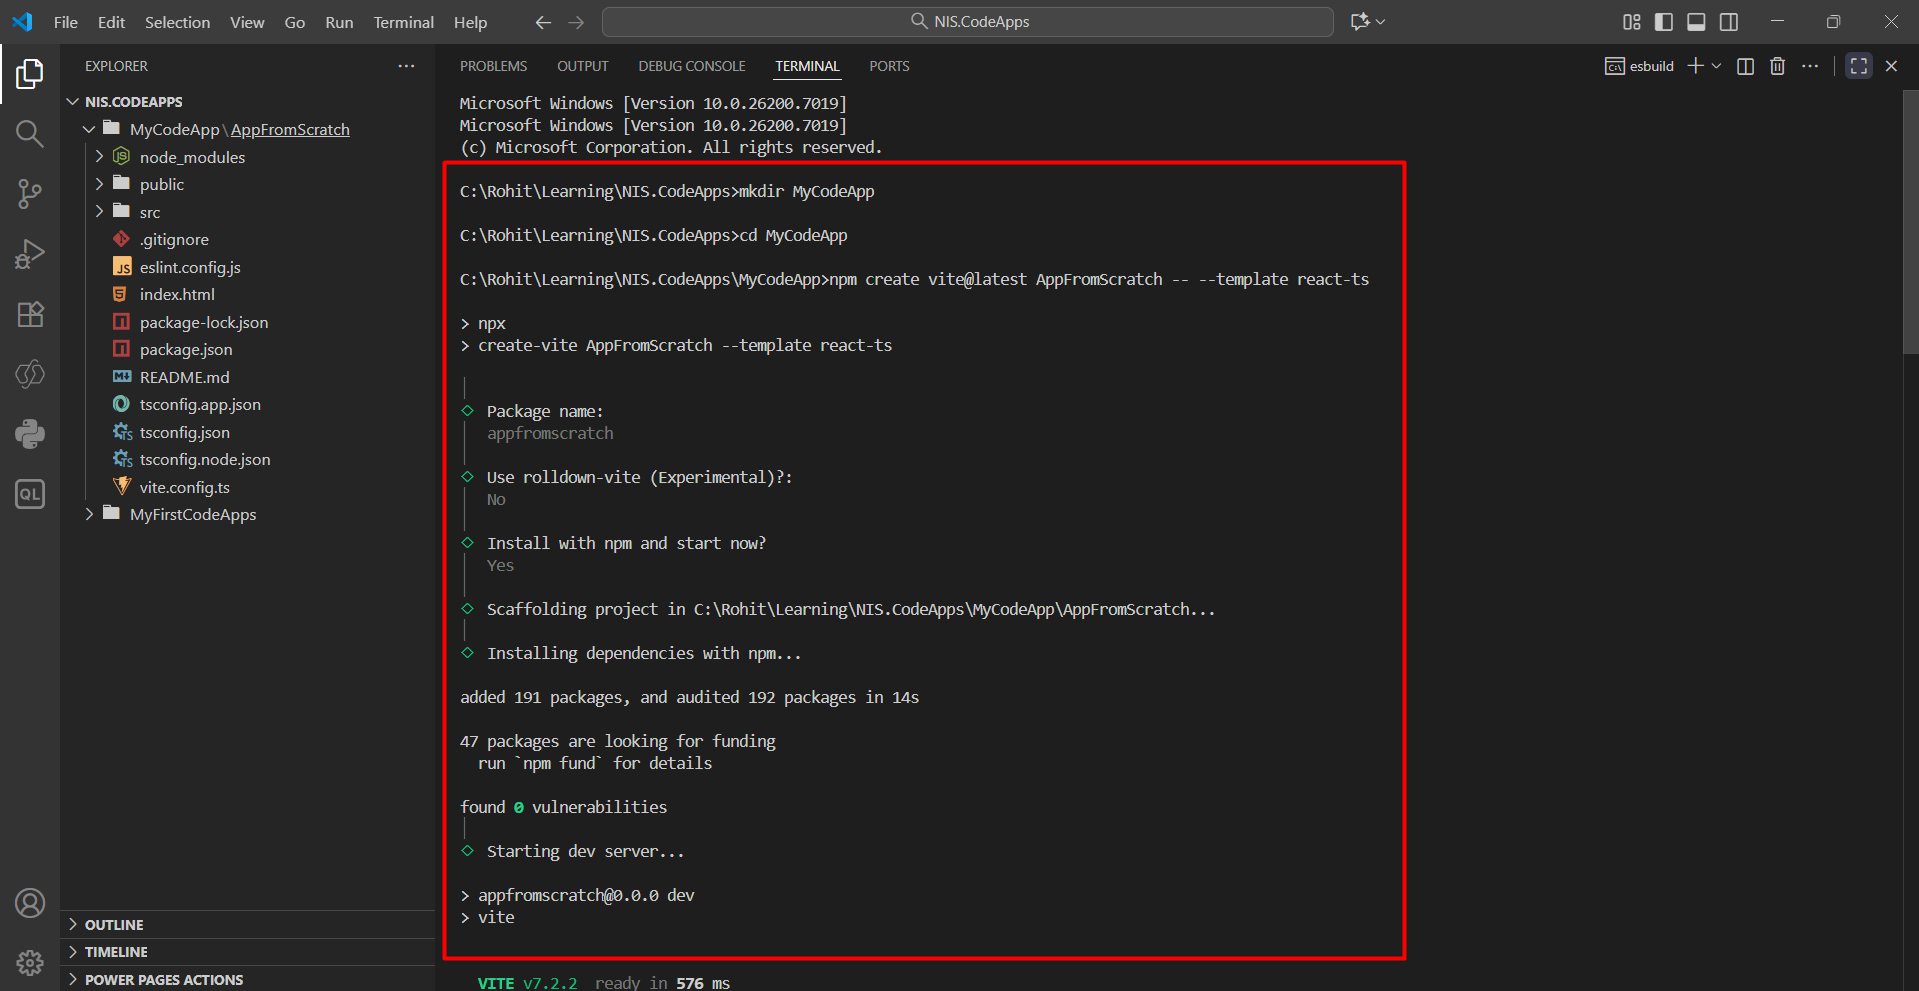
During this setup:
2. The Power Apps SDK currently requires the app to run on port 3000.
Install Node.js type definitions for TypeScript to avoid errors in your editor:

Once these commands are executed, a new React-based project structure will be created in your selected directory, containing all the initial files required to start building your Code App.
3. Open the vite.config.ts, and update to be:
import { defineConfig } from 'vite'
import react from '@vitejs/plugin-react'
import * as path from 'path'
// https://vite.dev/config/
export default defineConfig({
base: "./",
server: {
host: "::",
port: 3000,
},
plugins: [react()],
resolve: {
alias: {
"@": path.resolve(__dirname, "./src"),
},
},
});
4. After setup, run this command in your project folder:
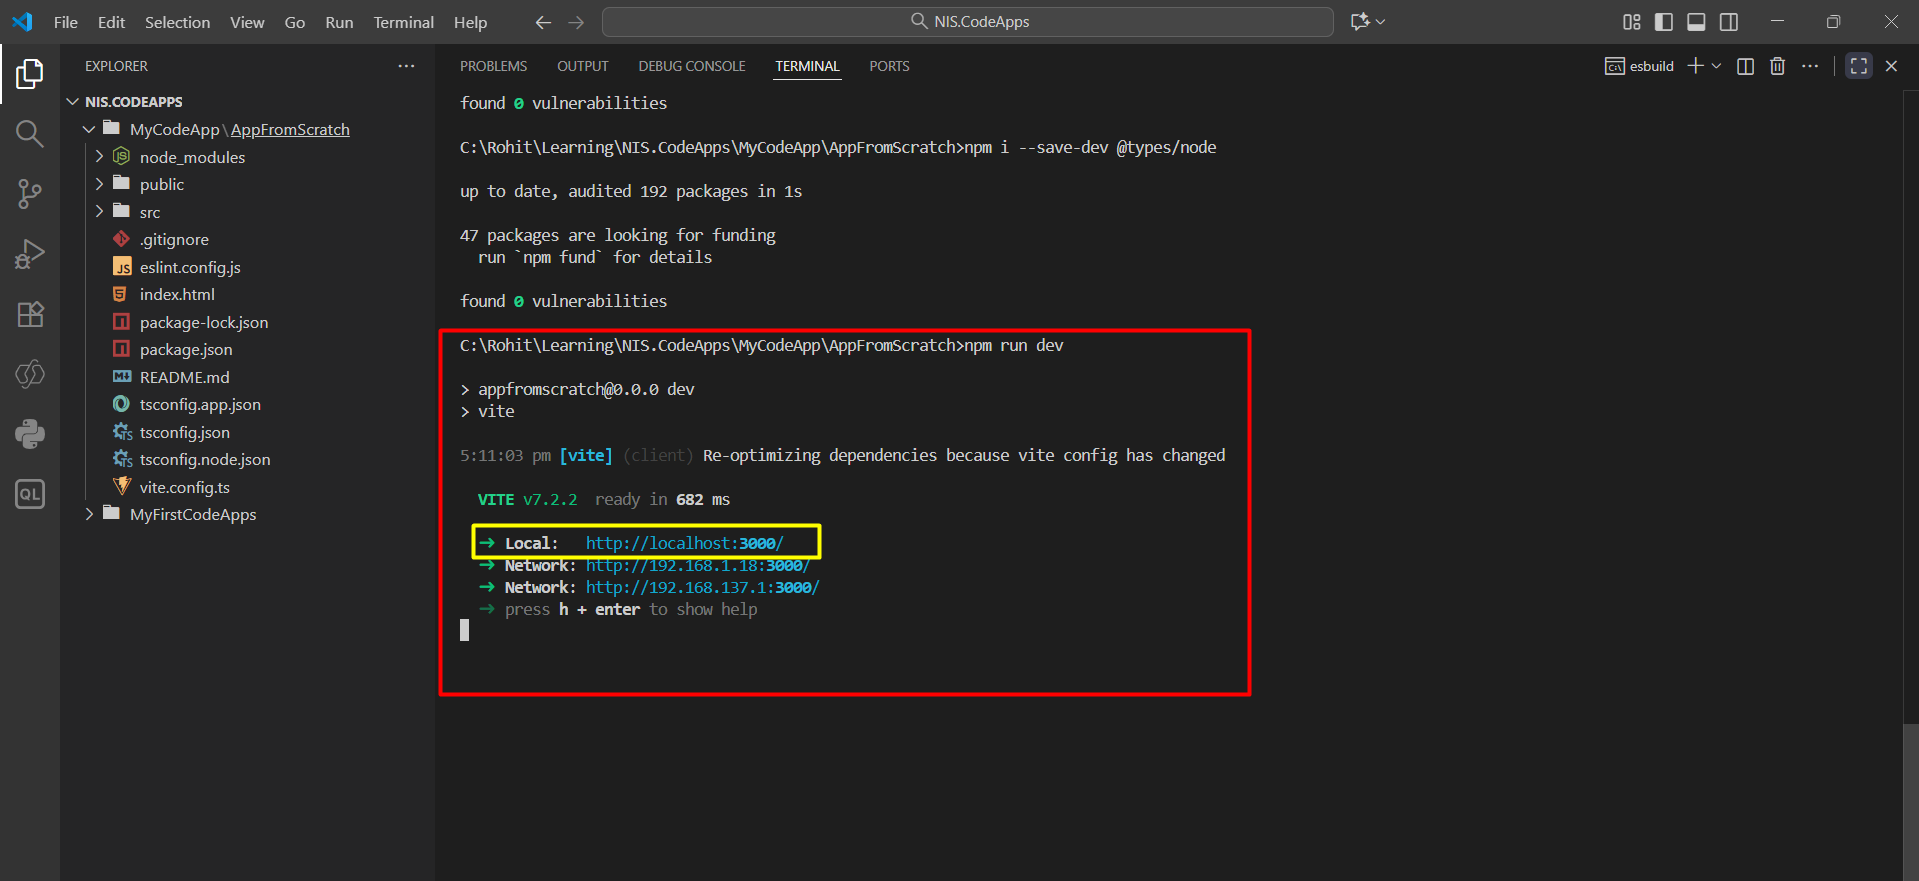
The terminal will show a local URL (usually http://localhost:3000). Press Ctrl + Click on the URL to open your app in the browser.

Important: If you don't see port 3000, then revisit the previous steps.
5. Press Ctrl + C to stop the server.
Now that your project is ready, it’s time to connect it to your Power Platform environment and initialize it as a Code App.
Step 1: Authenticate with the Power Apps CLI:
Open your terminal and run:
Log in with your Power Platform account when prompted.
Step 2: Select Your Environment
Choose the environment where you want to create your app:
Step 3: Initialize the Code App
Run this command to set up your app as a Power Apps Code-First project:
Step 4: Install the Power SDK
Now install the Power Apps SDK so your app can connect with Power Platform:
Step 5: Update package.json
Open your package.json file and find this line:
This makes sure both the Power SDK and your app start together
Step 6: Add PowerProvider File
Create a new file in the src folder named PowerProvider.tsx.
Copy the code from Microsoft’s GitHub here:
PowerProvider.tsx (GitHub)
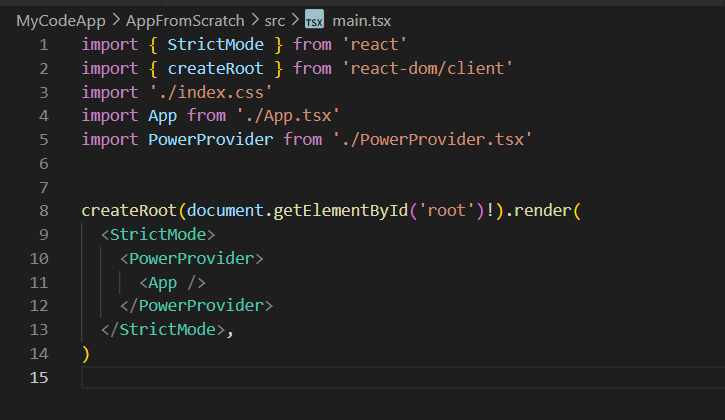
Step 7: Update main.tsx File
Add this import line:
Then wrap your component like this and save it.
Step 8: Run and Test Your App
If it doesn’t open automatically, copy the URL and paste it into the same browser where you are signed in to Power Platform.
Once your app is ready and tested locally, it’s time to publish it to your Power Platform environment.
Open your terminal in the project folder.
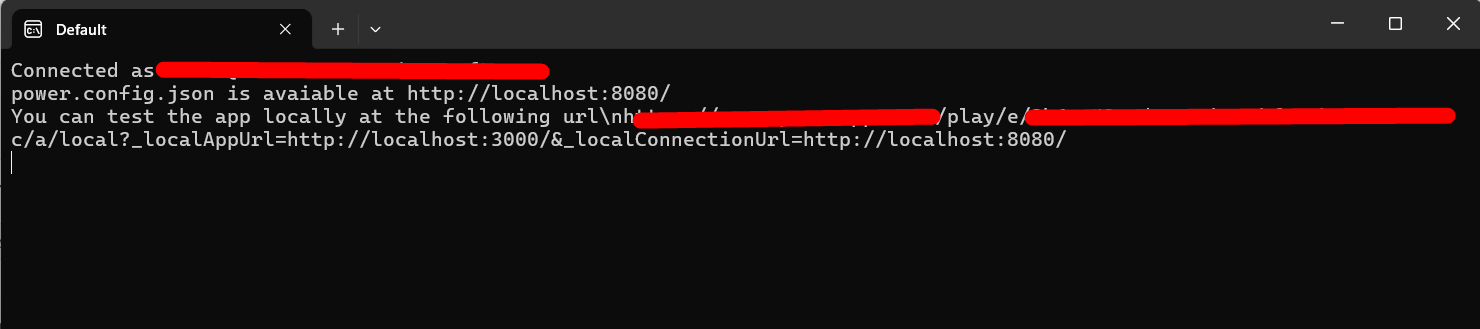
Run the command:
If the command runs successfully, you’ll get a Power Apps URL that lets you open the app.
You can also open Power Apps directly to view the app. From there, you can play, share, or view its details.


Congratulations! You’ve successfully pushed your first Power Apps Code-First
Comment

Introduction: Organizations frequently generate documents like invoices, certificates, quotations, transcripts, inspection reports etc. While single-value fields such as Name, Email,…
READ MORE
The Problem Recently, we faced an interesting issue while working with the Status Reason (statuscode) field on the Contact table.…
READ MORE
There are certain things in a CRM project that a QA must validate or verify before any solutions gets deploy…
READ MORE