Introduction
In this blog, we have explained how to use SQL connectors in Microsoft Flow/Power Automate. We can easily map SQL server database table to CRM entities or update record in to CRM entities from SQL table and vice versa. Whenever changes happen in SQL table, we can move those changes to CRM entities and reverse is also possible. Let’s see how we can do that.
Step by step
- In Microsoft flow, we start with a trigger which will starts the flow execution. We can find various SQL server triggers.
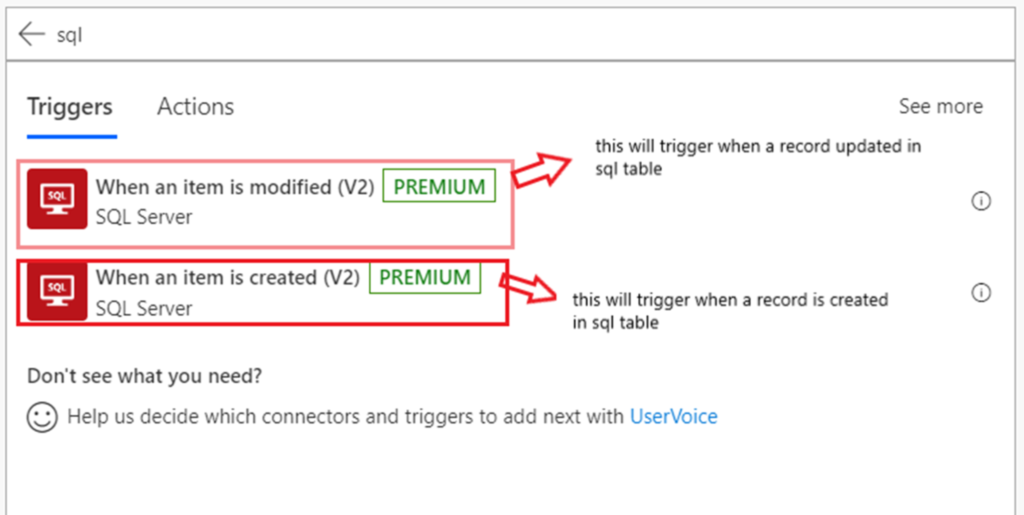
Note: When an item is modified trigger works only if you have timestamp type column in your database table.- The first trigger is shown in the picture is used to trigger the flow when a record created in SQL server database and the second trigger is used to trigger the flow when a record updated in SQL server database. You can select the appropriate trigger as per your requirement.
- After selecting a trigger, it will show some fields to select “Server Name”, “Database name” and “Table Name”.
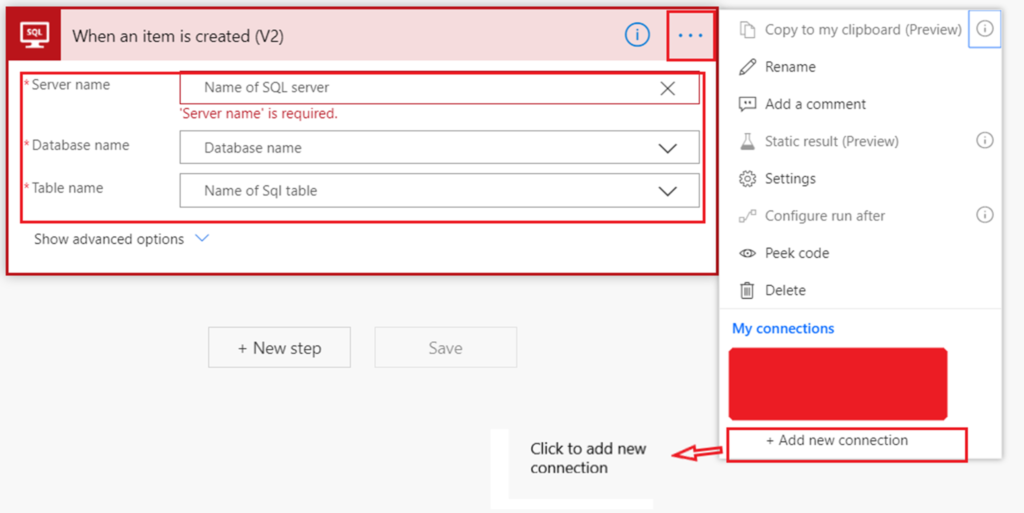
- To select all information, we first need to connect to SQL server. To connect with SQL server database, firstly, we need to create a connection to SQL server.
- To do that, click on 3 dots situated at the top right side of the trigger step. Then click on the “+ Add new connection” tab.
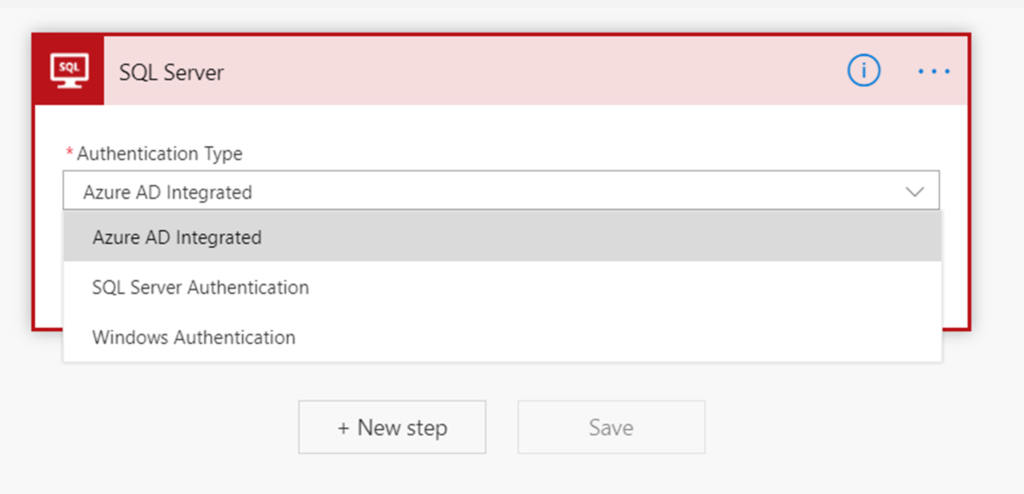
- Then you will see a dropdown list of authentication type. Select a type according to authentication type of you SQL server. If you are selecting “Azure AD integrated”, then you sign into your azure. If you are selecting “windows authentication”, you must give window password and username along with server name and database name. In my case, I am choosing “SQL Server authentication”.
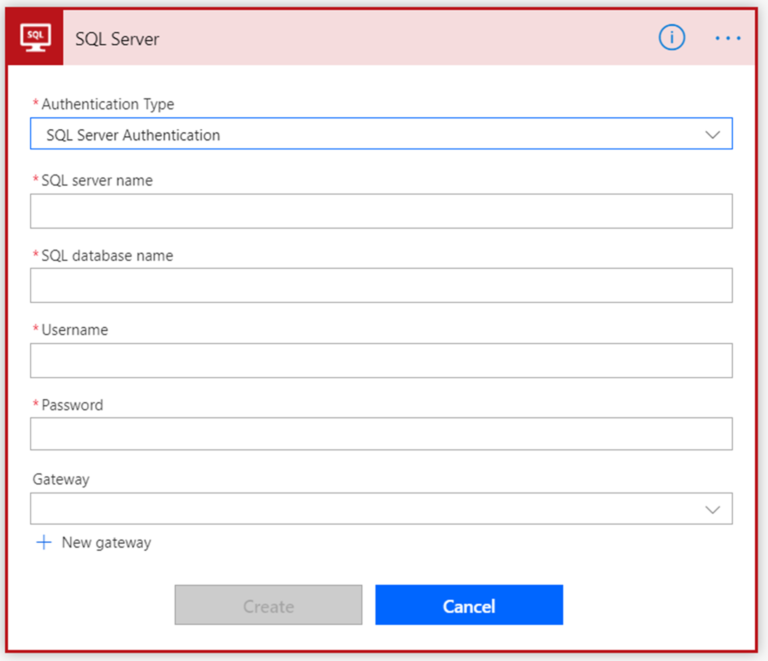
- As you can see in picture, you must fill into the fields, server name, database name, username and password. After that, click on the “Create” button. It will create a connection to SQL server. Using this connection, you can fill necessary information on SQL trigger in step 4.
- Because of SQL trigger, you will get all fields value from selected table specific to a record that triggered the flow. You can use them from Dynamic Content.
- As far we have seen how to trigger Microsoft Flow using SQL server triggers. Apart from that there are SQL server action that we can do for perform action on SQL server from MS flow.
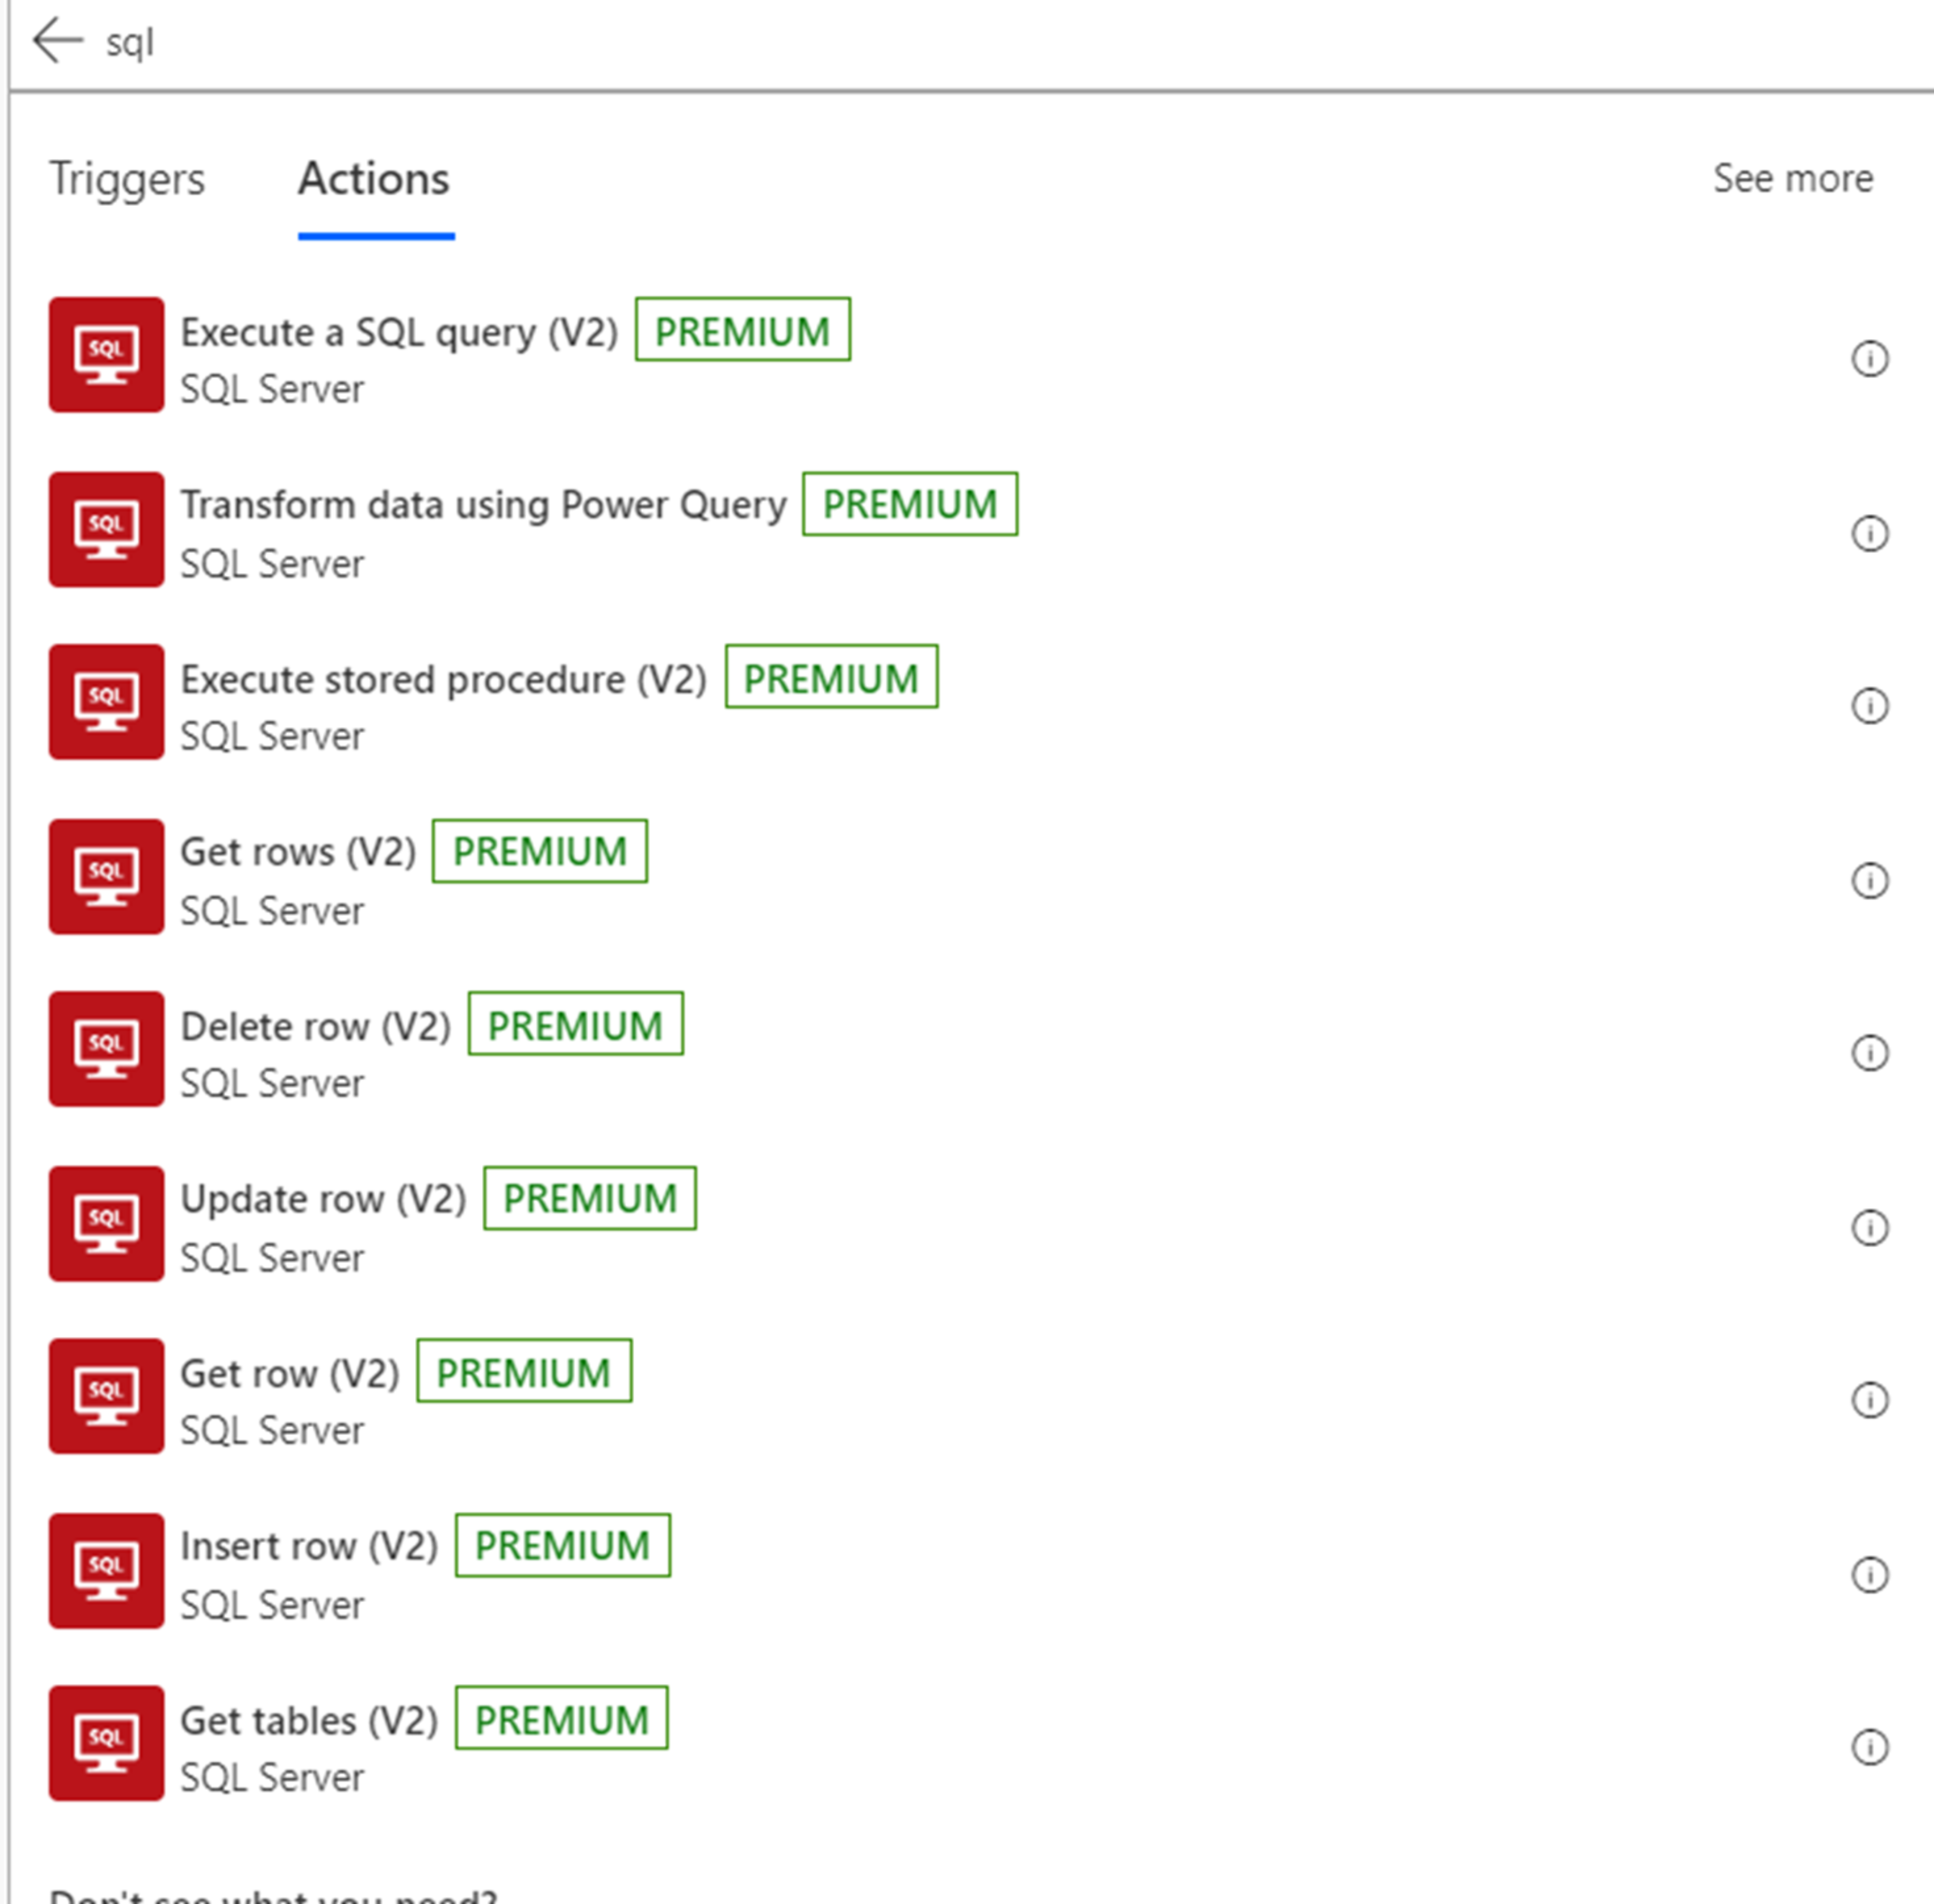
- As per above picture, there are 9 different action to work on SQL server from MS Flow.
There are certain limitations in using SQL server actions. For more information, visit https://docs.microsoft.com/en-us/connectors/sql/

 Blogs
Blogs


