
07 Apr, 2022
Posted on 07 Apr, 2022 by Admin, Posted in Dynamics 365 Dynamics-365 Sales
 Blogs
Blogs
Introduction : This blogs will guide us on how to show icons on the view for the selected Table.
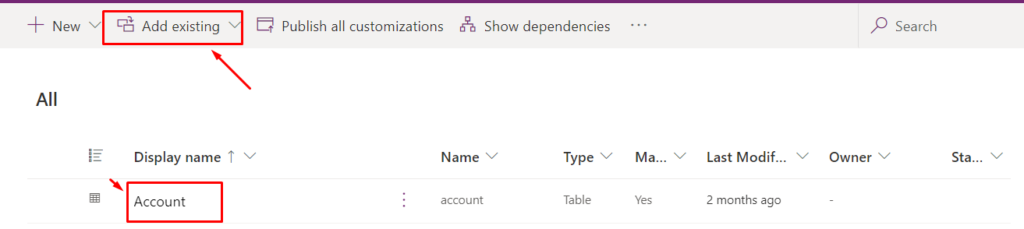
Step 1: Open Power Apps and click on Solutions. After selecting the solution, click on Add existing and select Table to show icons on the selected Table.
Step 2 : Before adding SVG icons you first need to download SVG icons that you want to add on view.
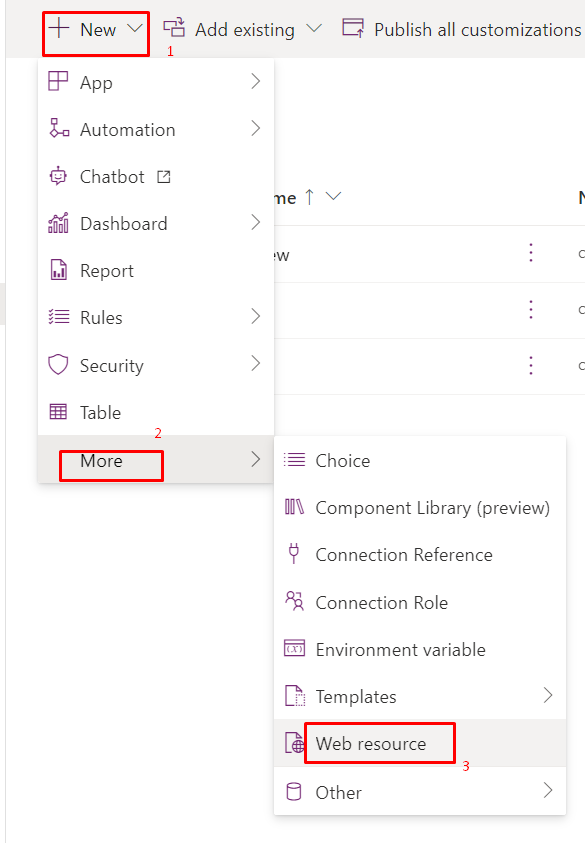
Step 3 : Add the downloaded SVG icons that you want to add to custom or existing fields using New button. Click on New and select More and then select Web resource.
Step 4 : Once you select Web resource, a new web resource dialog box opens. Click on Upload file and select the SVG file that you have downloaded. Give Display Name and Name and Type of the image. Here we have taken Vector Format(SVG).
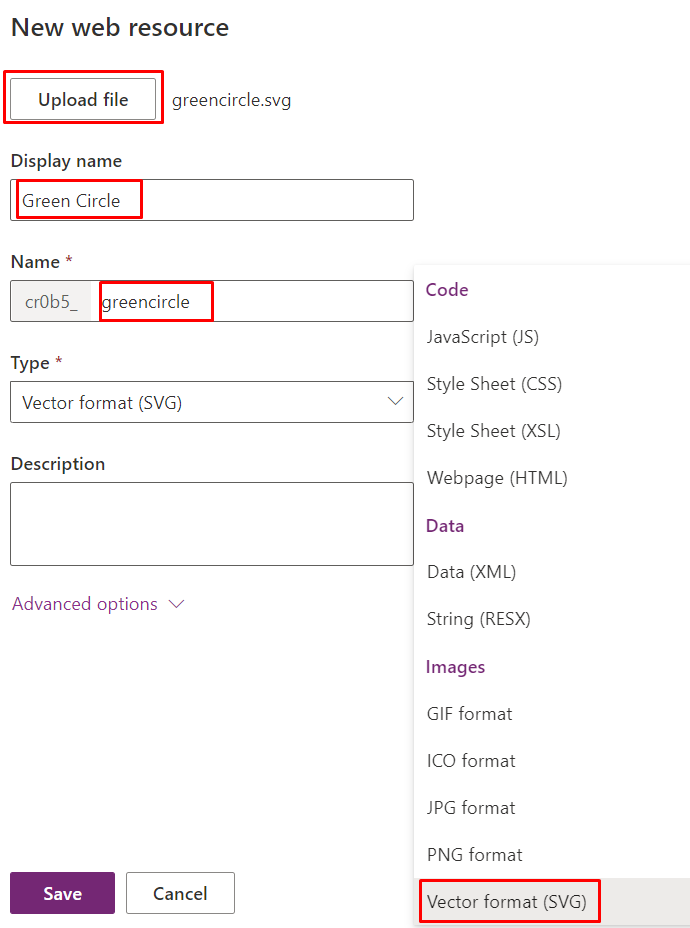
Step 5 : I have taken two SVG icons that is Red Circle and Green Circle. You can add any number of icons to the solution where you can view these icons on the Table view.
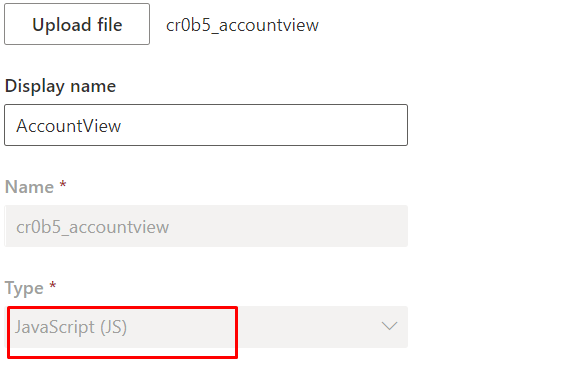
Step 6 : After adding icons to the solution, you can add your custom JavaScript code. Firstly click on New and select More and then click on Web resource. You will upload the JavaScript code similar to the icons that you have added earlier, the only difference is that you will select the Type as JavaScript(JS) instead of Vector Format(SVG).
Step 7 : JavaScript code.
JavaScript Code:

Step 8 : You can go to solution and click on Switch to classic. New solution window opens, from the left pane select Entities and then select the entity on which you want to show icons and then select Views. Here I have selected All accounts view.

Step 9 : Double click on the view and you will see new window opens. From the window double click the custom or existing column that you have added on the view. Then another window opens and it looks as below. Select the Web Resource the you have created using lookup and in the Function Name type object that you have created in your code and after that add dot(.) and then enter the function name that you have used in your script and click on OK.

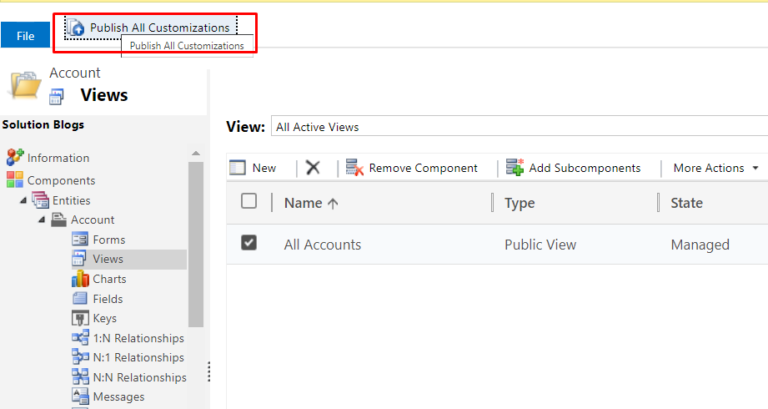
Step 10 : Click on Save&Close and then click on Publish All Customizations.
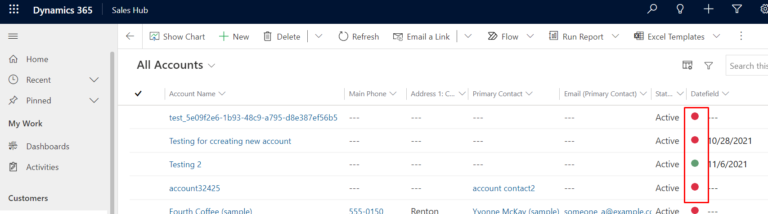
Step 11 : Now open you Dynamics 365 Sales Hub App and then select Account Table and then select the View that you have added to the solution. Now you can see the icons are added to the Date field column and are working accordingly. Our script will show Red Circle if the Date field is not populated or if the Date field is Today or Less. It will show Green Circle if the Date field is greater than Today.
Thank you for spending your time on reading this blog. I hope you find this blog useful..
Comment

Introduction: Organizations frequently generate documents like invoices, certificates, quotations, transcripts, inspection reports etc. While single-value fields such as Name, Email,…
READ MORE
The Problem Recently, we faced an interesting issue while working with the Status Reason (statuscode) field on the Contact table.…
READ MORE
There are certain things in a CRM project that a QA must validate or verify before any solutions gets deploy…
READ MORE