
30 Aug, 2023
Posted on 30 Aug, 2023 by Samson Kongala, Posted in Power Apps Dynamics 365 Customer Service
 Blogs
Blogs
Introduction:
In Dynamics 365 (D365) Customer Service, the 'Customer 360' Component provides a comprehensive view of information and enables users to edit customer data within the form.
In this blog post, we will explore the process of setting up the Customer 360 Component for the Case Entity. This configuration allows us to access Customer Information within the case form, covering details from either Contact or Account.
NOTE:
1. Customer 360 Component is supported only when a Customer Field exists in the Form, which is used to display information related to the Customer (either an Account or Contact).
2. You can select up to seven simple and three composite attributes.
Steps to be followed:
1. Use an Existing Solution or Create a new Solution, name it, and Add Existing tables Account, Contact, and Case.
2. Create A New Main Form for both Contact and Account
3. Do the below steps for both Account and Contact Forms
a. Rename the newly created form as Customer 360 Account Form or Customer 360 Contact Form.
b.You need to hide or delete all the existing elements on the form and then add a new tab for the Customer 360 component
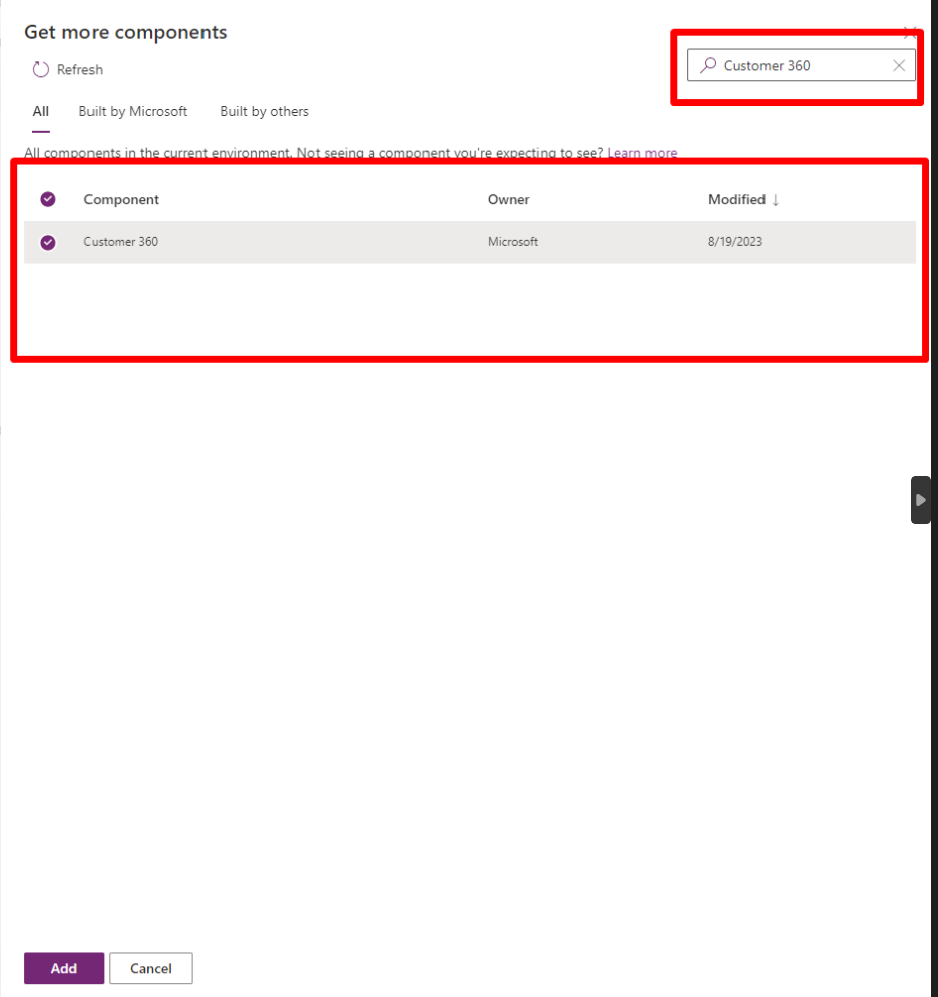
4. To add the Customer 360 Component, select 'Components' in the top-left pane and then click on 'Get more Components' at the bottom left of the main form. A pop-up will open on the right-hand side where you can search for 'Customer 360'.
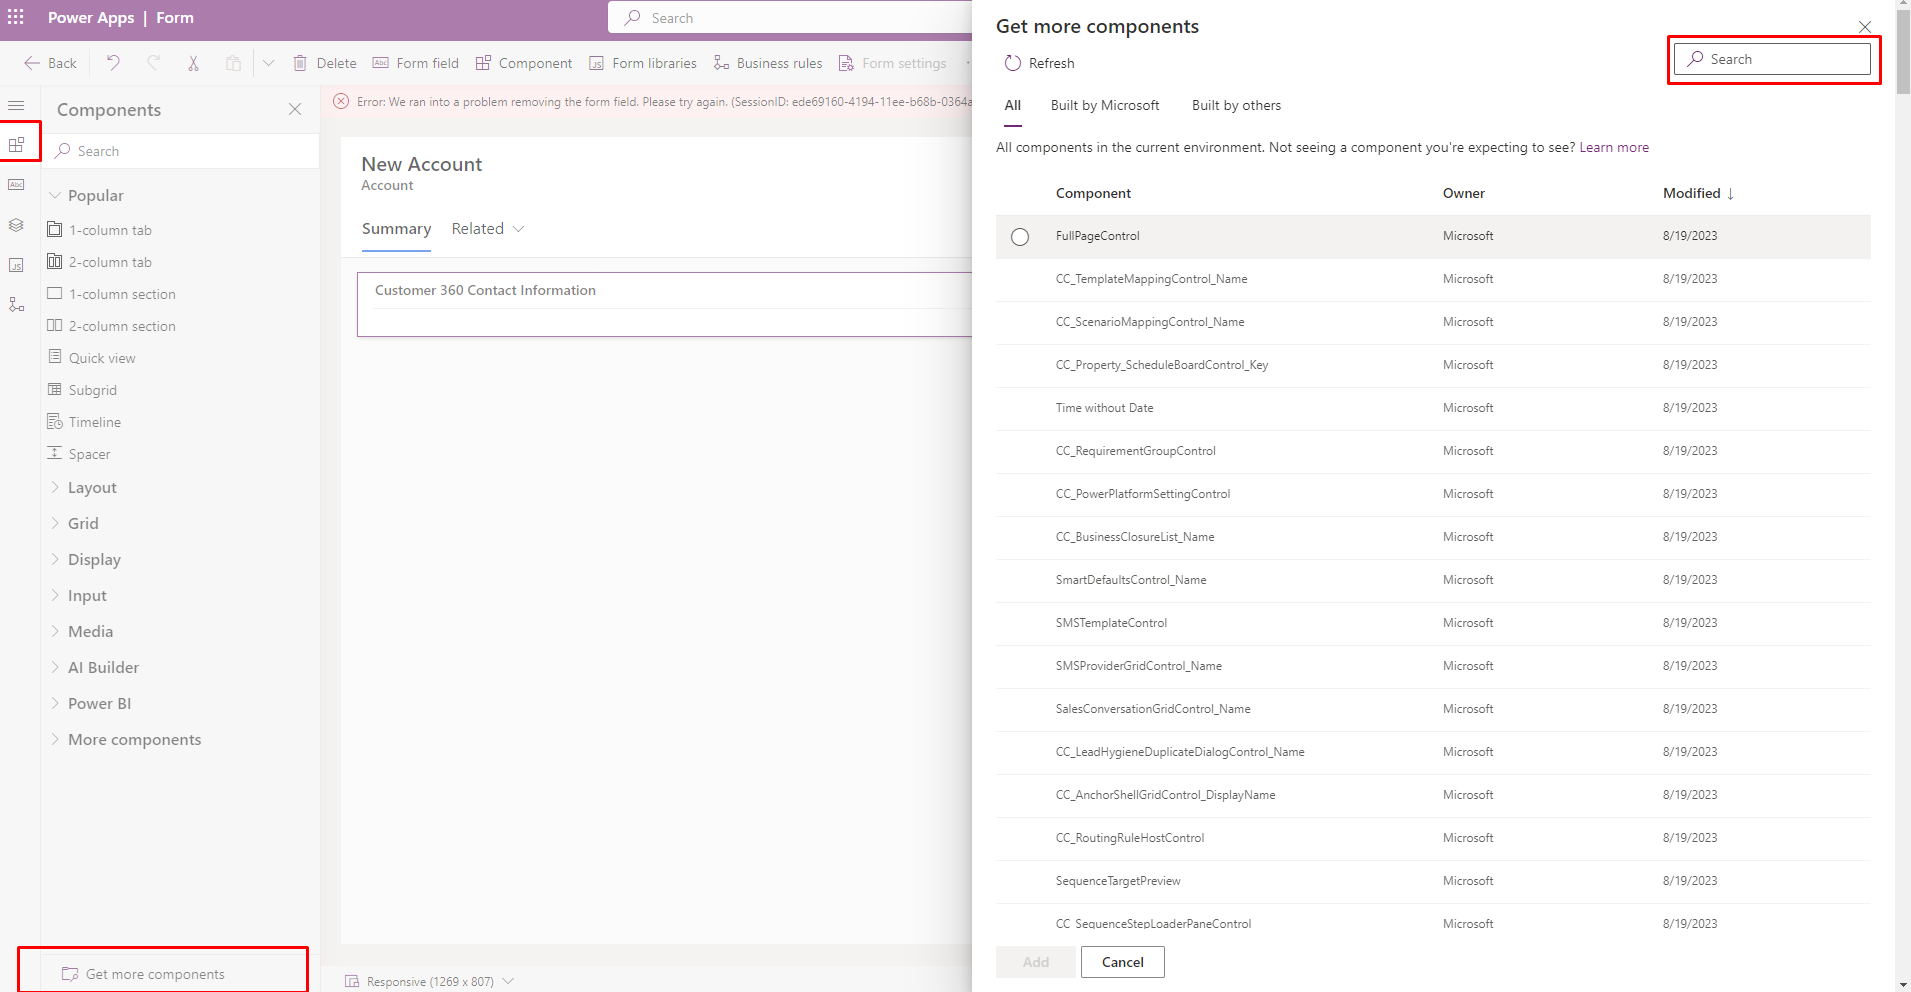
5. Click on Add

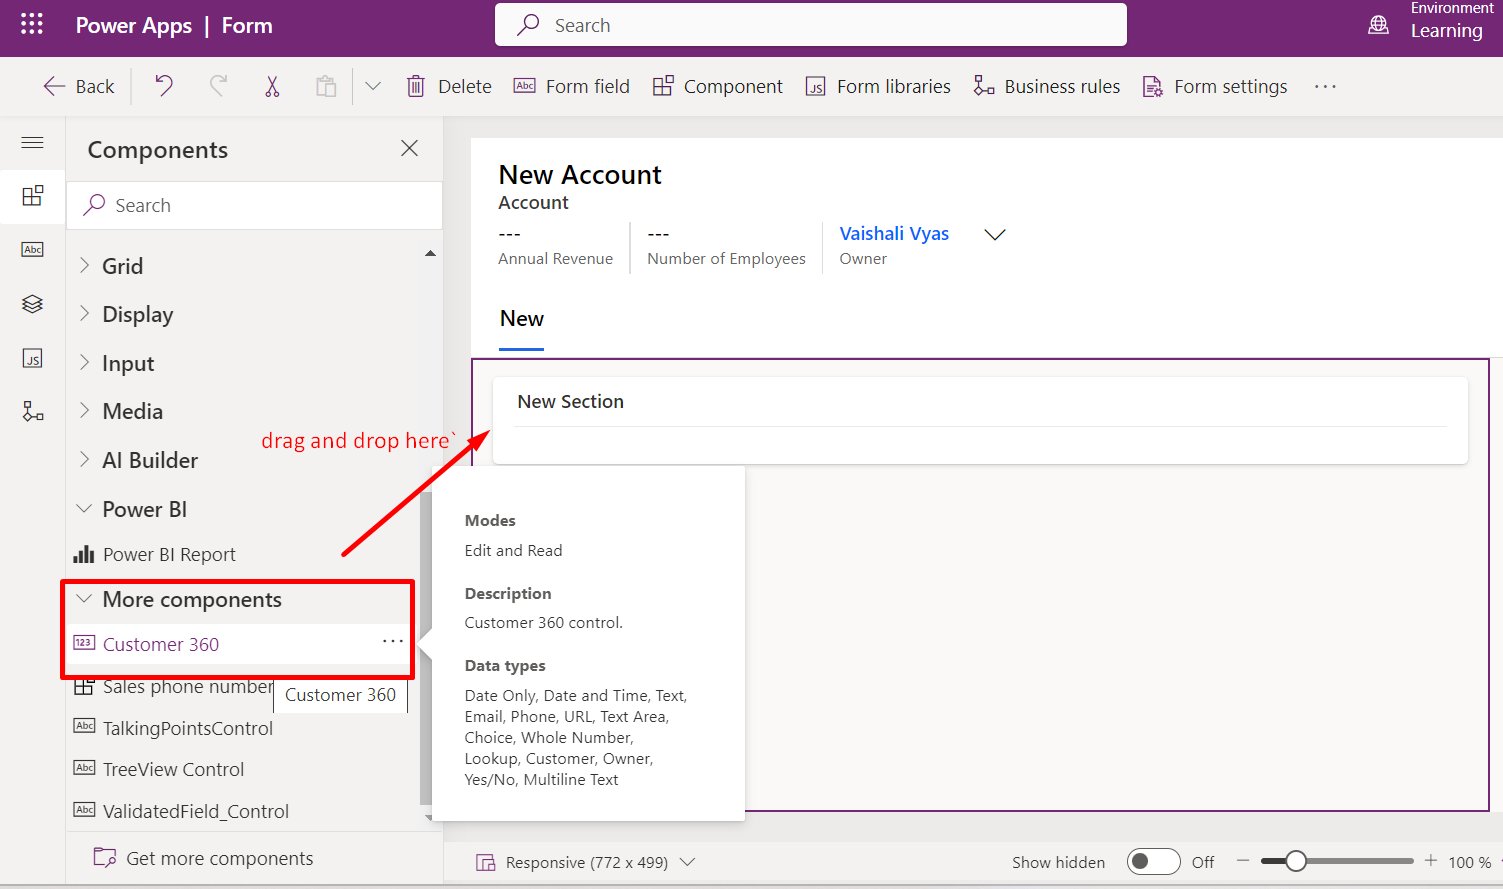
6. After adding the Customer 360 Component, drag it onto the form.
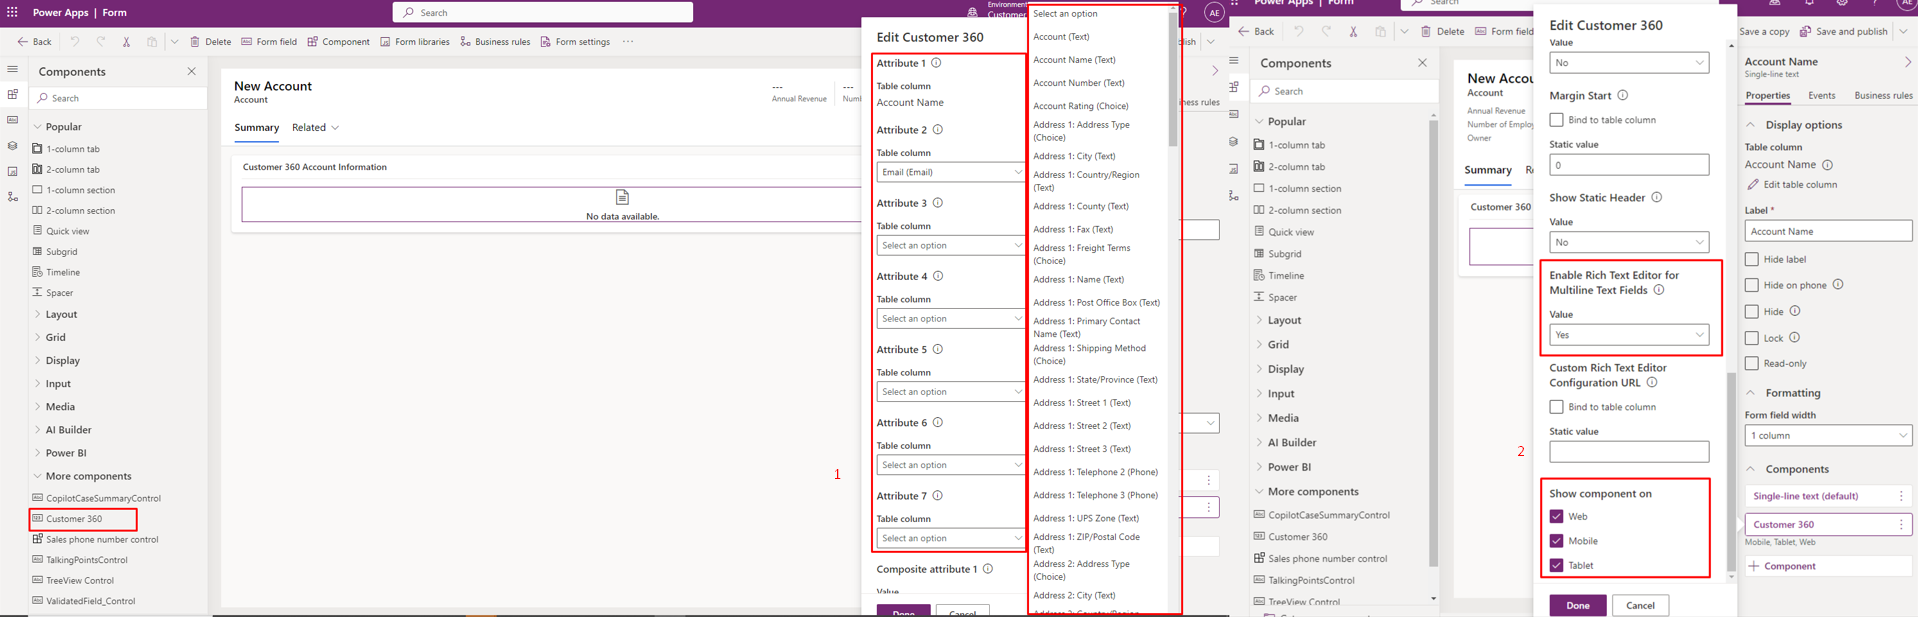
a. Clicking on the Customer 360 Component will open a pop-up. Here, you can set the attributes and fixed composite attributes that you want to view and edit within the Customer 360 component.
b. Configure attributes into the Customer 360 Component as you need.
c.You can also add 3 Composite attributes, I have selected Full Name, Address 1, and Address 2 as composite attributes. Additionally, I've enabled the Rich Text Editor Value, which is particularly useful for multiline fields. Enabling this option prevents users from seeing HTML tags in the field if it contains formatted content.
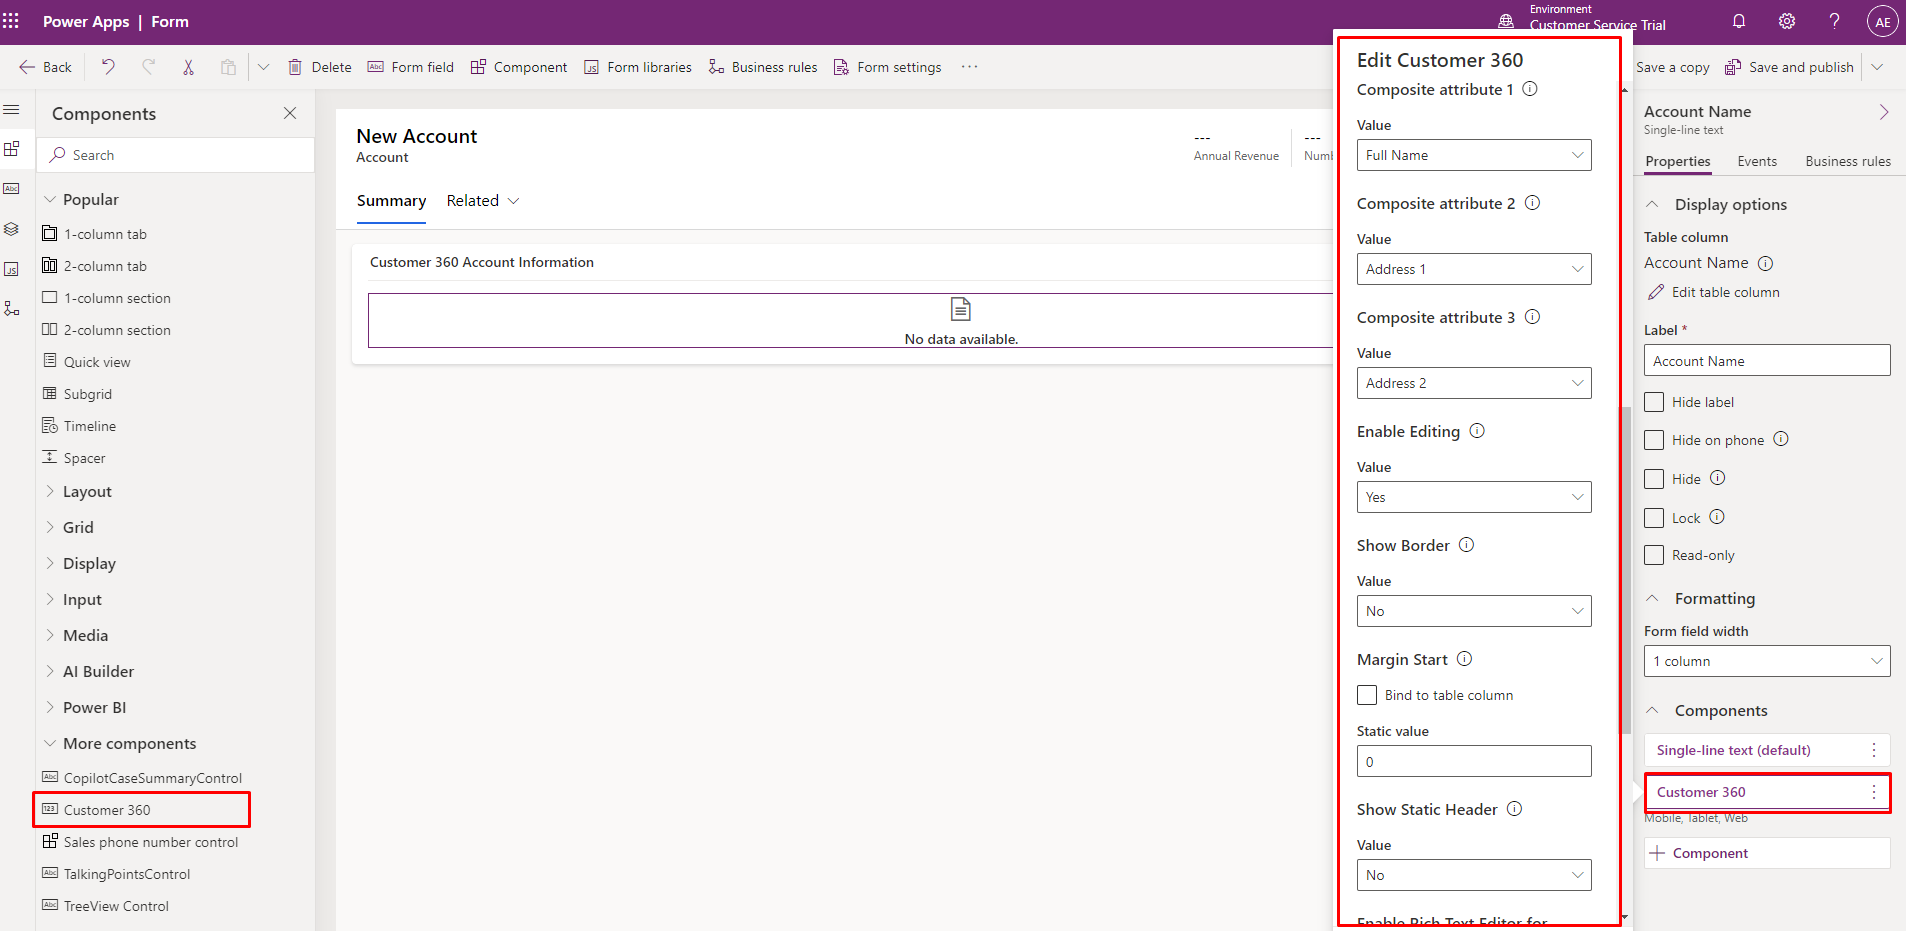
d. You can enable the Customer 360 Component for Windows, tablet, and mobile as well.
7. Save and publish the Form.
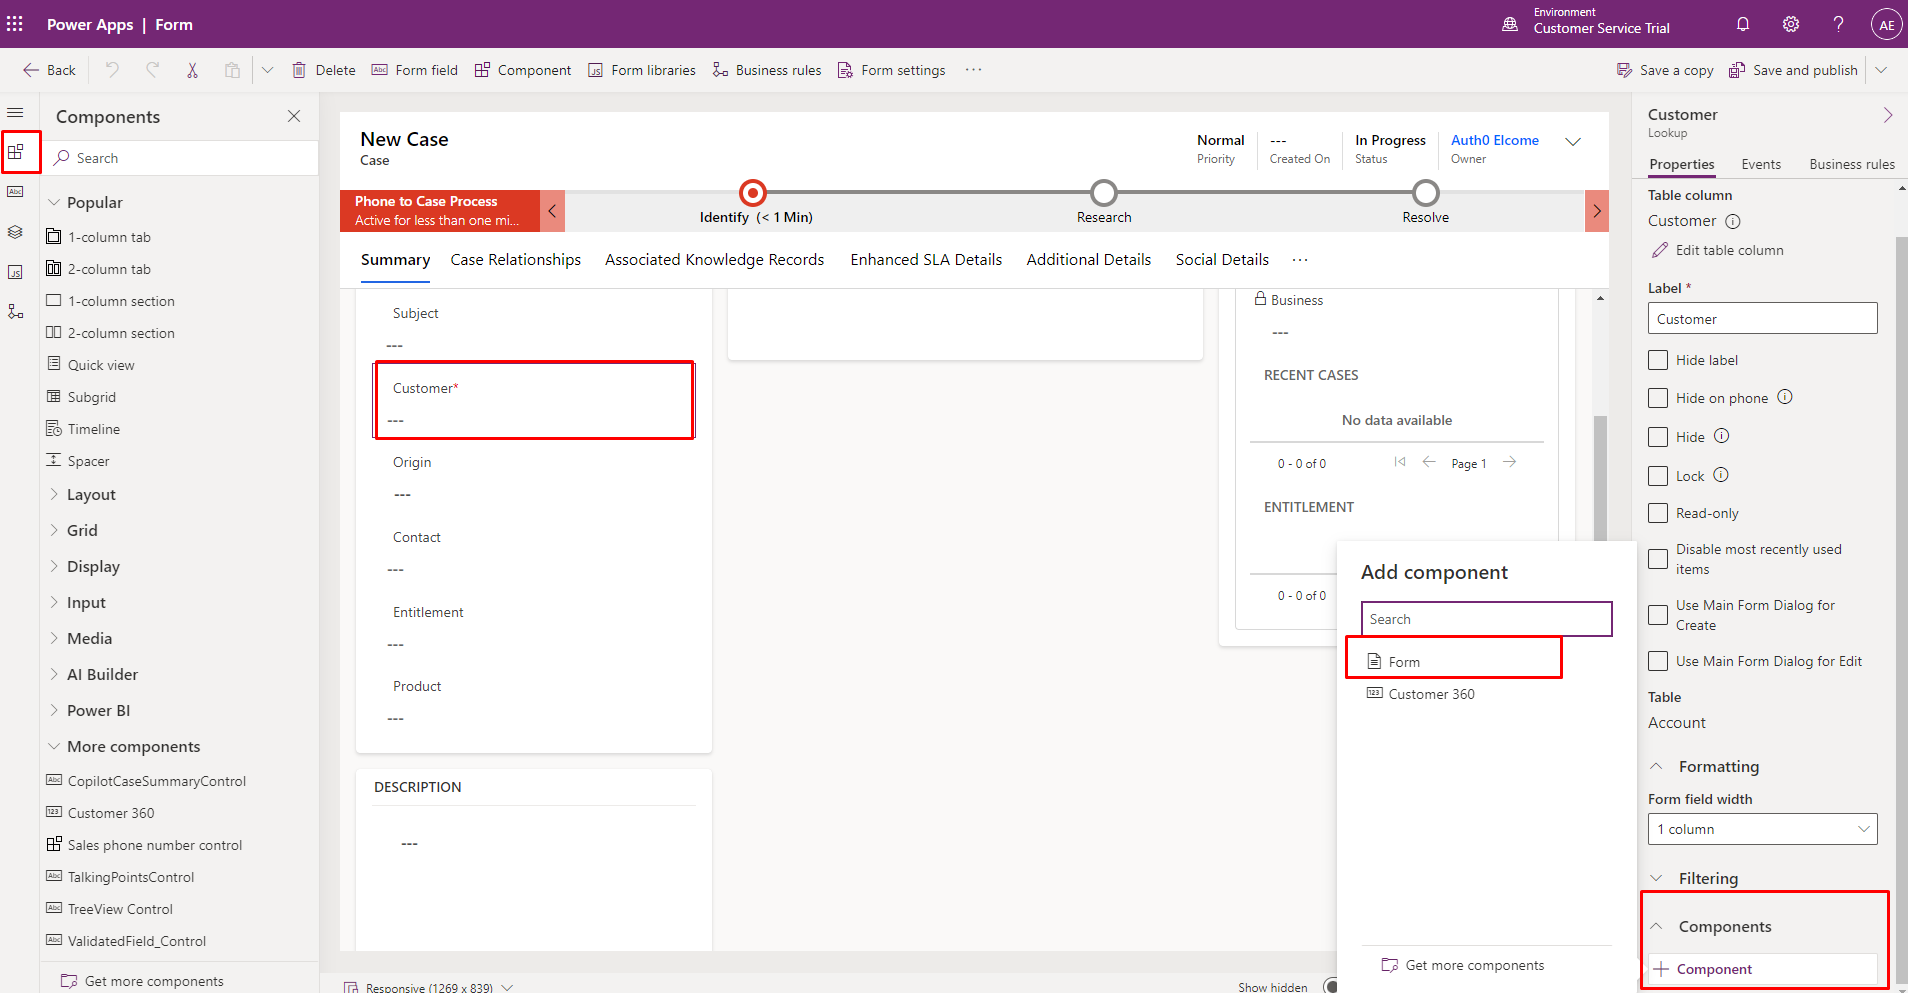
8. a. Navigate to the Case Table and either select the existing Main Form or create a new one. Proceed to edit the Main Form.
b. Ensure that Customer Field Exists and Select Customer Field in the main form,
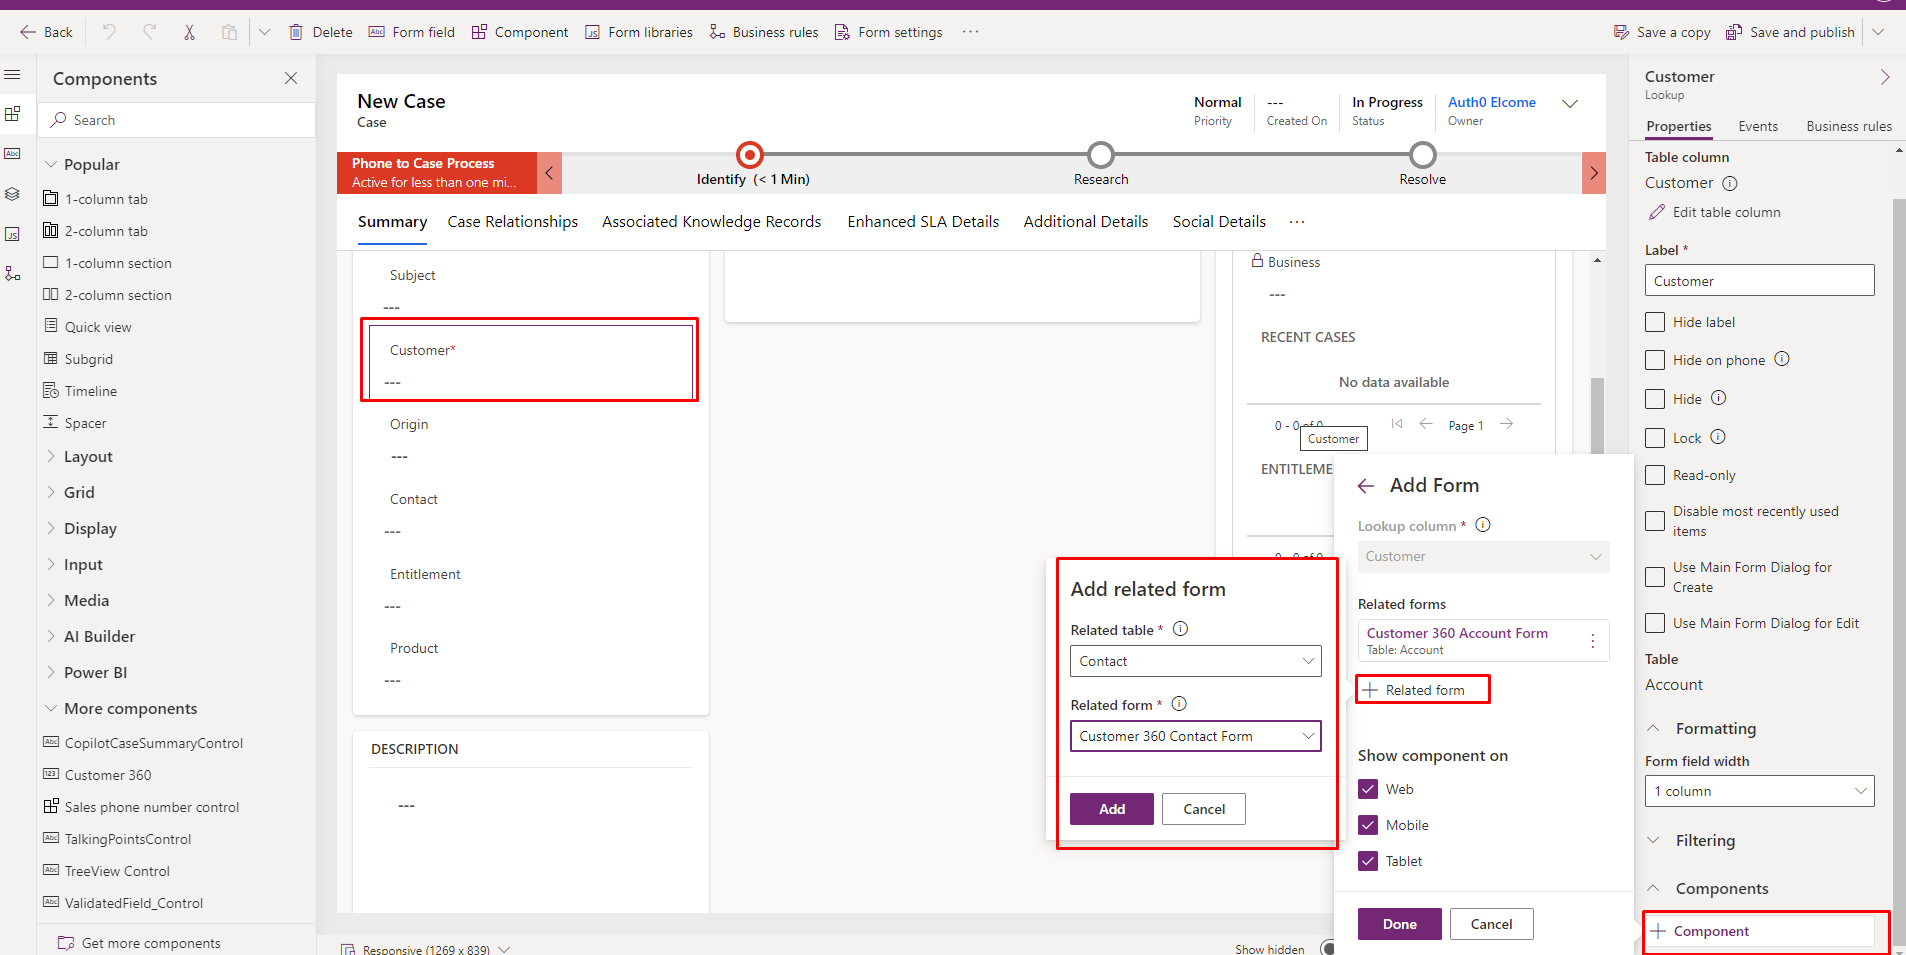
c. Click the + Component in the right corner of the Properties pane and in the Add Component popup Select Form and select related forms.
9. Click +Related Forms in the popup and select the form related to the customer i.e., Customer 360 Account Form, and Customer 360 Contact Form which we configured previously embedded with Customer 360 Component, and Save and publish the Case Form.
10. Finally, add the configured Case form with the customer 360 component as shown below. Save and Publish.
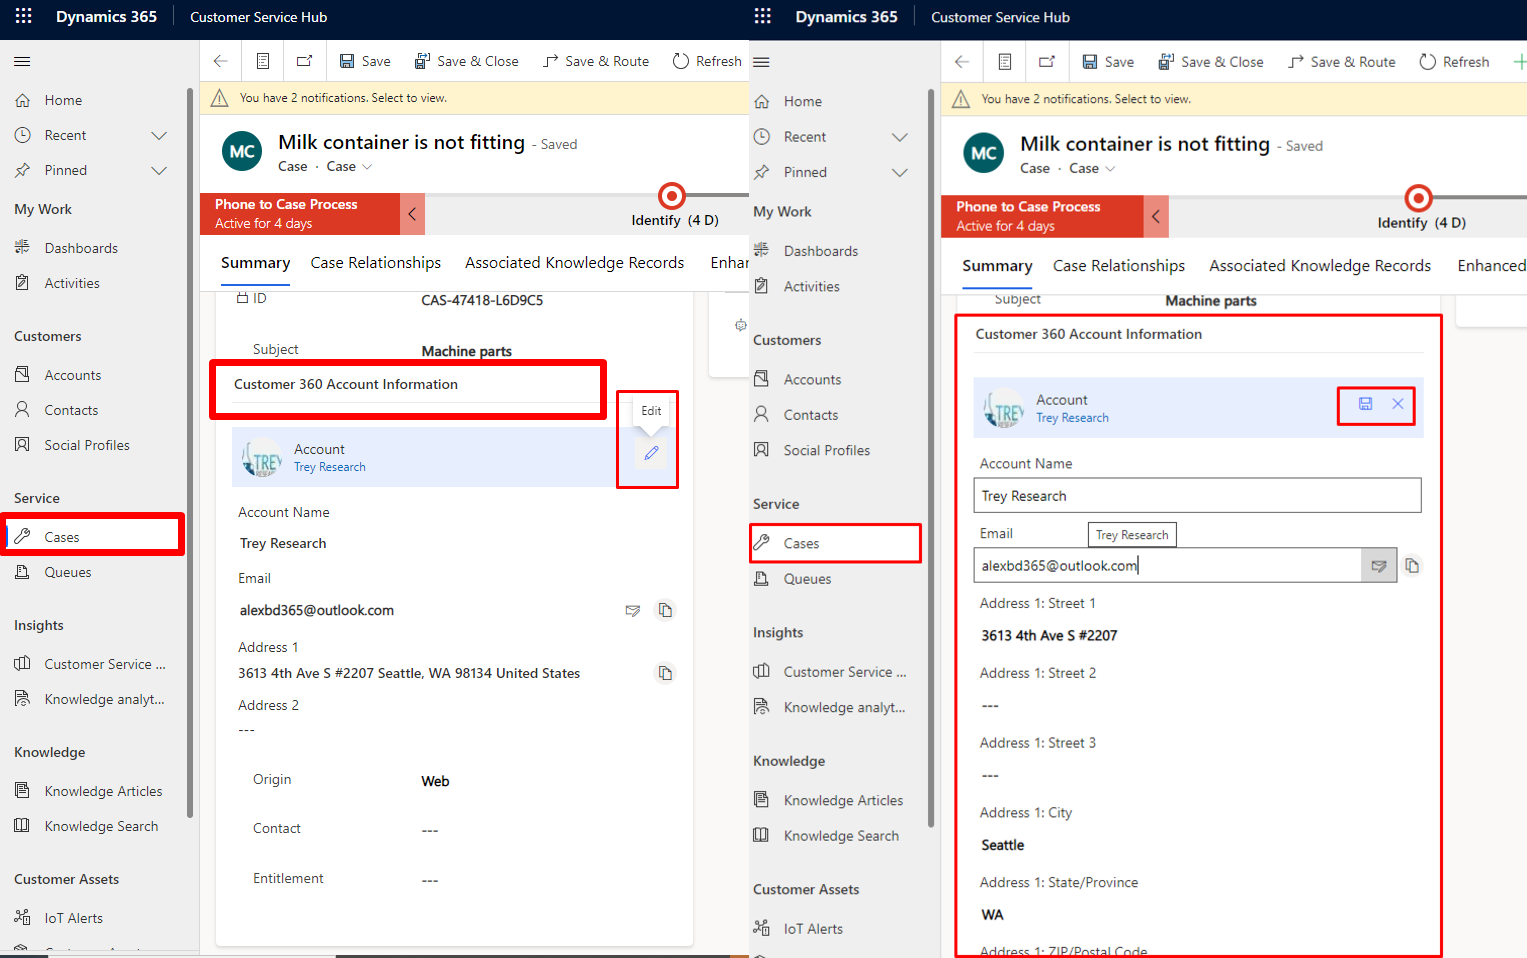
11. The Customer 360 Component provides a consolidated view of the related Account Information in place of the Customer Field.
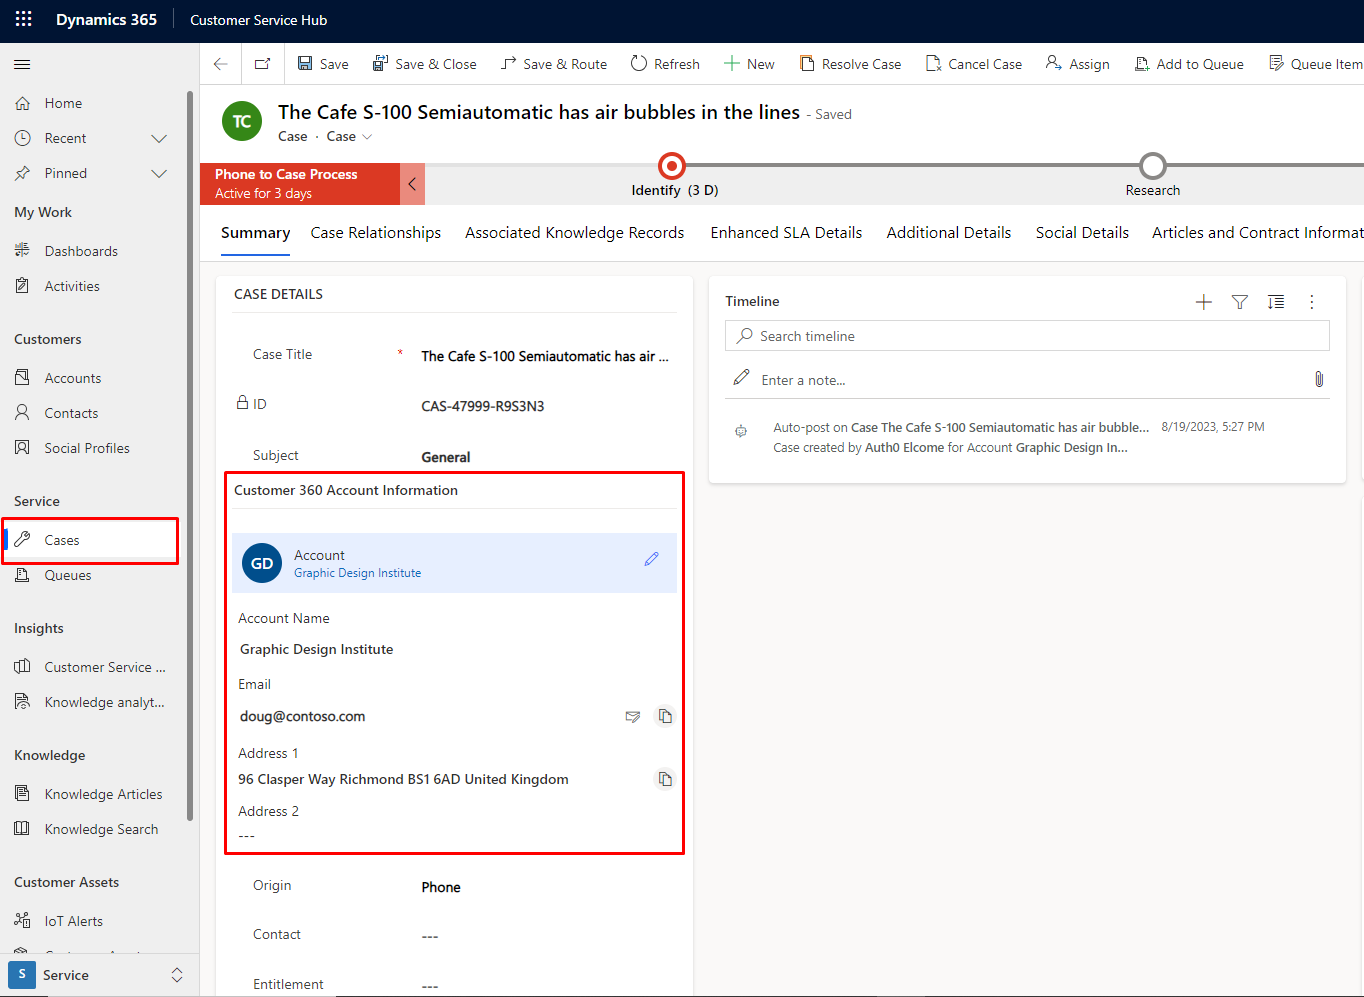
12.To edit the information directly, click on the edit icon, make your changes, and then click on 'Save'.
Comment

Introduction: Organizations frequently generate documents like invoices, certificates, quotations, transcripts, inspection reports etc. While single-value fields such as Name, Email,…
READ MORE
The Problem Recently, we faced an interesting issue while working with the Status Reason (statuscode) field on the Contact table.…
READ MORE
There are certain things in a CRM project that a QA must validate or verify before any solutions gets deploy…
READ MORE