13 Feb, 2025
Posted on 13 Feb, 2025 by Rohit Bhagat, Posted in PowerApps Portal Power Platform Power Pages
 Blogs
Blogs
Introduction
Power Pages provide a flexible way to display data using lists, but sometimes, you may need more advanced filtering than what is available in standard configuration. FetchXML is a powerful tool that allows you to filter records dynamically. In this blog, we will explore how to filter lists using FetchXML in Power Pages.
In this blog, we will explore how to use both simple FetchXML and complex FetchXML with Link-Entity.
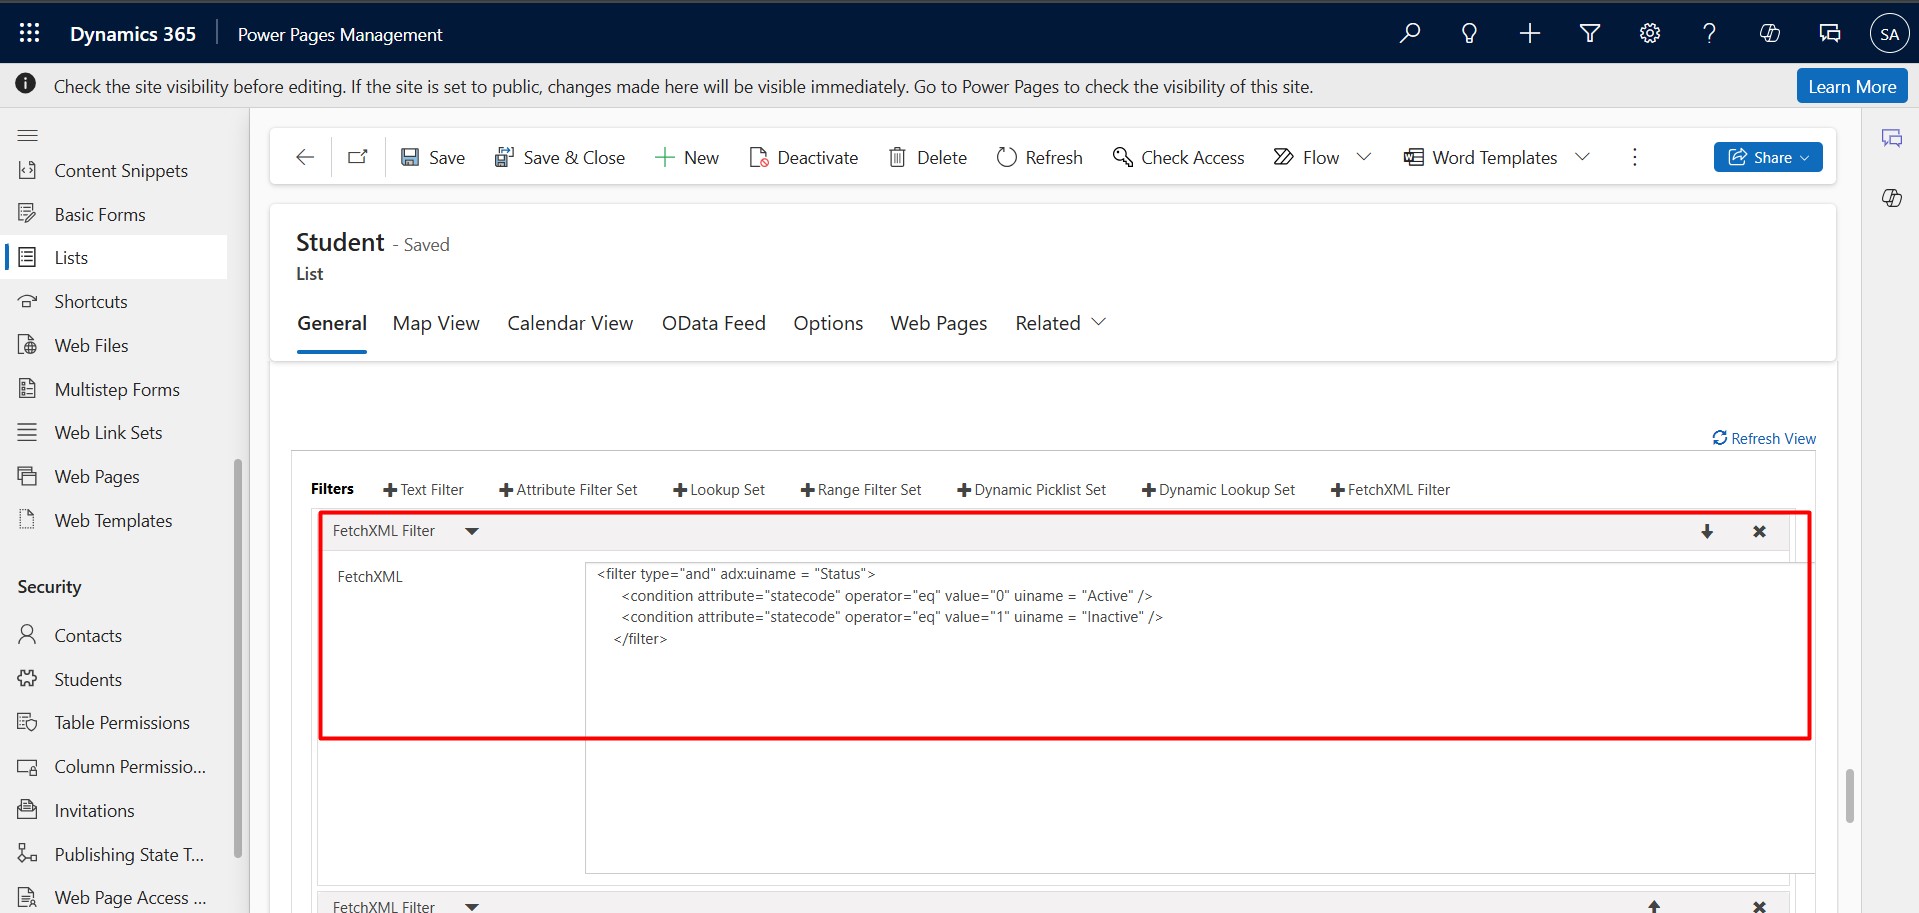
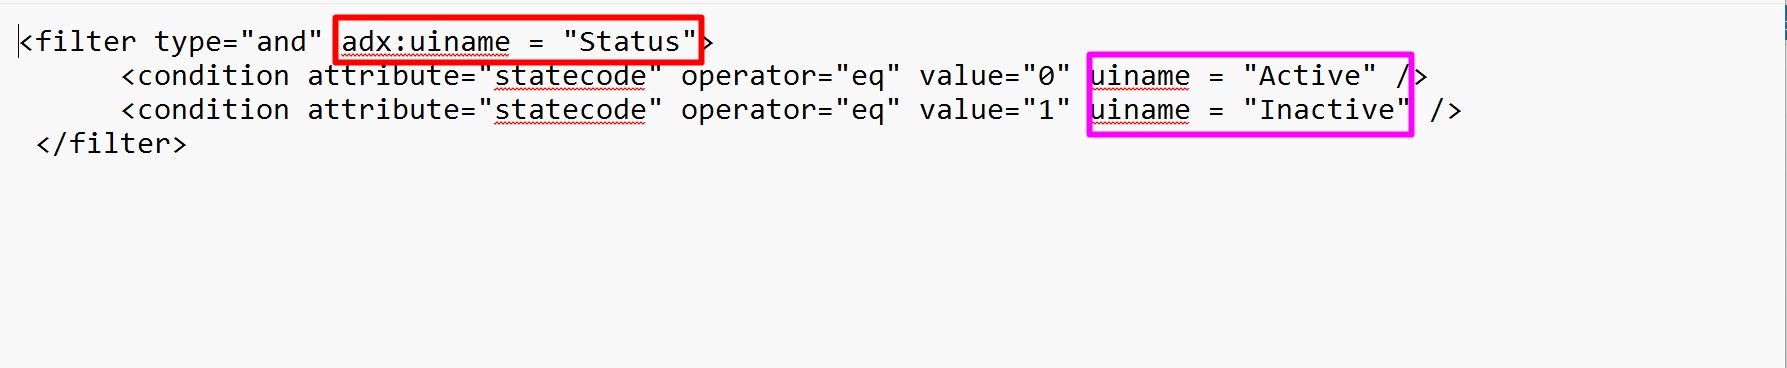
Use Case 1: Filtering Students by Status
Users can filter students based on their status (Active or Inactive) to view only the relevant records.
Steps to Follow:

6. Add your FetchXML condition as shown below
    <filter type="and" adx:uiname = "Status">
      <condition attribute="statecode" operator="eq" value="0" uiname = "Active" />
      <condition attribute="statecode" operator="eq" value="1" uiname = "Inactive" />
    </filter>
After adding the filter, save your list.
Don’t forget to sync your Power Pages site to view the latest changes.
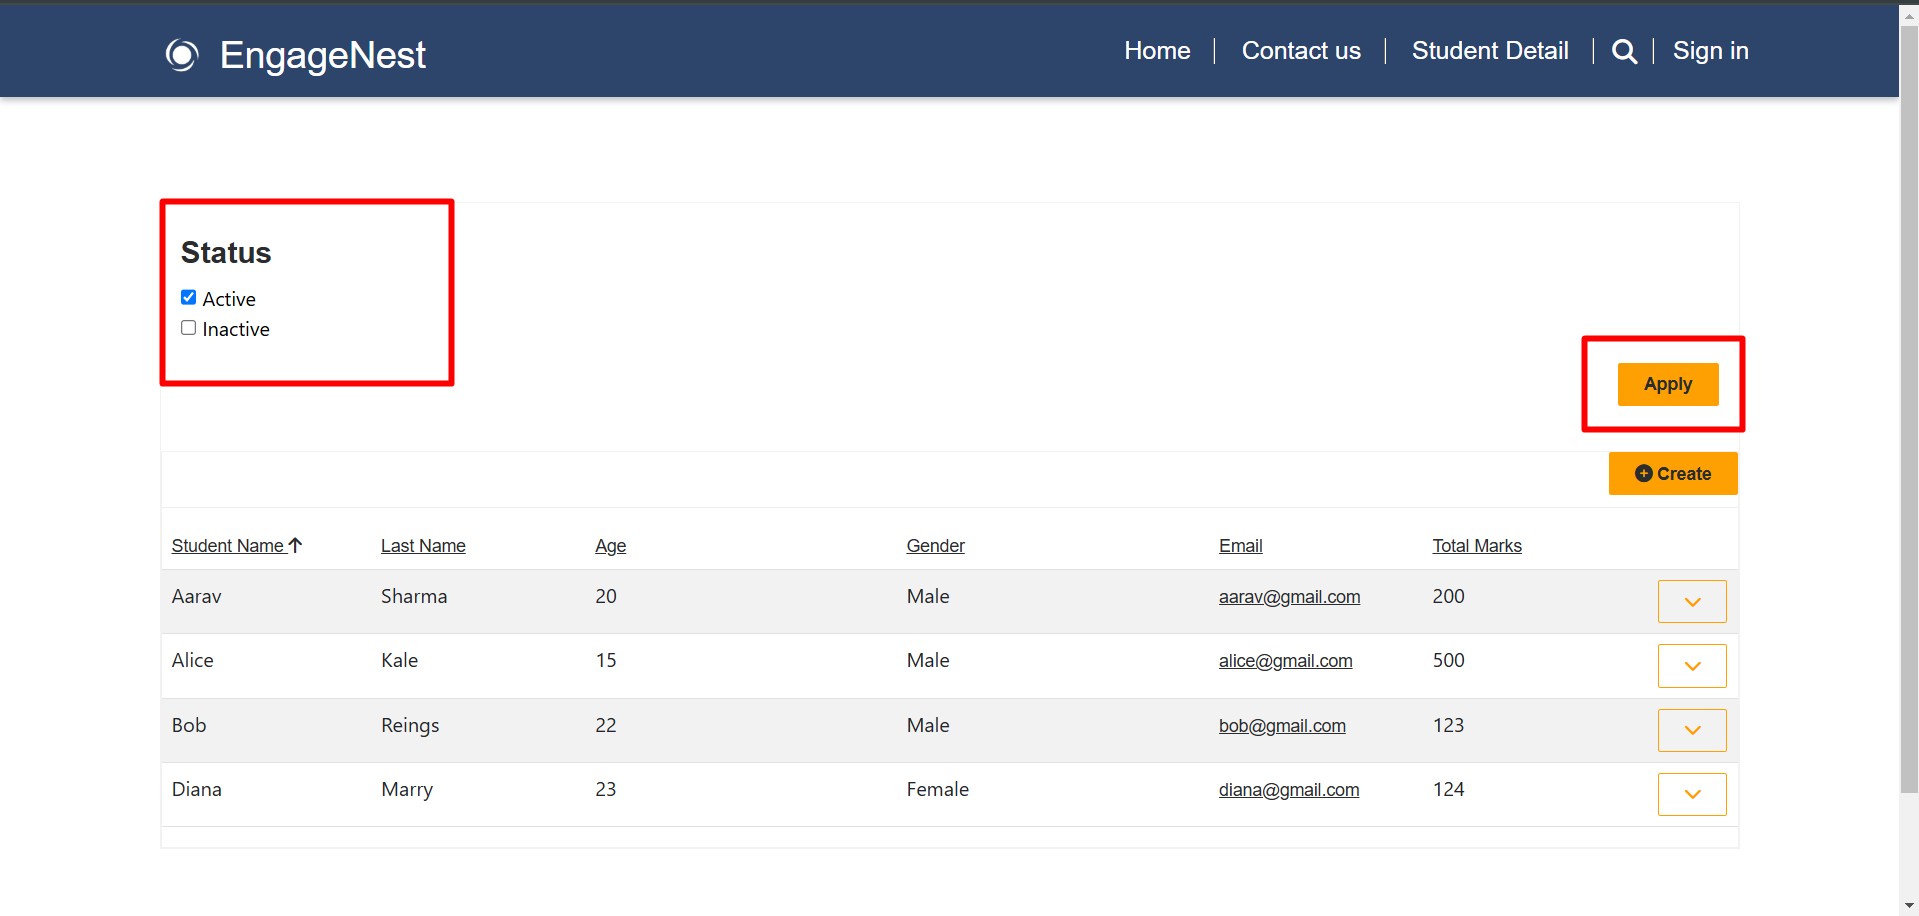
After adding the filter, it will appear as shown below on the site.
Advanced Link-Entity Filtering
Filtering data from related tables helps refine search results more effectively. In FetchXML, the Link-Entity feature allows filtering records based on fields from other related tables.
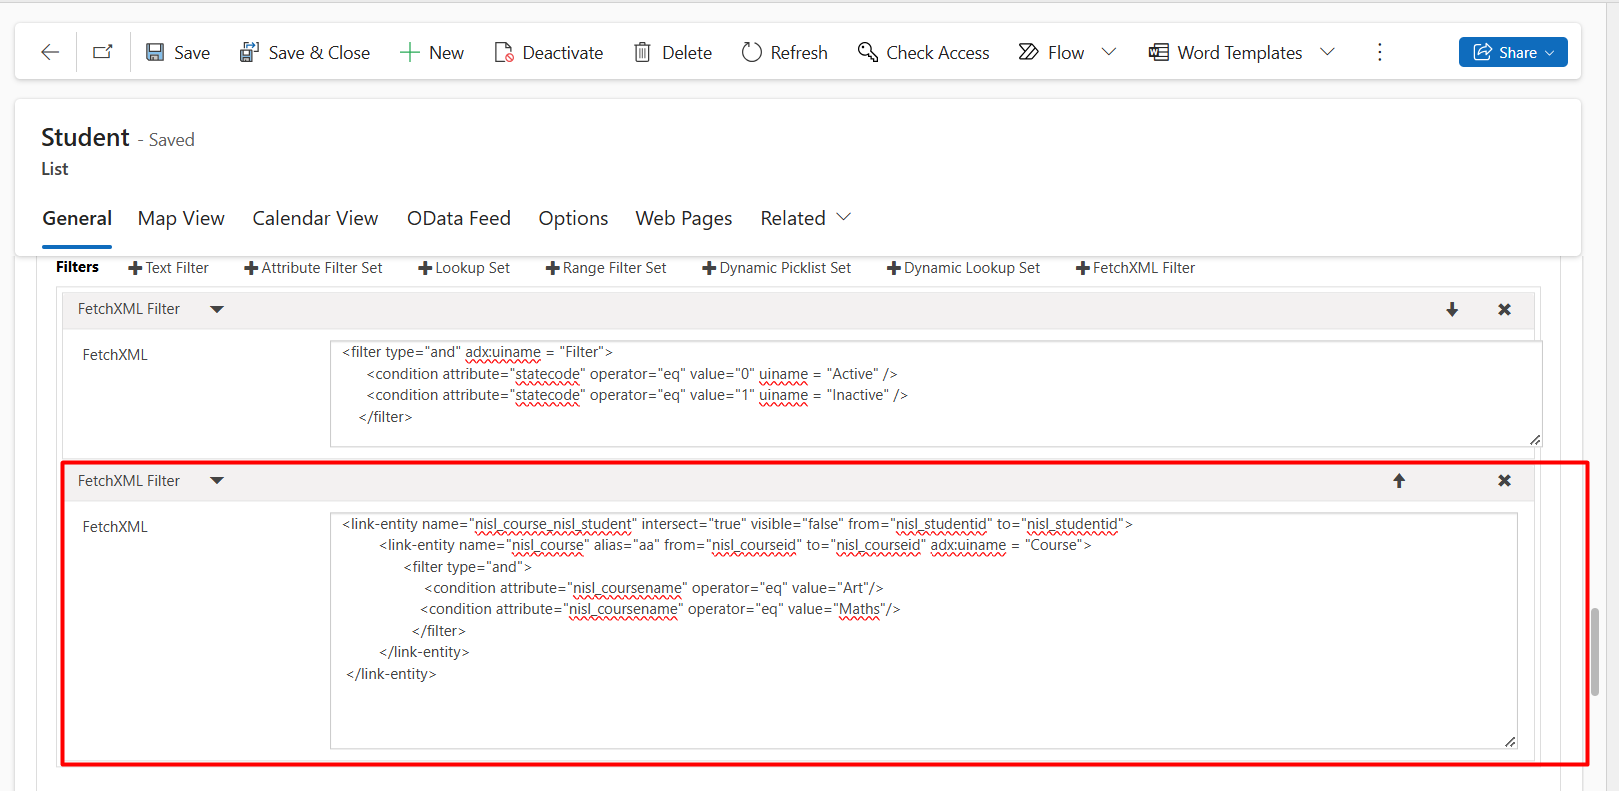
Use Case 2: Filtering Students by Course
In this example, the Student table and Course table are used with Link-Entity in FetchXML to filter students based on their status (Active or Inactive) and course selection.
Student and Course table has N:N relationship
How the Filtering Works:
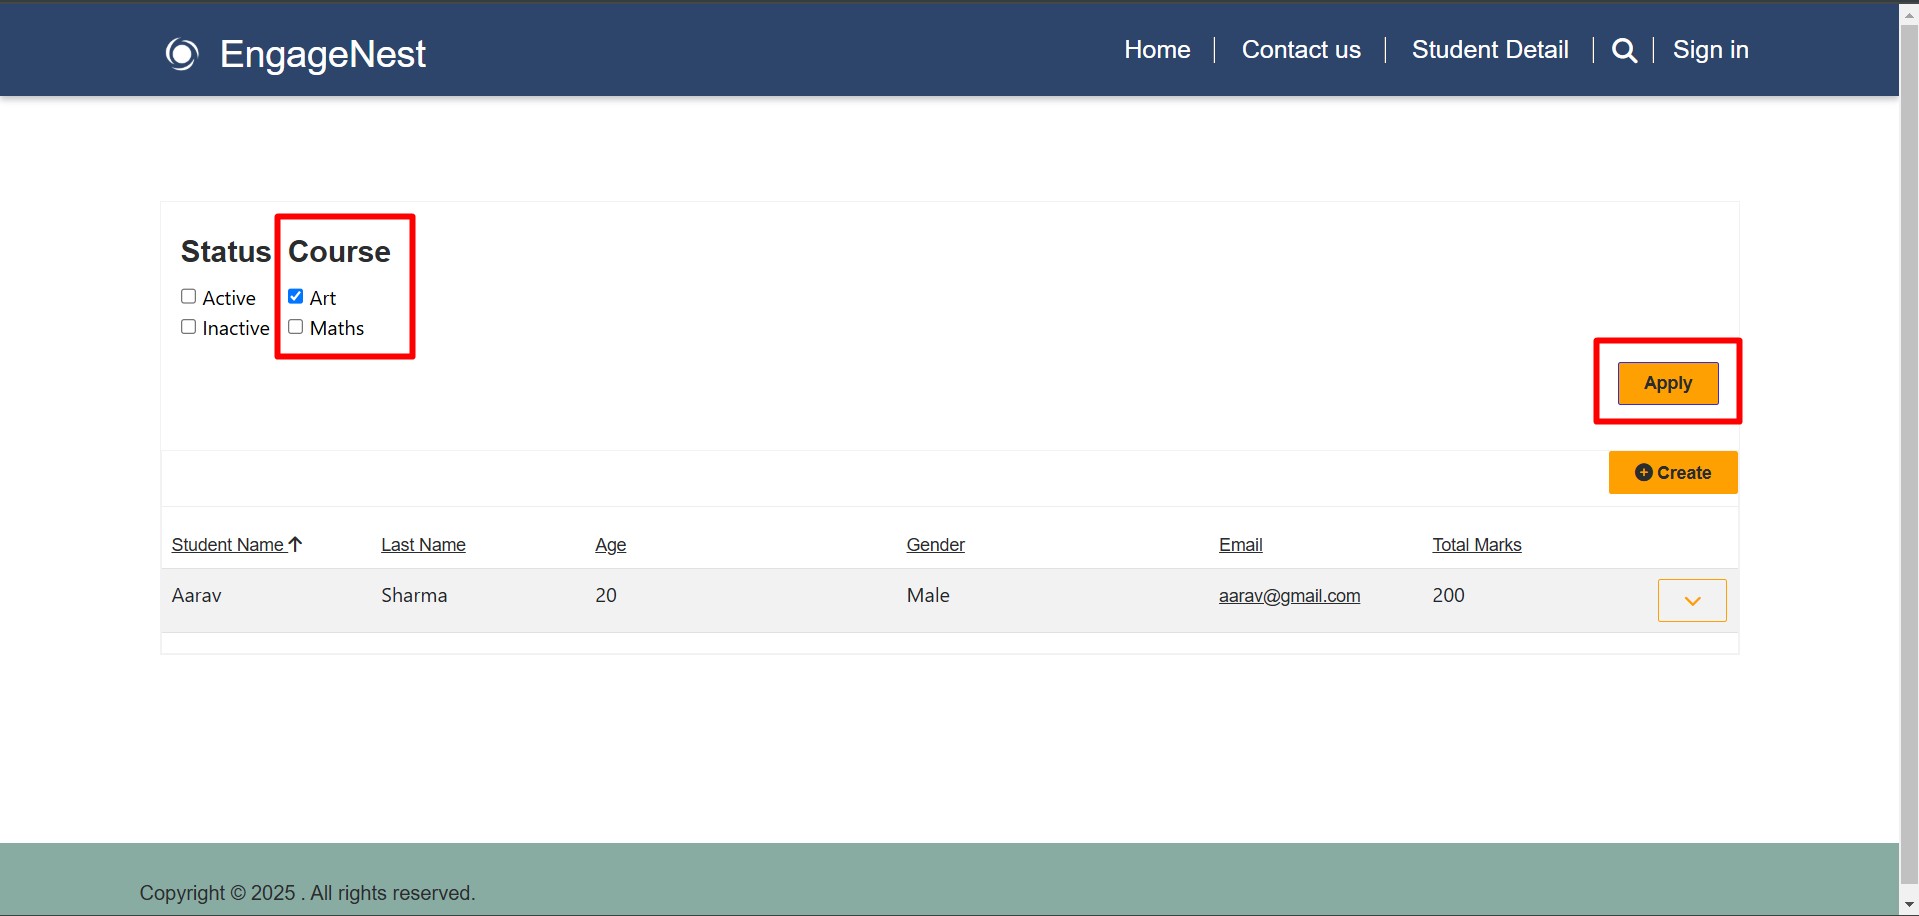
After selecting the desired filters, click "Apply" to update the list and view the filtered results.
This approach makes it easier to retrieve relevant student data based on course enrollment and status
<link-entity name="nisl_course_nisl_student" intersect="true" visible="false" from="nisl_studentid" to="nisl_studentid">
         <link-entity name="nisl_course" alias="aa" from="nisl_courseid" to="nisl_courseid" adx:uiname = "Course">
               <filter type="and">
                    <condition attribute="nisl_coursename" operator="eq" value="Art"/>
                   <condition attribute="nisl_coursename" operator="eq" value="Maths"/>
                 </filter>
         </link-entity>
 </link-entity>
After adding the filter, it will appear as shown below on the site.
Below points will be useful when adding a FetchXML filter:
2. adx:uiinputtype="dynamic"
Definition: When set to "dynamic", the adx:uiinputtype makes the input type change dynamically based on conditions, user actions, or system context.


Comment

Introduction: Organizations frequently generate documents like invoices, certificates, quotations, transcripts, inspection reports etc. While single-value fields such as Name, Email,…
READ MORE
The Problem Recently, we faced an interesting issue while working with the Status Reason (statuscode) field on the Contact table.…
READ MORE
There are certain things in a CRM project that a QA must validate or verify before any solutions gets deploy…
READ MORE