02 Aug, 2023
Streamlining solution deployment in Power Platform/Dynamics 365 CRM using Package Deployer Tool
Posted on 02 Aug, 2023 by Fahar Ansari, Posted in
C#
Dynamics 365
Power Platform
Blog
Blogs
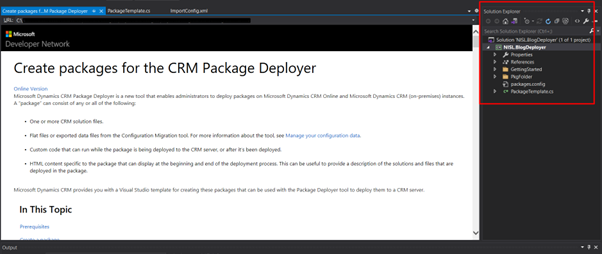
Gone are the days of manually importing solutions one by one into the Dataverse environment. Package Deployer lets administrators deploy packages on Microsoft Dataverse instances. A Package Deployer package can consist of any or all of the following:
- One or more Dataverse solution files.
- Flat files or exported configuration data file from the Configuration Migration tool.
- Custom code that can run before, while, or after the package is deployed to the Dataverse instance.
- HTML content specific to the package that can display at the beginning and end of the deployment process.
In this blog we will setup package deployer tool to import multiple solutions into our Power Platform Environment.
Firstly, we will download and install the Package Deployer using PowerShell.
- Create a folder named CRM Tools in C: drive.
![CRM Tools in C drive](https://nebulaaitsolutions.com/./uploads/cleanupload/18/CRM_Tools_in_C_drive.png)
- Open Windows PowerShell using Run as Administrator
- Change directory (cd) to the CRM Tools folder we created in above step.
![](https://nebulaaitsolutions.com/./uploads/cleanupload/18/cd_to_CRM_Tools.png)
- Run the following block of commands one by one in PowerShell.
Block1:
[Net.ServicePointManager]::SecurityProtocol = [Net.SecurityProtocolType]::Tls12
$sourceNugetExe = "https://dist.nuget.org/win-x86-commandline/latest/nuget.exe"
$targetNugetExe = ".\nuget.exe"
Remove-Item .\Tools -Force -Recurse -ErrorAction Ignore
Invoke-WebRequest $sourceNugetExe -OutFile $targetNugetExe
Set-Alias nuget $targetNugetExe -Scope Global -Verbose
Block2:
##Download Package Deployer
./nuget install Microsoft.CrmSdk.XrmTooling.PackageDeployment.WPF -O .\Tools
md .\Tools\PackageDeployment
$pdFolder = Get-ChildItem ./Tools | Where-Object {$_.Name -match 'Microsoft.CrmSdk.XrmTooling.PackageDeployment.Wpf.'}
move .\Tools\$pdFolder\tools\*.* .\Tools\PackageDeployment
Remove-Item .\Tools\$pdFolder -Force -Recurse
Block3:
##Remove NuGet.exe
Remove-Item nuget.exe
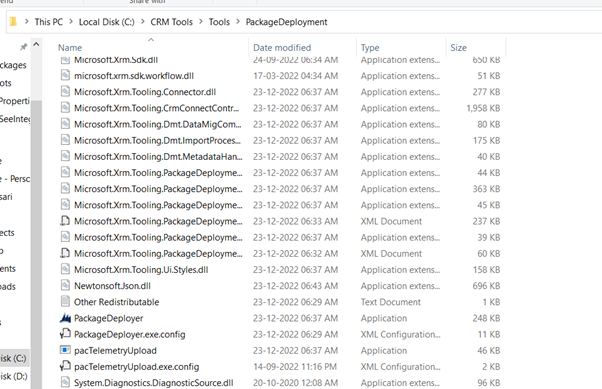
Once the PowerShell finishes successfully, we can verify the existence of PackageDeployment folder.
![PackageDeployment Folder in CRM Tools](https://nebulaaitsolutions.com/./uploads/cleanupload/18/PackageDeployment_Folder_in_CRM_Tools.png)
![](https://nebulaaitsolutions.com/./uploads/cleanupload/18/Contents_of_PackageDeployment_Folder.png)
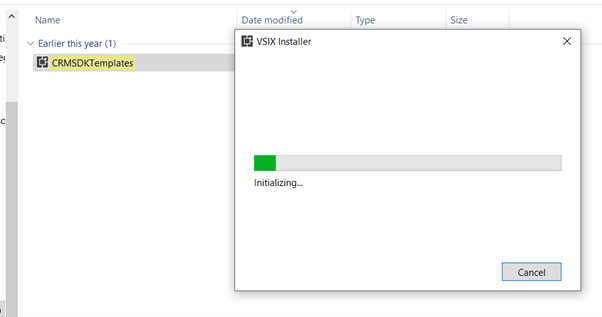
Now to install the Microsoft Dynamics CRM SDK Templates for Visual Studio which contains package template used to create the package deployer project.
- Go to the following link in the browser and download Microsoft Dynamics CRM SDK Templates.
https://marketplace.visualstudio.com/items?itemName=DynamicsCRMPG.MicrosoftDynamicsCRMSDKTemplates
- Install it by double clicking the CRMSDKTemplates file.
![](https://nebulaaitsolutions.com/./uploads/cleanupload/18/Installing_CRMSDKTemplates.png)
- Once installed, we can now create CRM Package projects in a new solution or existing solutions.
![](https://nebulaaitsolutions.com/./uploads/cleanupload/18/Create_new_CRM_Package_Project.png)
- Here we will create a new solution with a new CRM Package project.
![](https://nebulaaitsolutions.com/./uploads/cleanupload/18/Create_NISL_BlogDeployer_Project_and_Solution.png)
- Once created we will have a folder structure as below.
![](https://nebulaaitsolutions.com/./uploads/cleanupload/18/Nisl_BlogDeployer_Solution_Explorer.png)
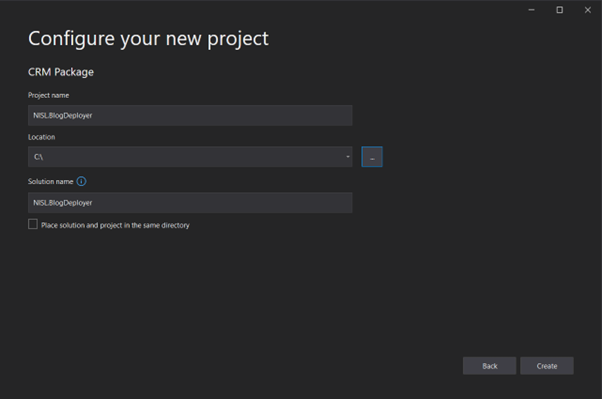
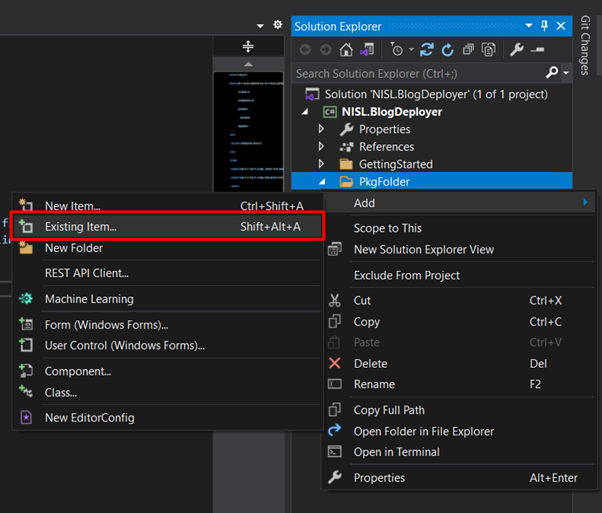
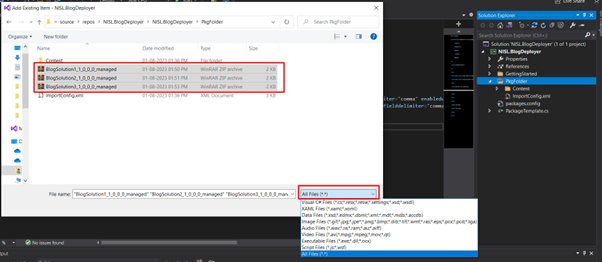
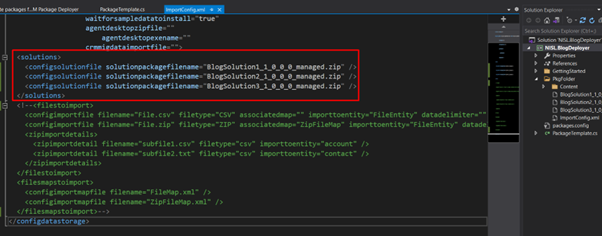
Now that we have created a Package Deployer project, we will proceed by adding the required solutions which we require to import into a target environment.
- We navigate to the project folder using File Explorer,
![Nisl.BlogDeployer project folder](https://nebulaaitsolutions.com/./uploads/cleanupload/18/Nisl_BlogDeployer_project_folder.png)
Or by right clicking the project name in visual studio and selecting “Open Folder in File Explorer.
![](https://nebulaaitsolutions.com/uploads/cleanupload/14/sPicture9.png)
- In the PkgFolder folder, add the required solutions that need to be imported.
![solutions in PkgFolder](https://nebulaaitsolutions.com/./uploads/cleanupload/18/solutions_in_PkgFolder.png)
- After adding solutions in PkgFolder, the solution would not show up in visual studio NISL.BlogDeployer Solution Explorer window. We need to add these solutions to our project. Since the solution files are already copied into PkgFolder, we need to right click the “PkgFolder” in our project and select “Add” and click “Existing Item…”
![Add Existing Item in PkgFolder](https://nebulaaitsolutions.com/./uploads/cleanupload/18/Add_Existing_Item_in_PkgFolder.png)
- In the “Add Existing Item” window, at the bottom right, change the file type to “All Files (*.*)”, which allow us to see our solutions .zip files. Navigate to the PkgFolder if not already in there. Select all the added solution files and press the “Add” button at the bottom right.
![](https://nebulaaitsolutions.com/uploads/cleanupload/14/Picture1.png)
Now we will be able to see our solution .zip files in our project.
![solutions in project in solution explorer](https://nebulaaitsolutions.com/./uploads/cleanupload/18/solutions_in_project_in_solution_explorer.png)
- After adding the solutions in PkgFolder, we need to use these files in our project. We do this by adding them in the ImportConfig.xml.
- Open ImportConfig.xml and add the tag "< configsolutionfile solutionpackagefilename="SolutionName.zip">" in between the "< solutions>" tag as given below. Add it multiple times for multiple solutions. Note: The order of the solutions given here is important. The first solution listed here will be the first solution to be imported and then second solution and so on. This is critical if some solutions have dependencies on other solutions.
![Edit ImportConfig.xml](https://nebulaaitsolutions.com/uploads/cleanupload/18/Edit_ImportConfig_xml2.png)
- Also comment out (ctrl+k+c) the whole section of “” and “” as we don’t need it currently.
- Build the project by pressing (ctrl+shift+b) or using the Build menu on the top menu bar.
![Build Nisl.BlogDeployer project](https://nebulaaitsolutions.com/./uploads/cleanupload/18/Build_Nisl_BlogDeployer_project1.png)
Now that our project has been build. We will add the build files from this project to our the PackageDeployment folder in CRM Tools which we created earlier.
- Copy the PkgFolder where we added the solutions from our project folder.
![copy PkgFolder](https://nebulaaitsolutions.com/./uploads/cleanupload/18/copy_PkgFolder.png)
- Navigate to the “PackageDeployment” folder in CRM Toos->Tools and paste the whole PkgFolder.
![PkgFolder in PackageDeployment](https://nebulaaitsolutions.com/./uploads/cleanupload/18/PkgFolder_in_PackageDeployment.png)
- Now we need to copy the project .dll file (here NISL.BlogDeployer.dll). Since we build this project as a Release Build.
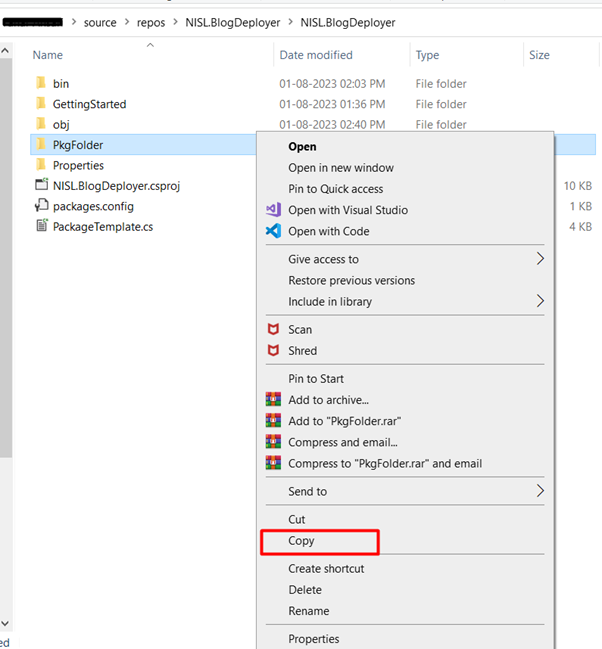
We will navigate to “bin” folder in our project and open the “Release” folder. Here we will find the “NISL.BlogDeployer.dll” file.
![copy Nisl.BlogDeployer.dll](https://nebulaaitsolutions.com/./uploads/cleanupload/18/copy_Nisl_BlogDeployer_dll.png)
Copy the “NISL.BlogDeployer.dll” file and paste it in the “PackageDeployment” folder in CRM Tools->Tools.
![Nisl.BlogDeployer.dll in PackageDeployment](https://nebulaaitsolutions.com/./uploads/cleanupload/18/Nisl_BlogDeployer_in_PackageDeployment.png)
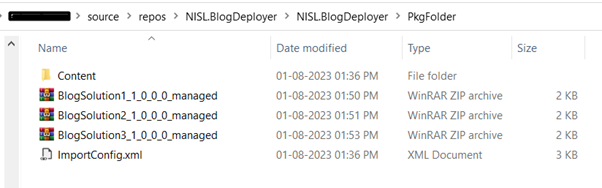
We now have the Package Deployer ready to import the 3 solutions namely, BlogSolution1, BlogSolution2 and BlogSolution3 into any Power Platform/Dataverse environment.
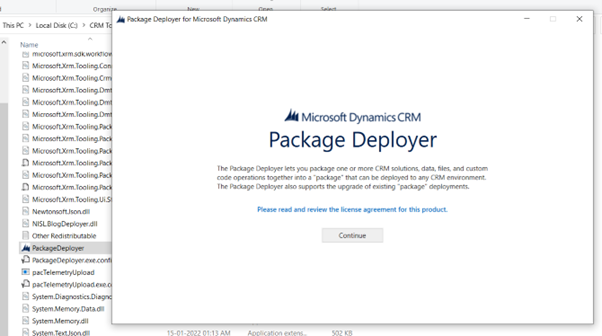
To start process of importing, double click the “PackageDeployer” Application(.exe) in “PackageDeployment” folder and follow the steps to log in to the environment.
![Package Deployer.exe run](https://nebulaaitsolutions.com/./uploads/cleanupload/18/Package_Deployer_exe_run.png)
Once logged in to the target environment. It will read all the solutions present in the package deployer project build and start importing.
![Package Deployer reading solutions from importconfig](https://nebulaaitsolutions.com/./uploads/cleanupload/18/Package_Deployer_reading_solutions_from_importconfig.png)
![importing solutions to target environment](https://nebulaaitsolutions.com/./uploads/cleanupload/18/importing_solutions_to_target_environment.png)
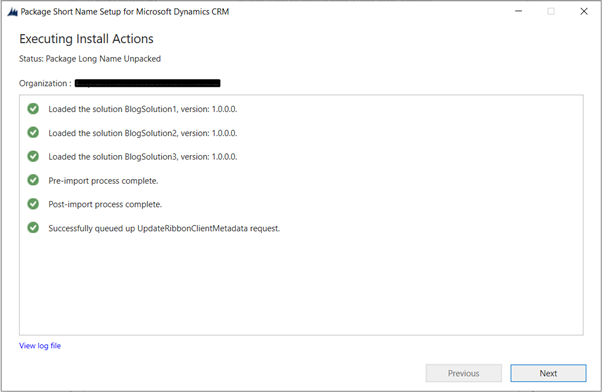
After Successful import, we can verify the solutions are present in target environment.
![solutions in target environment](https://nebulaaitsolutions.com/./uploads/cleanupload/18/solutions_in_target_environment1.png)
Thanks for reading our blog.