
22 Feb, 2023
Posted on 22 Feb, 2023 by Admin, Posted in Dynamics 365 C# Power Platform
 Blogs
Blogs
JSON (JavaScript Object Notation) is a lightweight data-interchange format. It is easy for humans to read and write. It is easy for machines to parse and generate. JSON is a text format that is completely language independent but uses conventions that are familiar to programmers of the C-family of languages, including C, C++, C#, Java, JavaScript, Perl, Python, and many others. These properties make JSON an ideal data-interchange language.
JSON is built on two structures:
NOTE: The approach described below can also be used for plugins in Dynamics 365 Customer Engagement (CE).
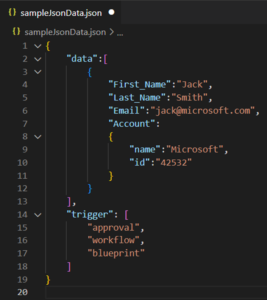
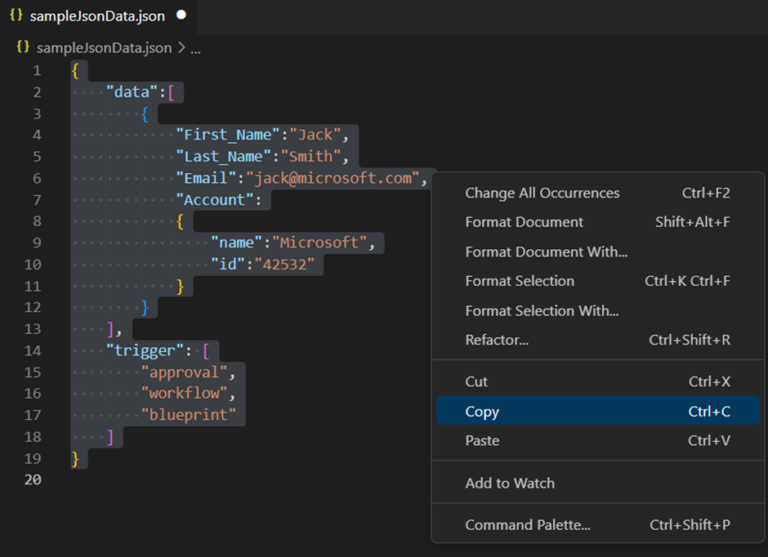
Below is a sample JSON:
Context: We will be working with C# code in Visual Studio 2019
The WRONG way to write json in code is by creating a json string manually:

Above json code at first glance seems fine but once json has hundreds of embedded objects the code will neither be readable nor maintainable.
The CORRECT way to write json is by using classes.
Here we will be using Newtonsoft.Json.
Firstly, we import Newtonsoft.Json into our solution.
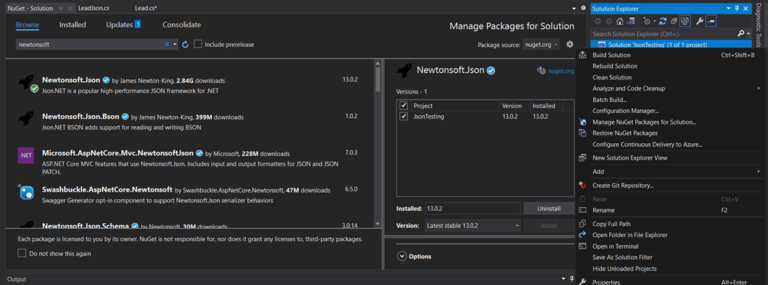
1. In the Solutions Explorer window, right click the solution and select “Manage NuGet Packages for Solution”.
2. In the Browse Tab, Search for Newtonsoft.Json and install the latest version.
Once Newtonsoft.Json is installed we can start using it in code.
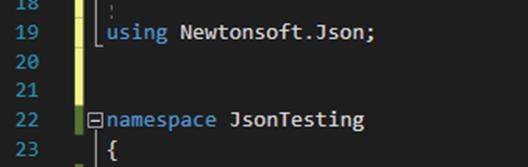
We start by importing Newtonsoft.Json with “using” keyword.
using Newtonsoft.Json
Now we create a class file in the same project.
1. In the Solutions Explorer window, right click the project and select Add -> New Item…
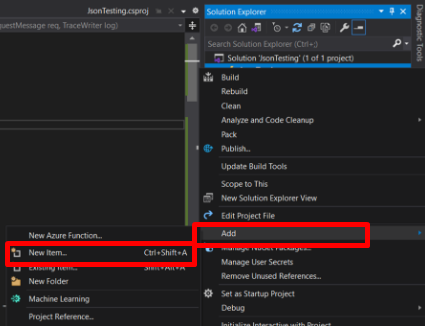
2. Select C# Class file and name it with .cs extension and click on Add.
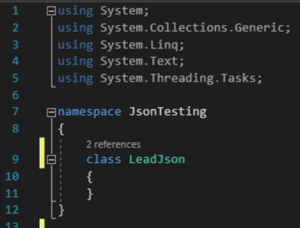
A new class file will be created with auto-generated code. Remove the class LeadJson{}.
Now to add the contents to this class file.
Copy the JSON.
Go to the newly created class file and place cursor between namespace JsonTesting{} curly brackets.

Now go to Edit tab on menu bar. Select Paste Special and then select Paste JSON as Classes.
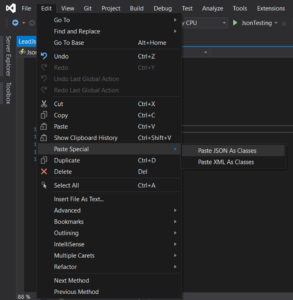
The classes will be automatically created based on the json structure.
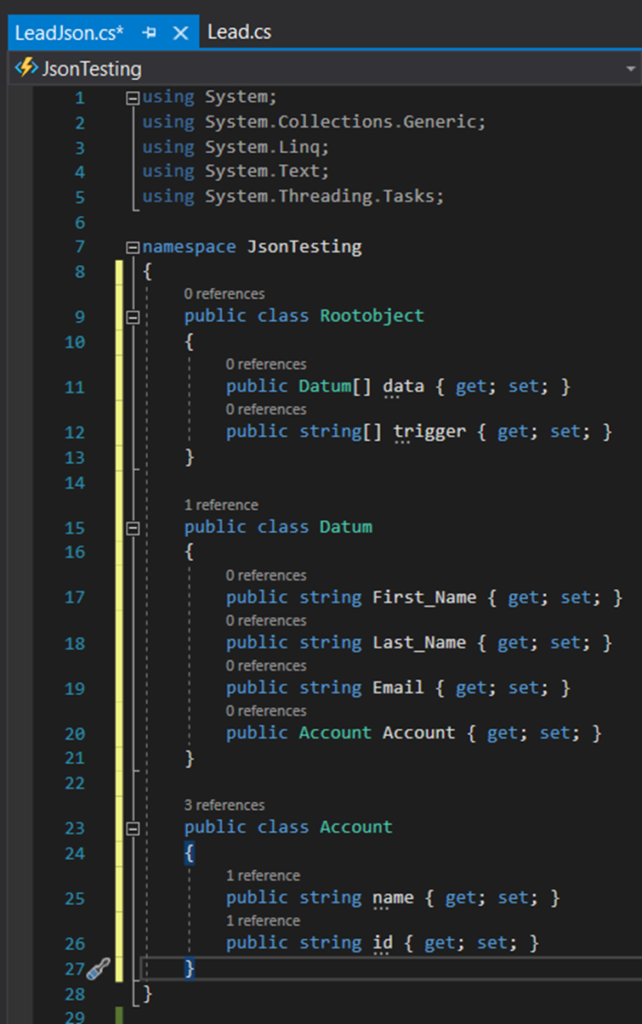
We will change the name of Rootobject class to LeadJson and Datum to LeadFields.
Also, we will be using Lists instead of arrays []. So Datum[] will become List
So finally, LeadJson class file will look as below:
Another way to generate JSON classes is to use online tools.
Here we will be using a site called json2csharp.com. Paste the sample json on the left side and click convert.
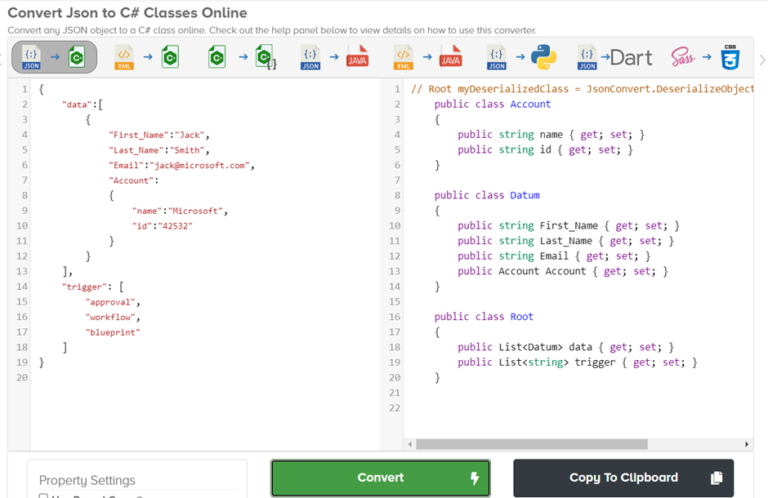
Copy the right-side code and paste it inside the newly created json class file.
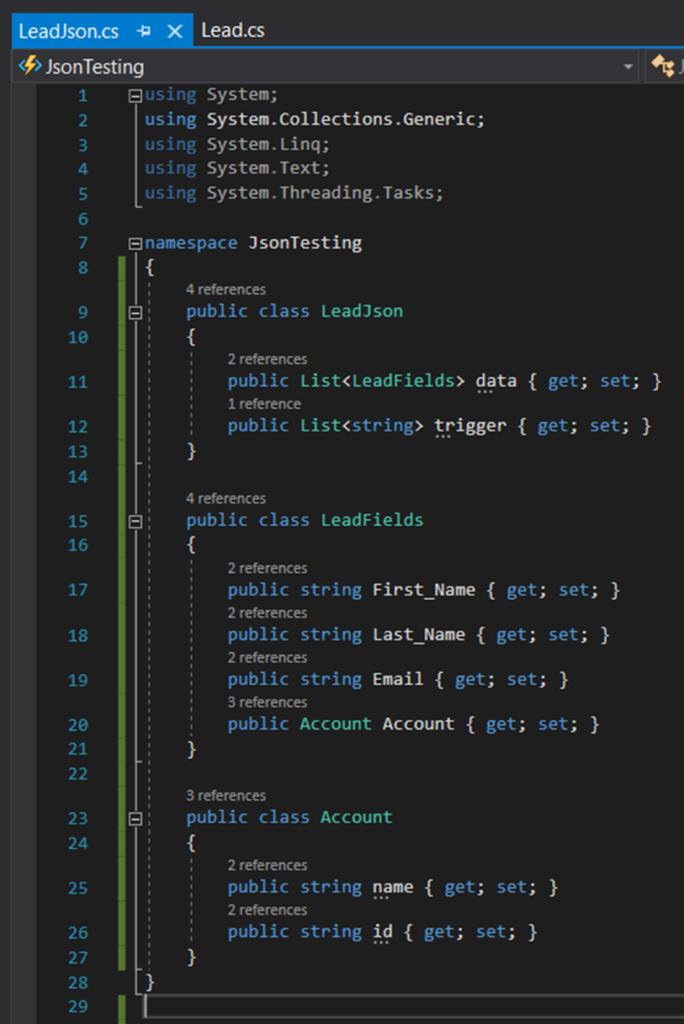
Below I have renamed Datum as LeadFields, List
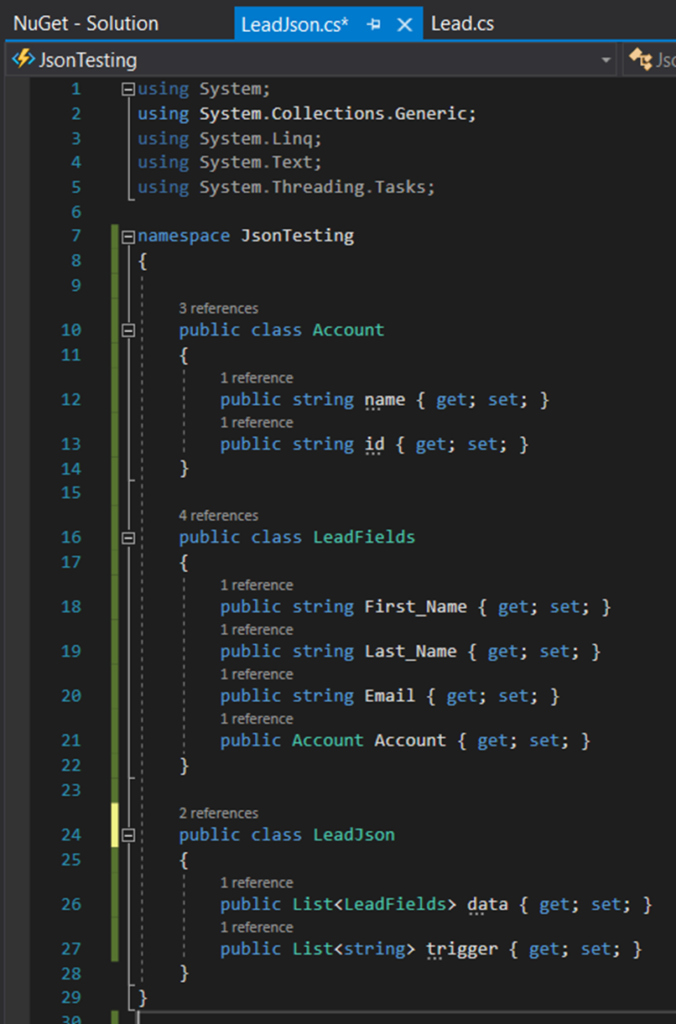
Now the class is ready to be used. Save it and go back to the main class (here Lead.cs).
We create a function that serializes the LeadJson class into a string and returns it.

We start by creating an object of Account class and assigning it in LeadFields class.
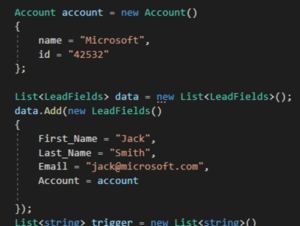
Since the “data” object is a list, We will use Add method to add an item to a List.
We create the data and the trigger List class objects and assign both in the LeadJson class.

Finally, we use JsonConvert.SerializeObject() method to pass leadJson object and the parameter to format the json to get the indented json.

Now to reverse the serialization i.e., to convert json string to json objects we do Deserialization.
We create a DeserializeJson function and pass the json string as the parameter.
Note: Use whichever logging method available to you to log the data. Here I’ve used TraceWriter.
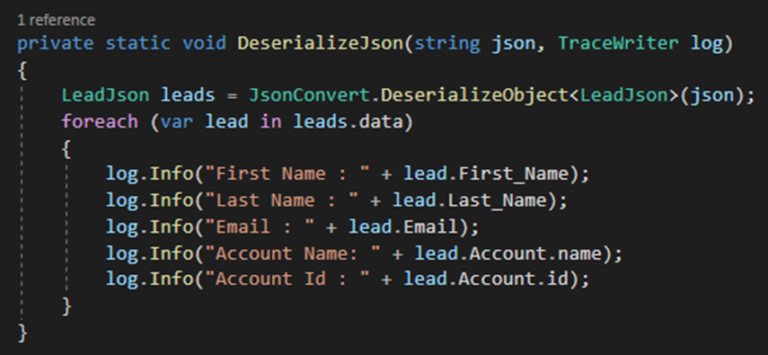
We use JsonConvert.DeserializeObject
Since all the leads are in the “data” List object. We use foreach to cycle through each individual lead.
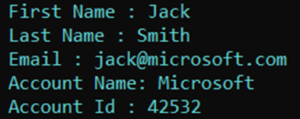
Accessing the lead data is as easy as accessing the objects. We simply use lead.[Field Name] to get the required data.
Thank you for reading our blog.
Comment

Introduction: Organizations frequently generate documents like invoices, certificates, quotations, transcripts, inspection reports etc. While single-value fields such as Name, Email,…
READ MORE
The Problem Recently, we faced an interesting issue while working with the Status Reason (statuscode) field on the Contact table.…
READ MORE
There are certain things in a CRM project that a QA must validate or verify before any solutions gets deploy…
READ MORE