

14 Oct, 2022
Posted on 14 Oct, 2022 by Admin, Posted in Dynamics 365 Power Automate Dataverse Dynamics-365 Sales
 Blogs
Blogs
Introduction: -In this blog we are going to see how to call cloud flow from JavaScript.
Use Case-: On clicking the ‘Call Flow’ button, we update the name field of the Accounts table in the dataverse.
Steps: –
Creating a button in the Model-driven app:-
You can check out the link below to understand how to add buttons and edit the command bar in model-driven apps.
Add Ribbon Buttons and Edit Command Bar within Power Apps – Dynamics 365 – Nebulaa IT Solutions
Create new flow
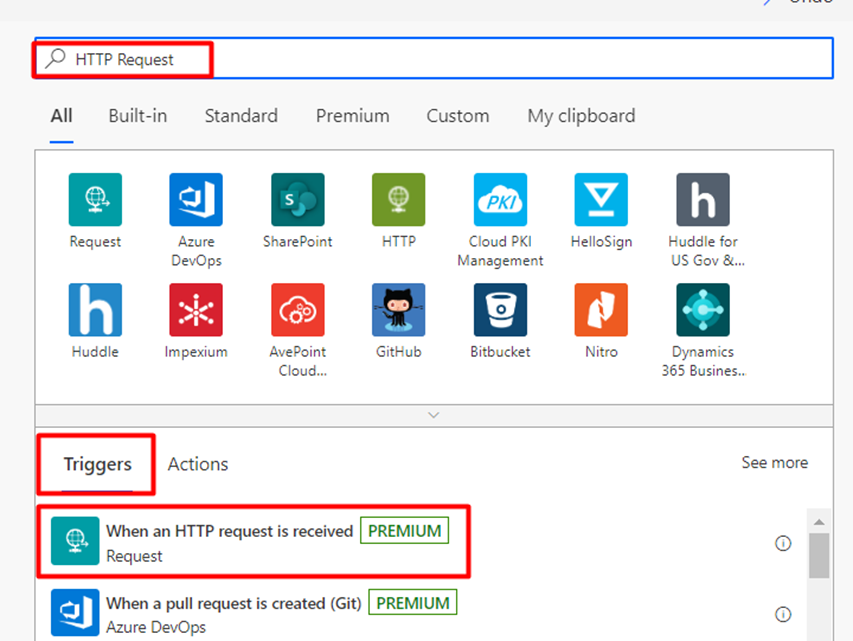
search for “HTTP Request” and select “When an HTTP request is received“.
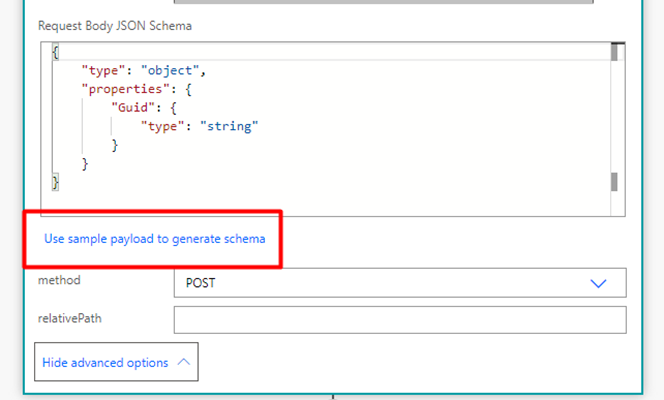
Click on “Use sample payload to build schema” and enter sample JSON.
It will automatically generate the JSON Schema.
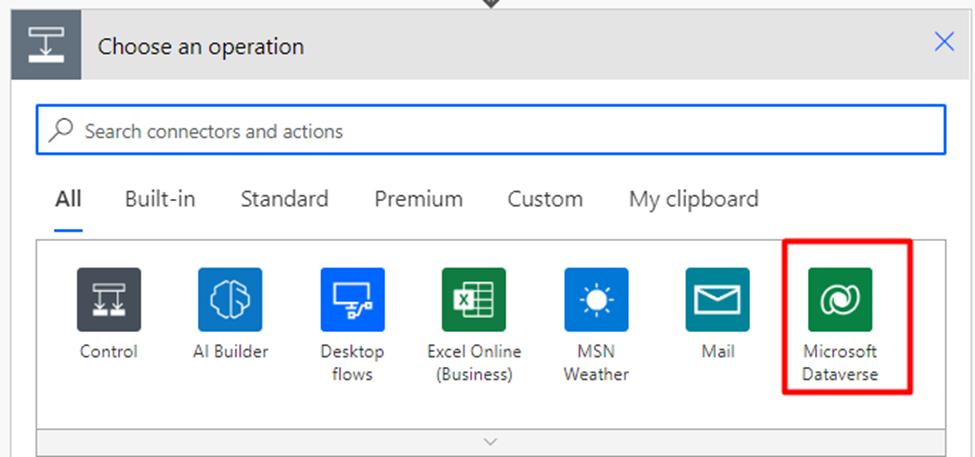
Search and select the “Microsoft Dataverse” connector.
Select the “Update a row” action.
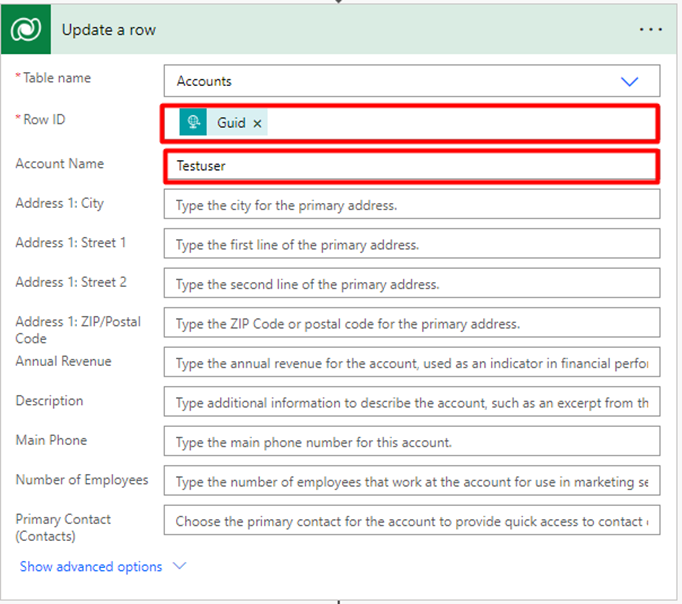
Add the Tablename, RowId and Account Name:-
Table Name: – Select a table name.
Row ID: – Here you have to pass the GUID of the record.
Account Name: -Add the name that you want to set.
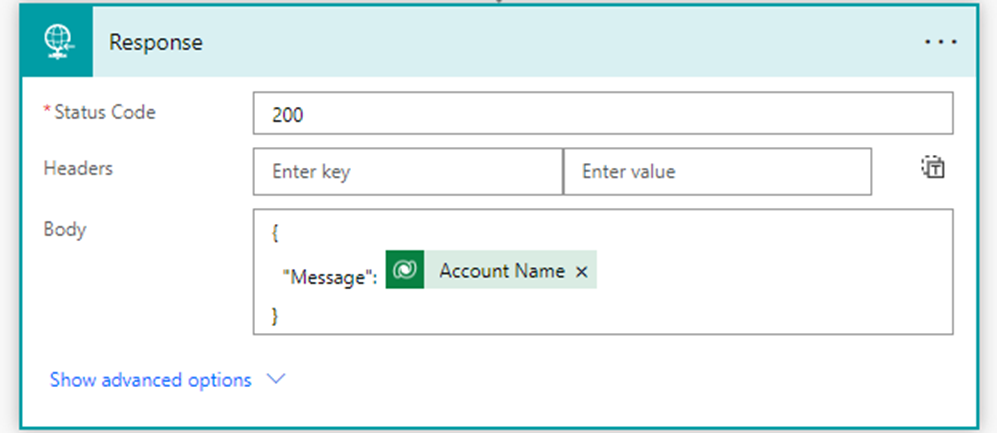
5) Add “HTTP Response” action to send the response back to the [removed]-
Status Code: -200(Successful responses)
Body: – Enter the message you want to return for a successful response.
JavaScript Code:-
//Request

CallFlow(formContext) {
let RecordID = formContext.data.entity.getId().replace("{", "").replace("}", "");

let params = {

"Guid": RecordID,

}
let url = "https://prod-1.westus.00"; //flow url

let req = new XMLHttpRequest();

req.open("POST", url, true);

req.setRequestHeader('Content-Type', 'application/json');

req.send(JSON.stringify(params));

//@ts-ignore

Xrm.Utility.showProgressIndicator("Please Wait for the moment...");//here get the response
//response

req.onreadystatechange = function () {

if (this.readyState === 4) {

req.onreadystatechange = null;

if (this.status === 200) {

var Account_name = JSON.parse(this.response);

//@ts-ignore

Accountsobj.showAlertMessage("Account has been Updated... " + Account_name.Message);

}

else {

Accountsobj.showAlertMessage("Error in flow ");

}

}

formContext.data.refresh(true);

};

}

//Show the alert box after the account has updated

showAlertMessage(message) {

try {

let alertStrings = { confirmButtonLabel: "OK", text: message };

let alertOptions = { height: 120, width: 350 };

//@ts-ignore

Xrm.Navigation.openAlertDialog(alertStrings, alertOptions).then(

function (success) {

},

function (error) {

Accountsobj.showAlertMessage(error.message);

}

);

} catch (e) {

Accountsobj.showAlertMessage(e.message);

//@ts-ignore

Xrm.Utility.closeProgressIndicator();

}

}

}

let Accountsobj = new CRM.Library.Call_Flow();
Comment